Now it’s time for the assembling of the Cat earrings! I’m going to be honest; this was the part of the whole process that I was dreading. Only because I knew it was going to be very fiddly and I have a really short frustration fuse (lol who’s with me?). But in the end, I think it worked out well! And she absolutely loved them!
*Check out my previous post to see how you can create your own clay charms from scratch!*
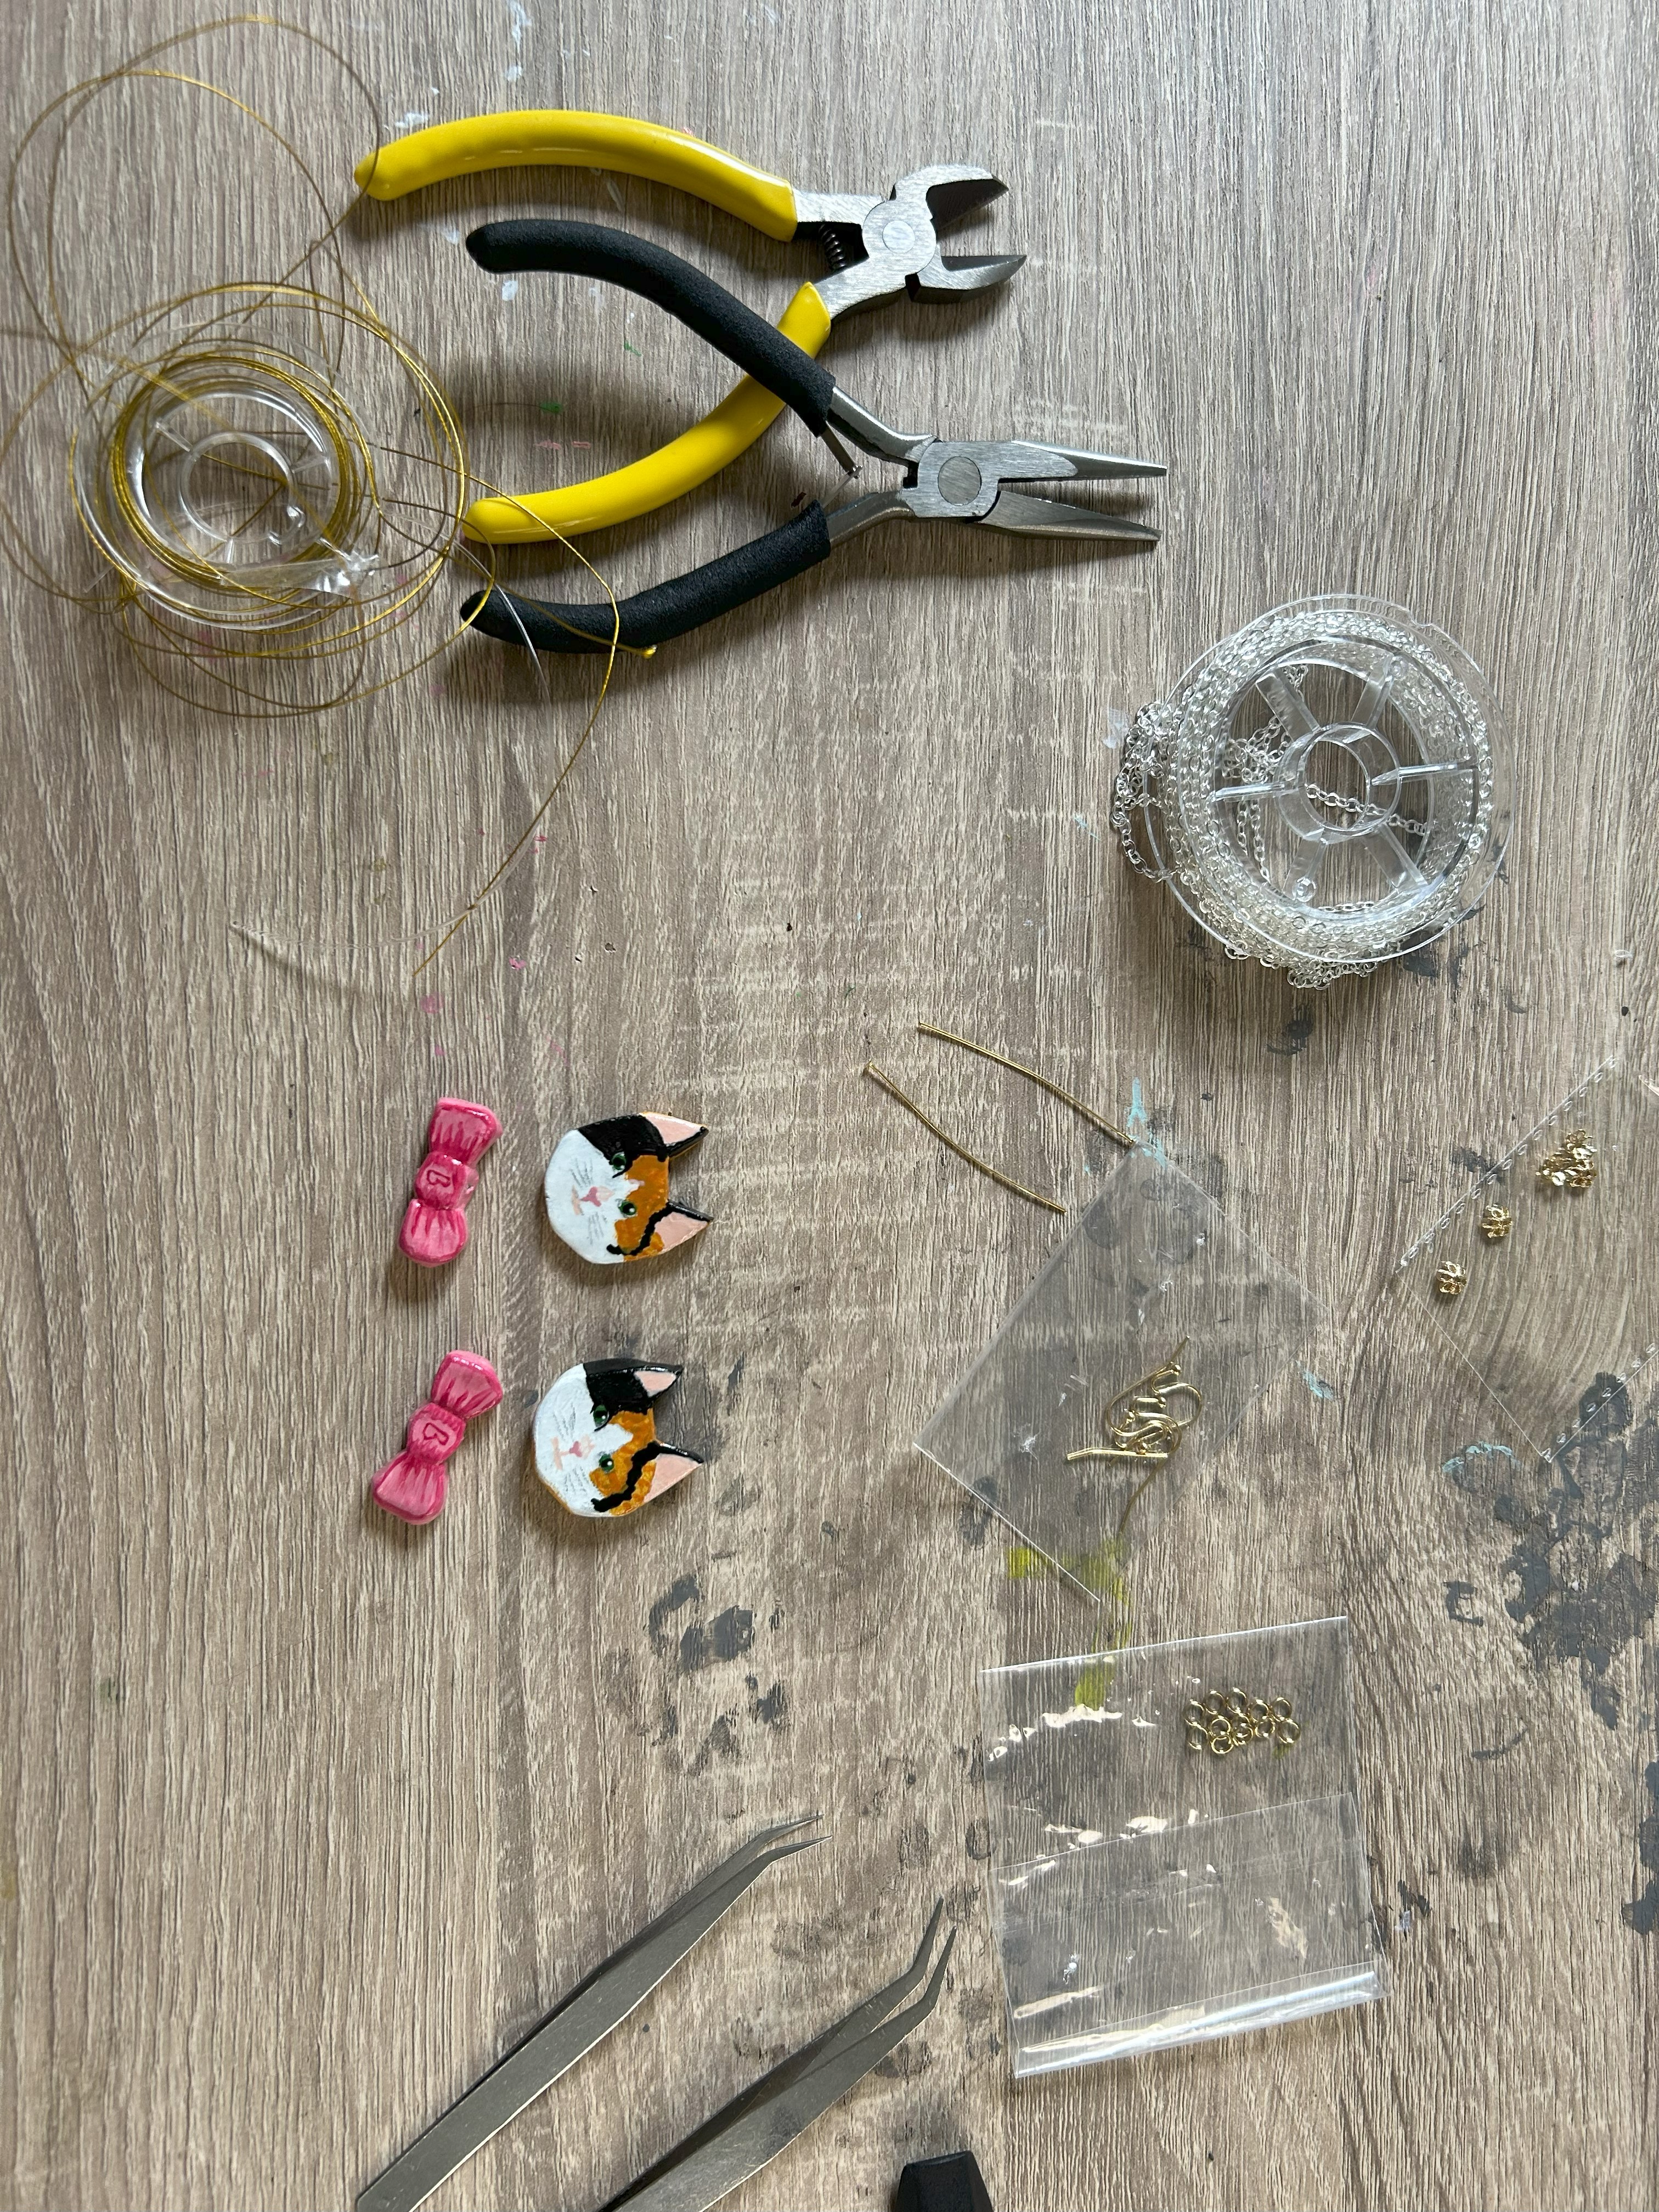
Tools I used to create these earrings:
Metal loops x4
Jewellery pliers as well as chain pliers
~All of this can be found on amazon if you just click the links.~
Lets get right to it!
- The very first step is to make your clay charms from my previous post or you can use whatever charms you have available etc.
- The second step (if you made clay charms like I did) is to grab your needle from the previous post and ensure you can still get it through your clay charm in the hole you created previously. You may have gotten some paint in the hole and just need to push it out.
- Once your holes are clear, you can insert your flat pin and see if you have any room on at the end to create a loop. This will depend on how long your clay charm is.
- If you have enough space on the end of the flat pin to create a loop, you’ll need to grab your flat pliers and your crimping bead. Thread your crimping bead onto your flat pin end and then use your pliers to bend the end of the pin into a loop where the end of it will fit through the crimping bead that we threaded first. In the end we need to have our flat pin threaded back into the crimping bead. Take your time on this because it’s so fiddly!
- Once you have your crimping bead in the right placement, you just need to clamp down on it with your flat pliers as hard as you need to in order to get the ends secure.
- Once your crimping bead has been crimped and is secure, you have a loop! Now you can use that loop to attach your metal loop. In order to attach the metal loop to the loop we just made, you’ll need both your pliers.
- The first thing you’ll need to do is open your metal loop by grabbing one half of the loop close to the split with one pair of pliers. And then you’ll want to grab the other side of the loop near the split with the other pliers and tug in opposite directions so that it opens.
- Once the metal loop is opened, you’ll want to hook it into your handmade loop. If you are only attaching your earring connector to the clay charm without any other jewellery decoration, then you’ll want to attach your earring connector to the metal loop as well before we close it.
- Once you’ve attached what you want to the metal loop, you’ll just repeat step 6 in the opposite way so grab both sides of the loop with 2 pliers and push them together until they are nearly seamless.
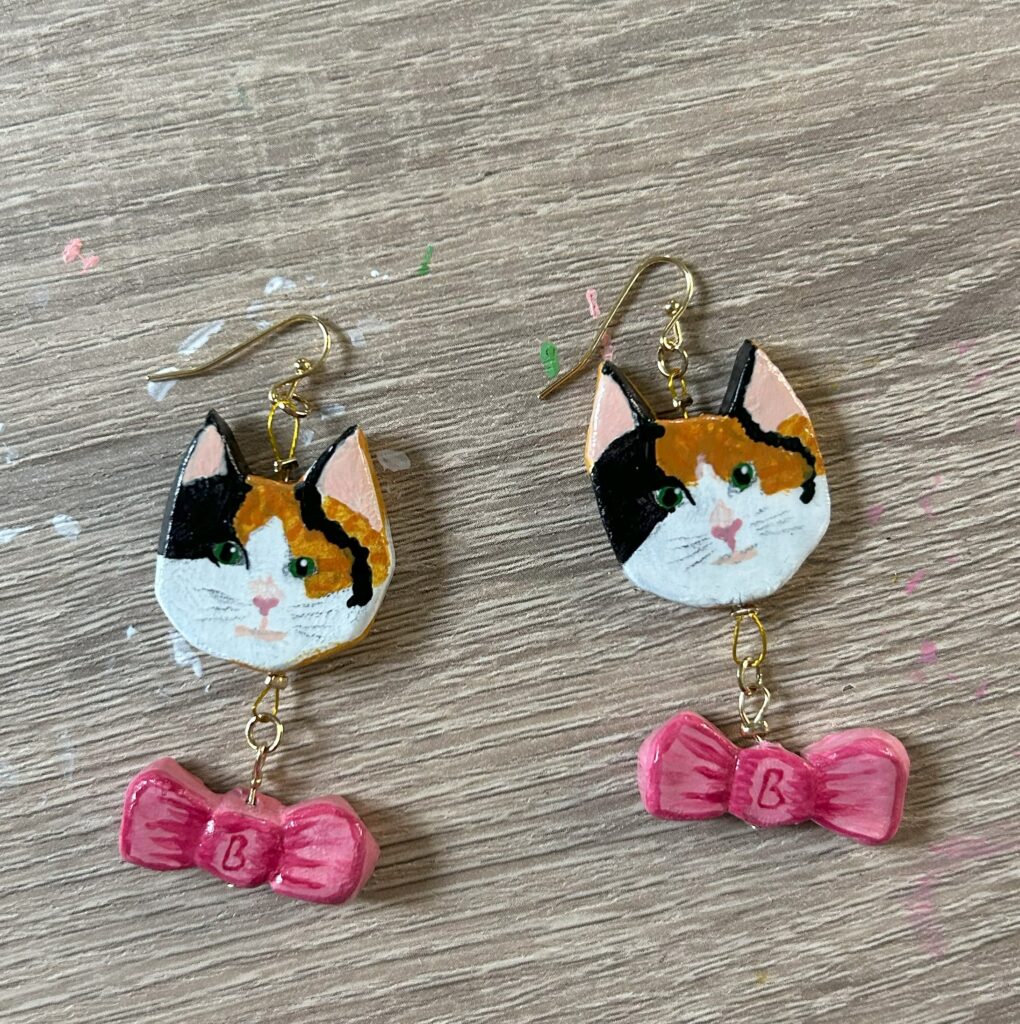
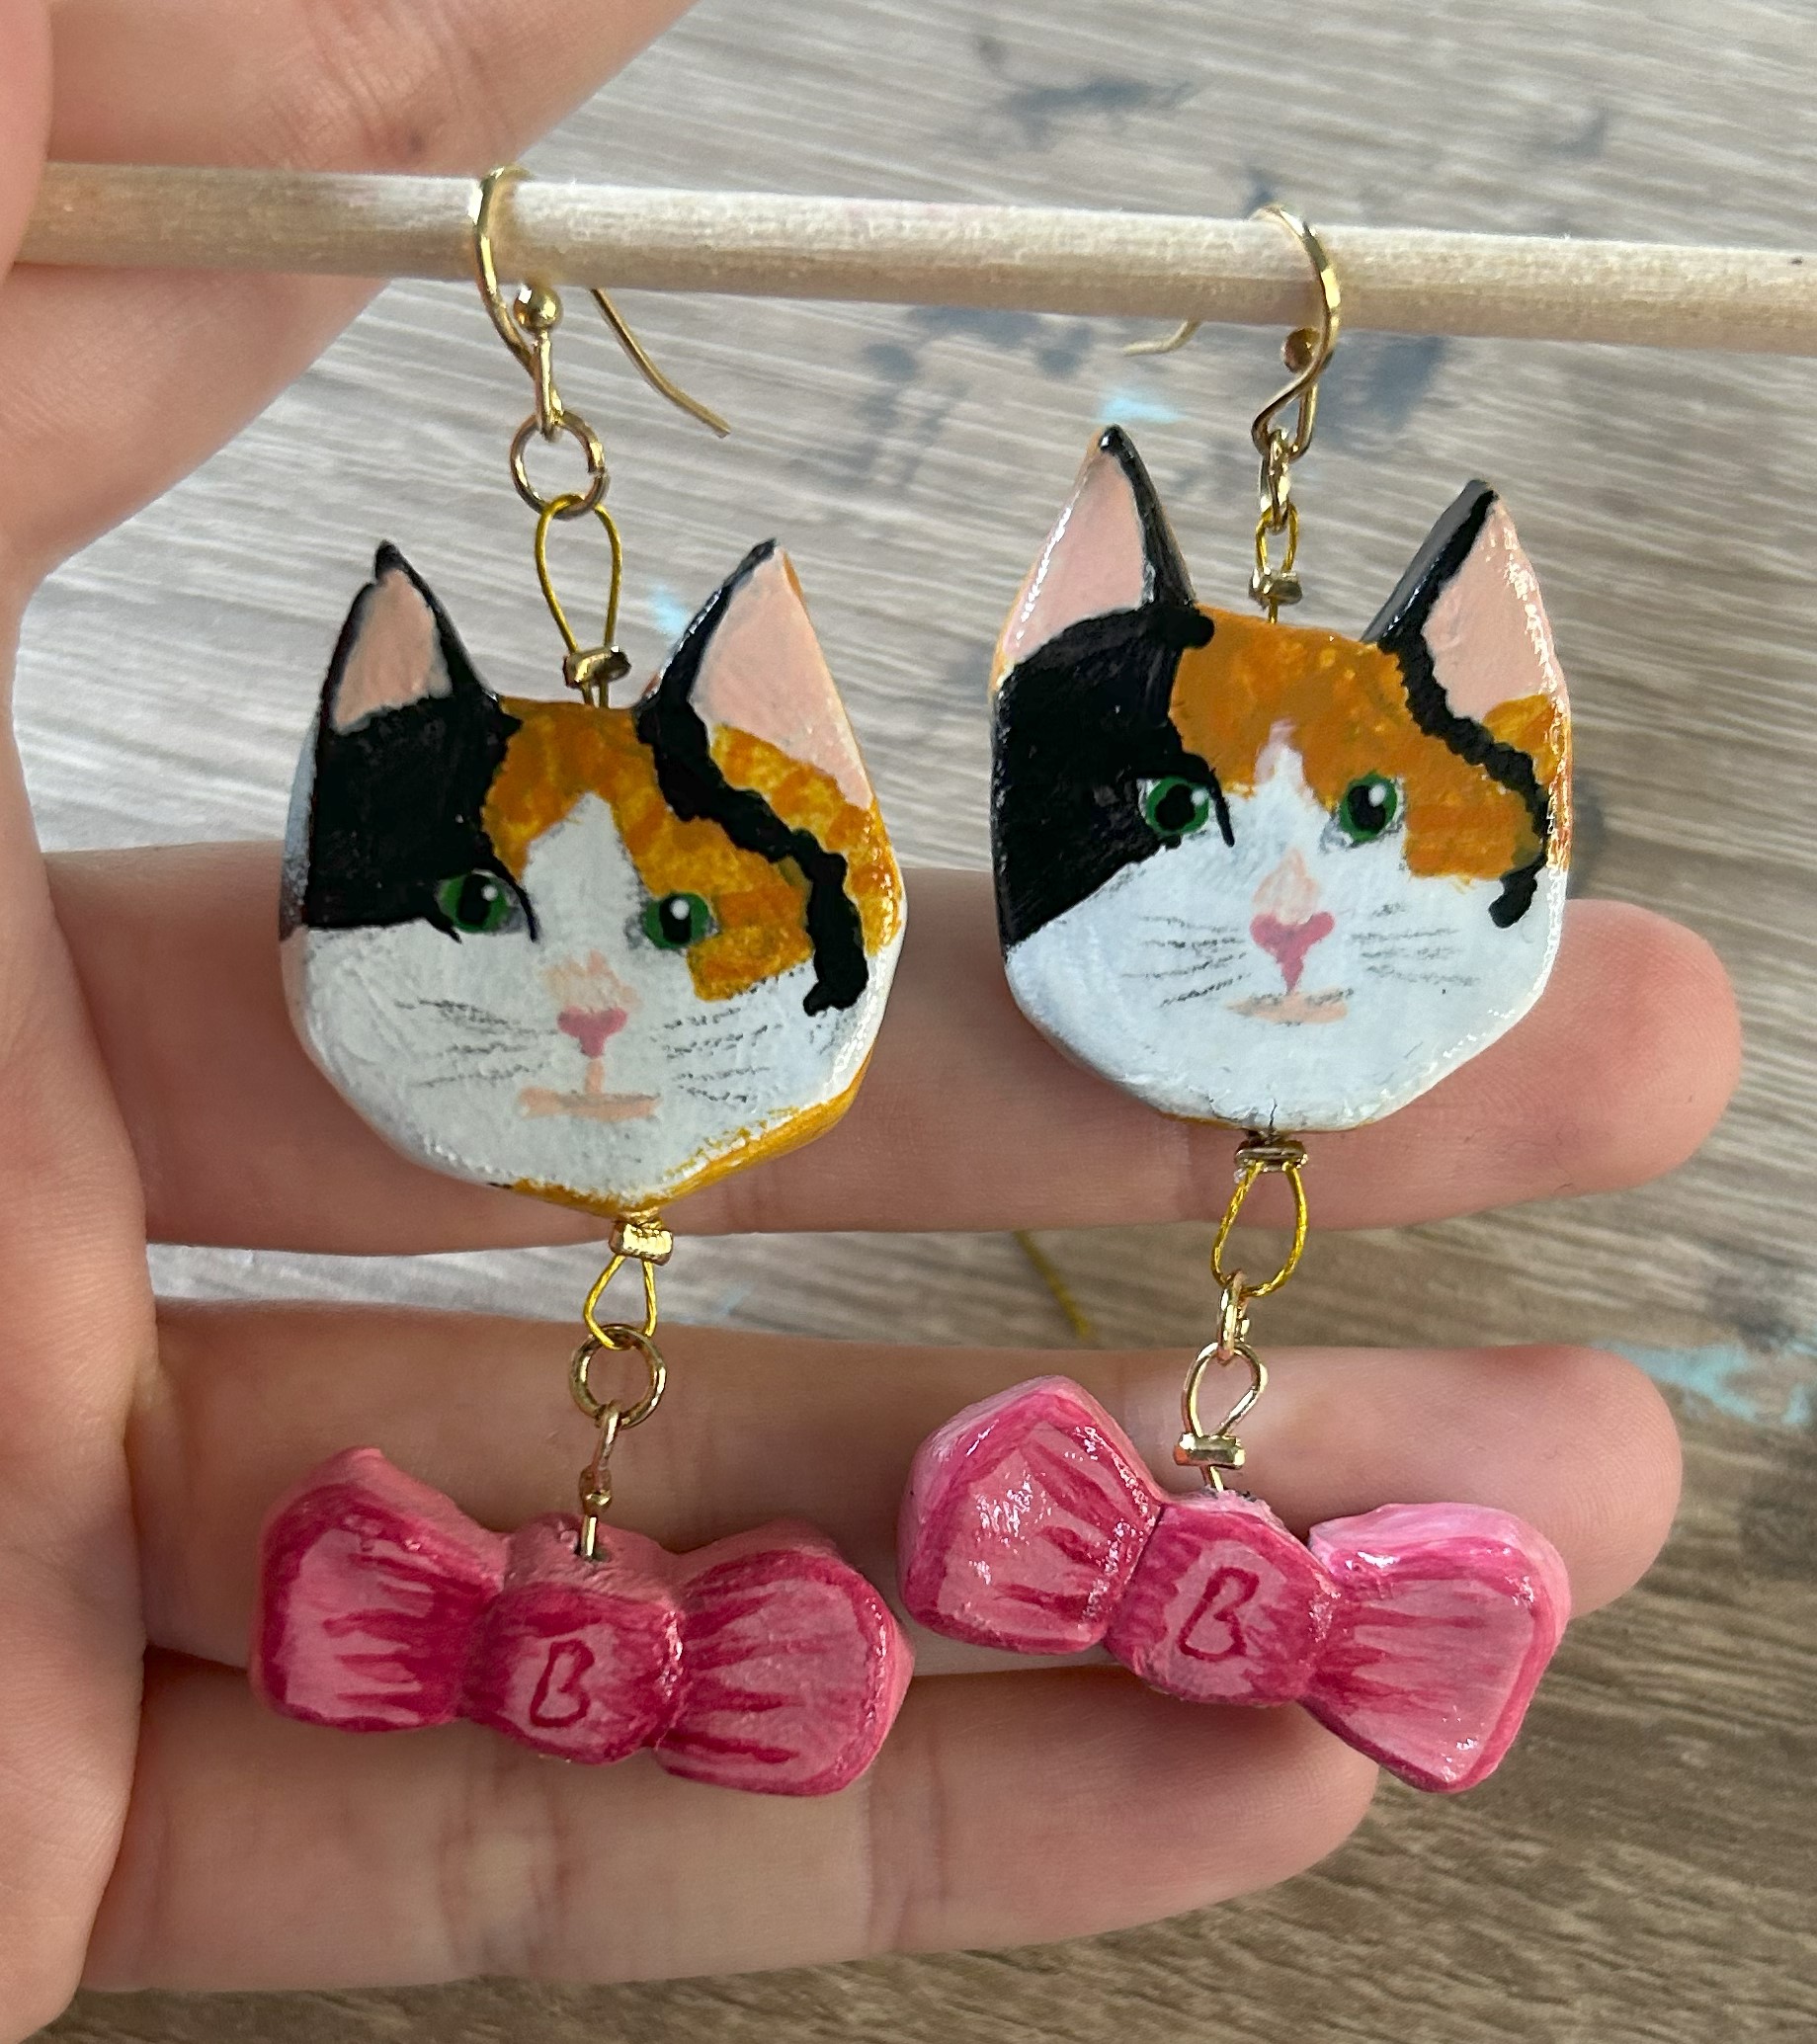
Now just repeat that on the other clay charm and you have your earrings!
It’s not over for me yet as I decided to add those bows as well as the cats to my earrings. If you are wanting to add an additional charm to your earrings, then I will show you how I did mine.
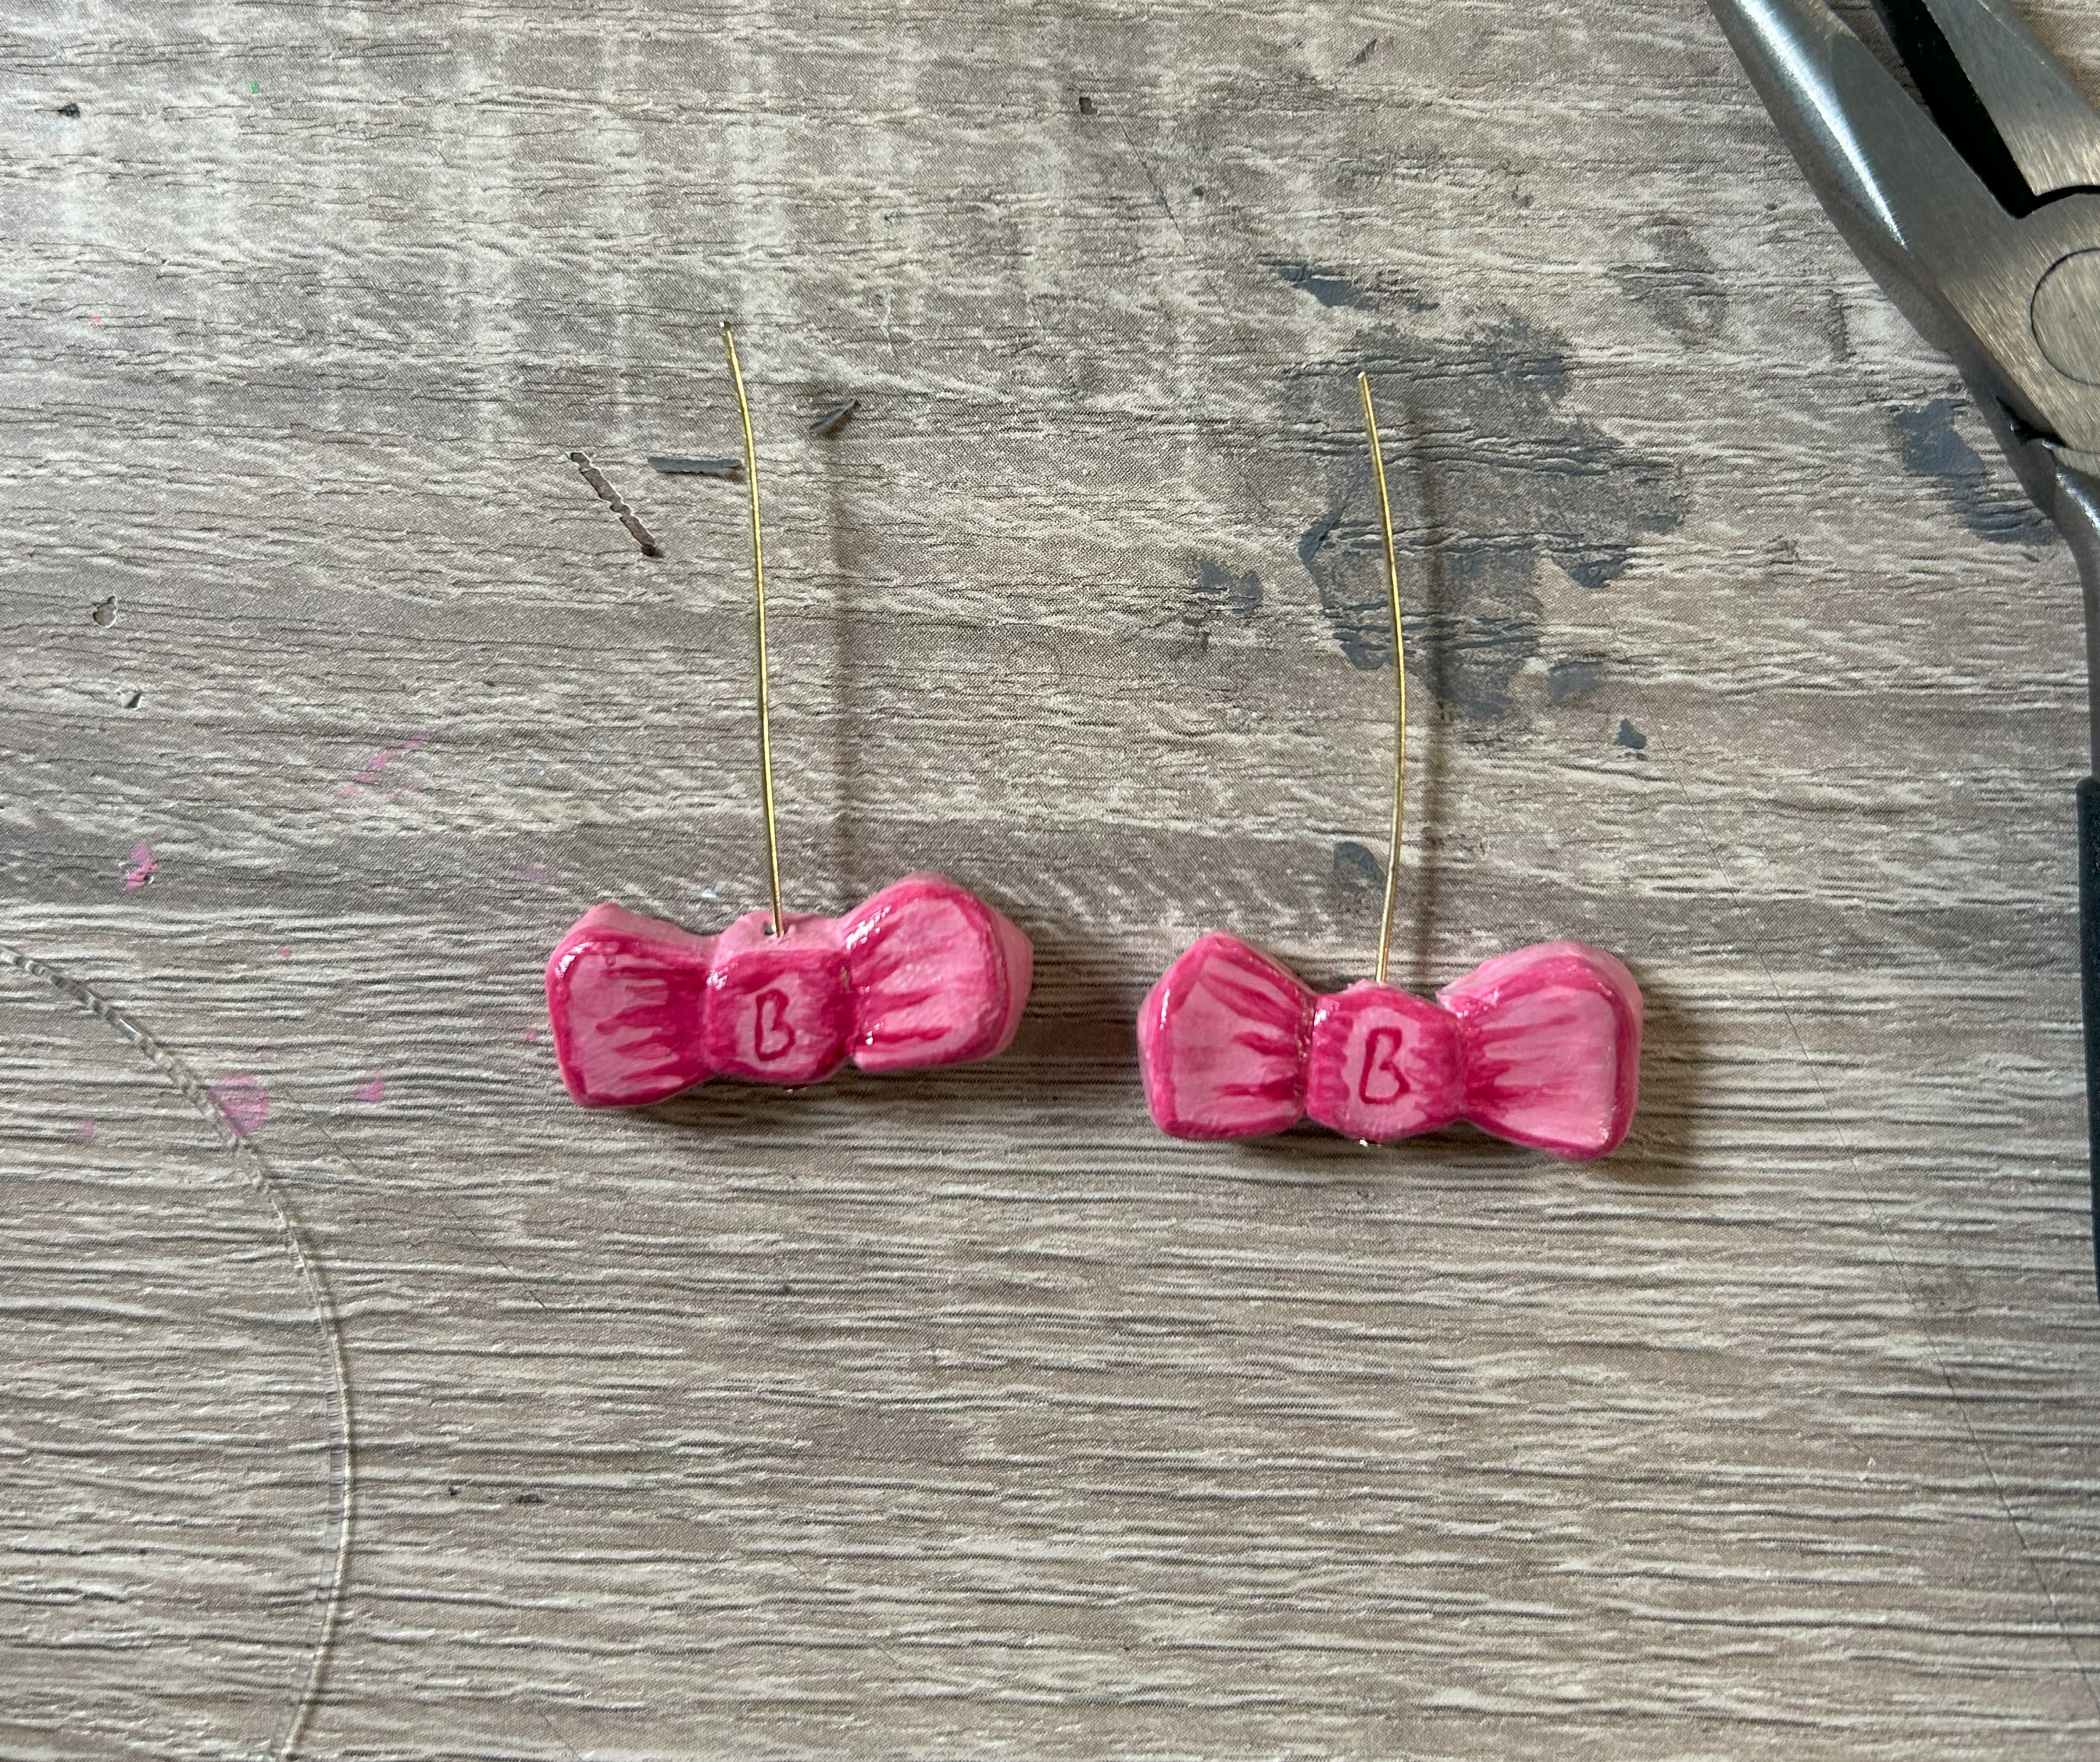
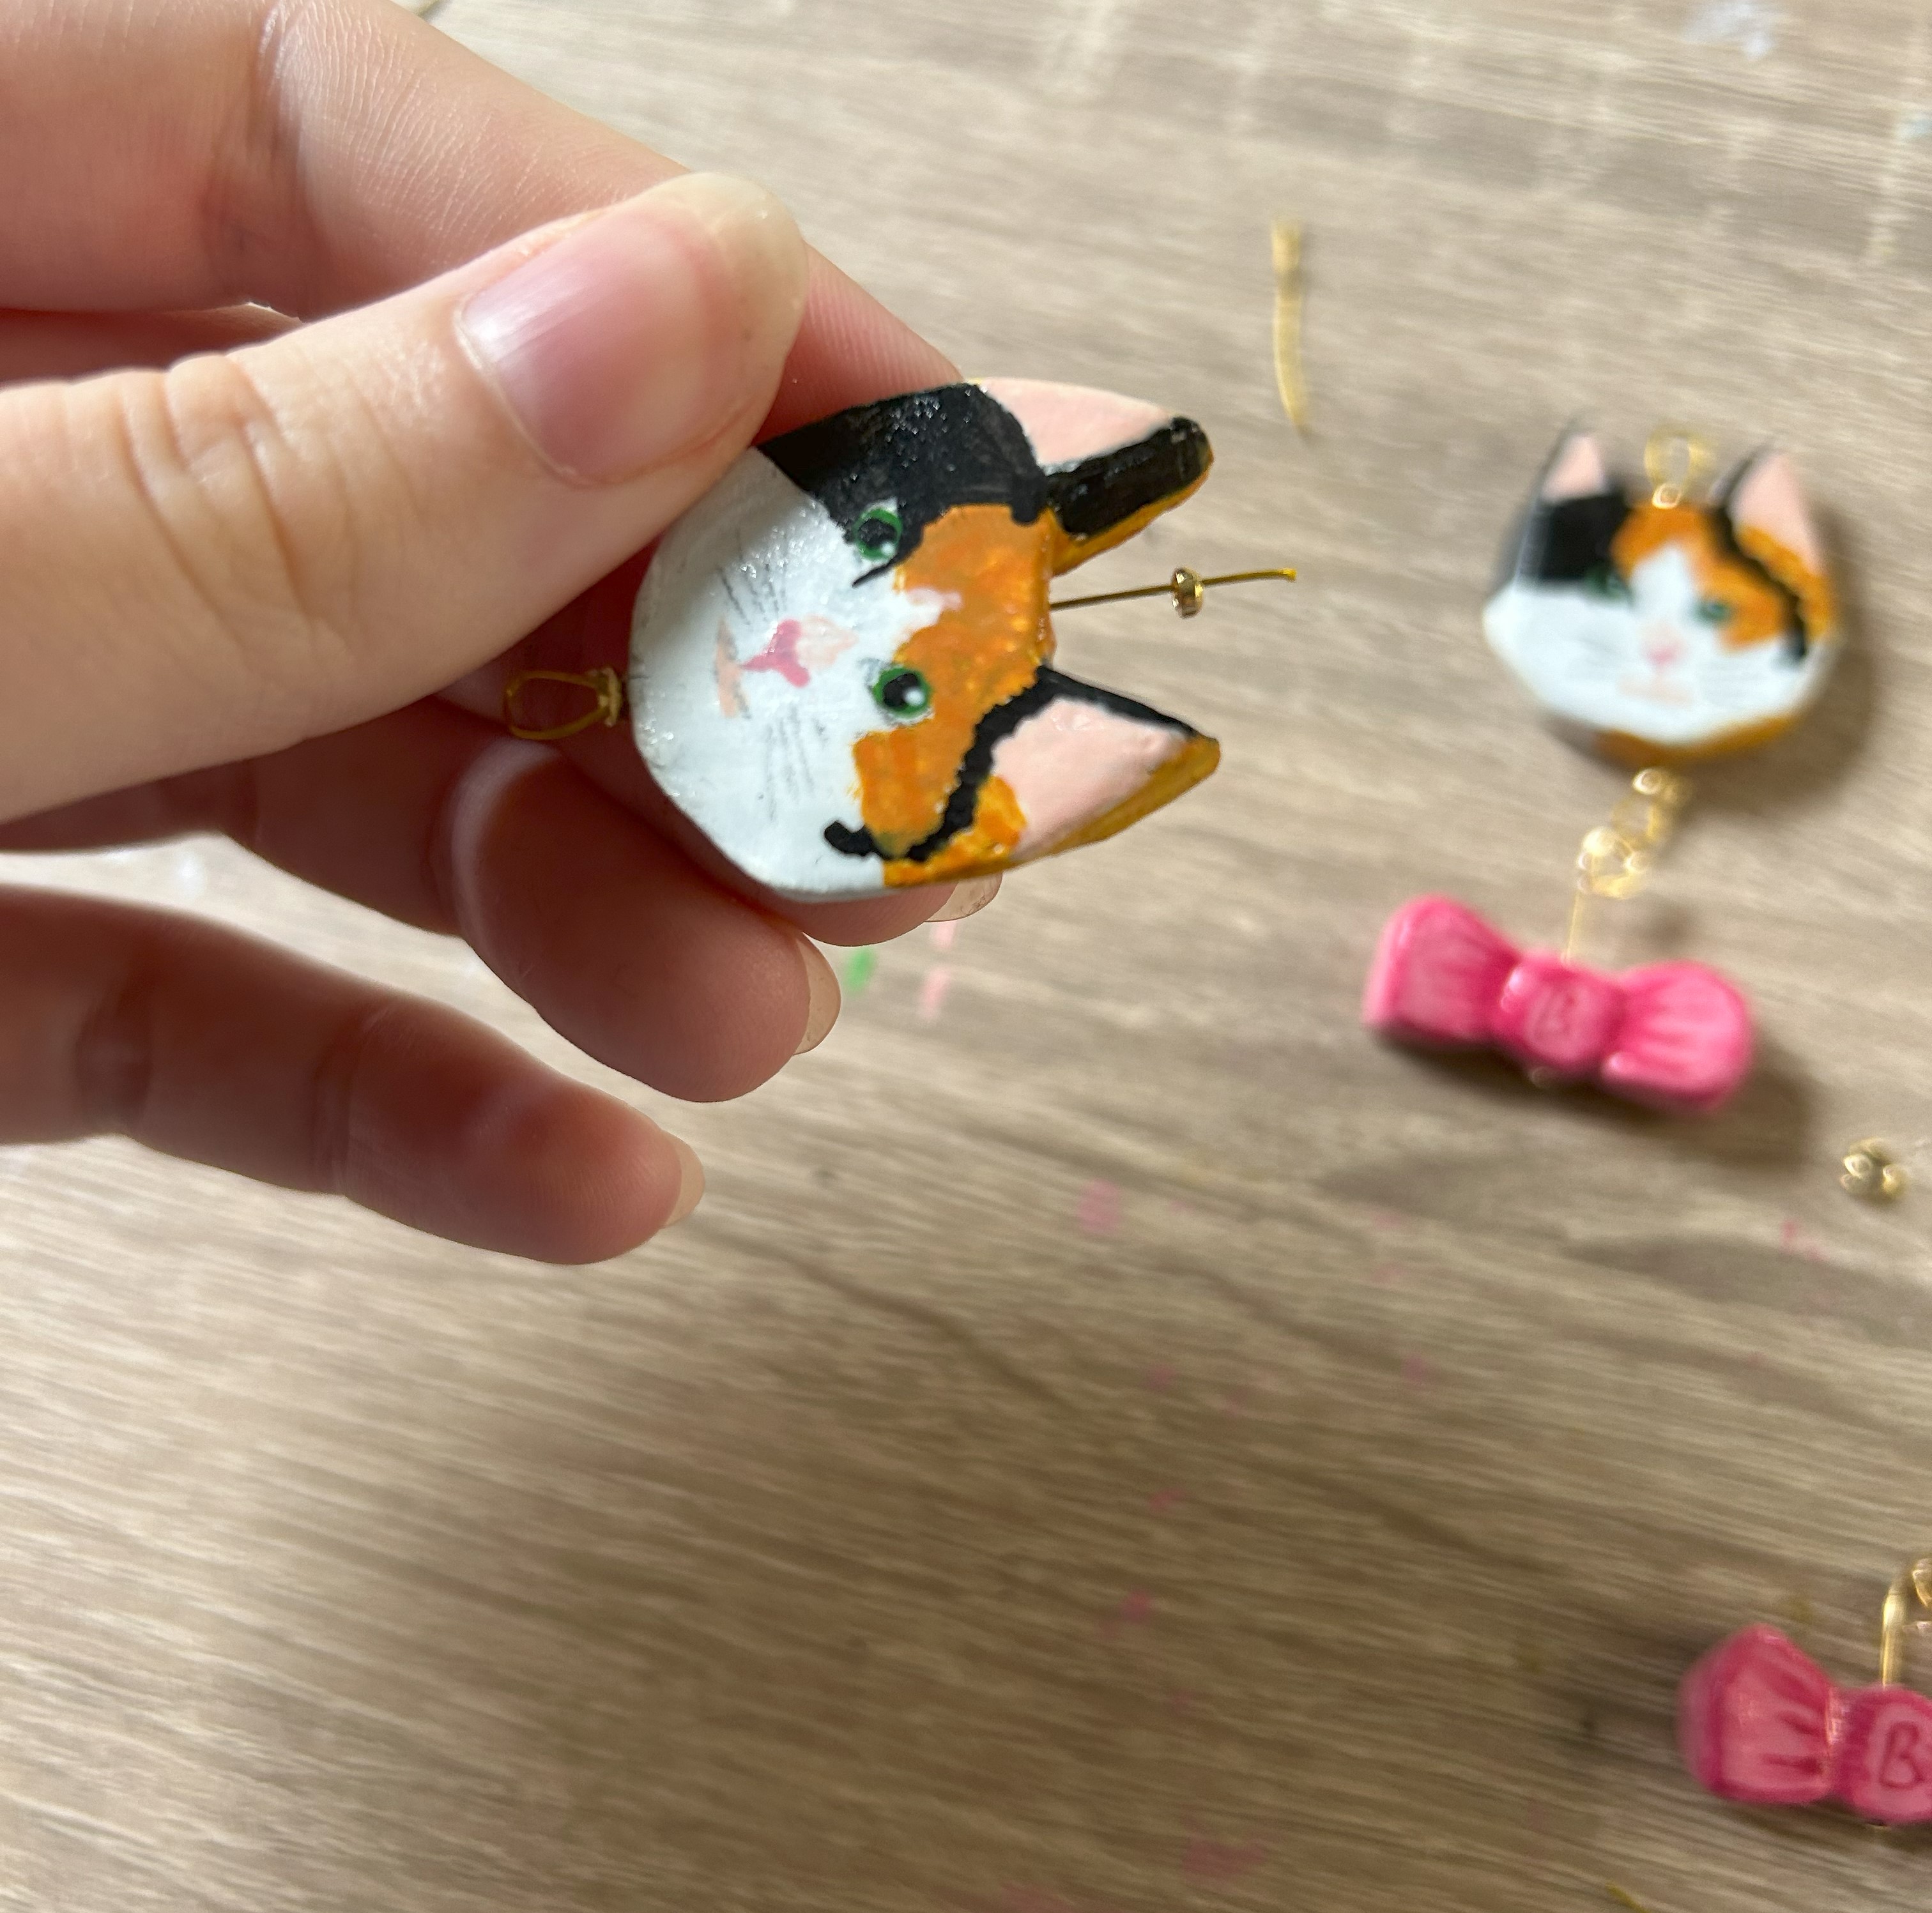
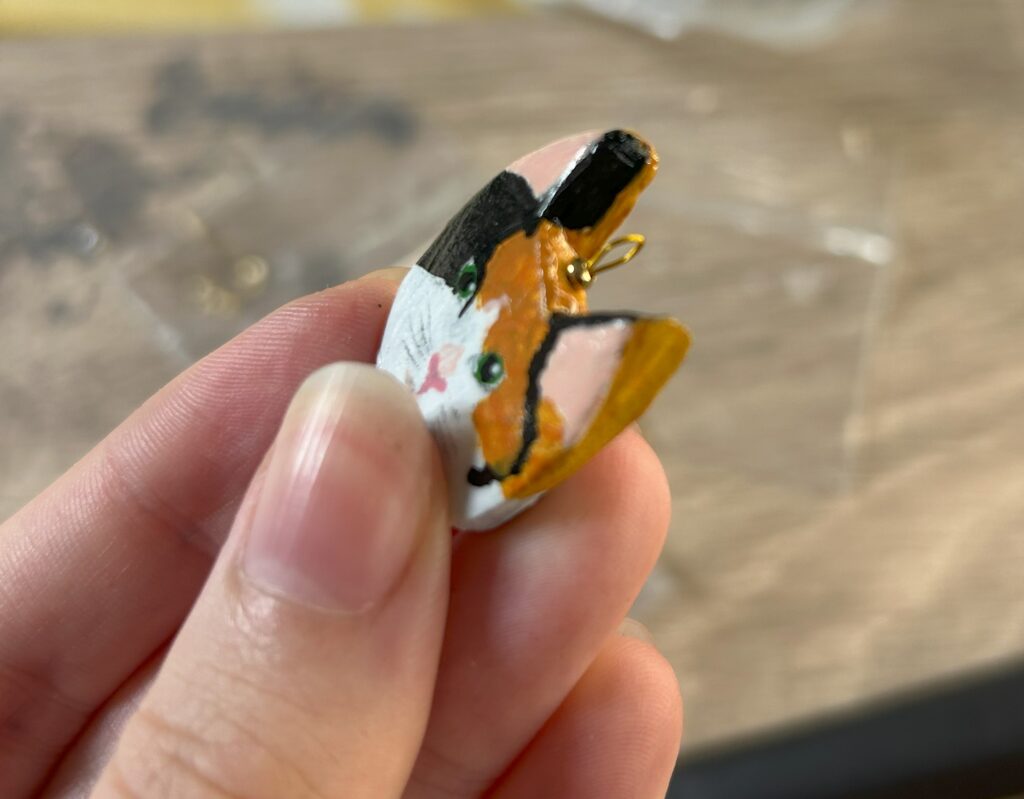
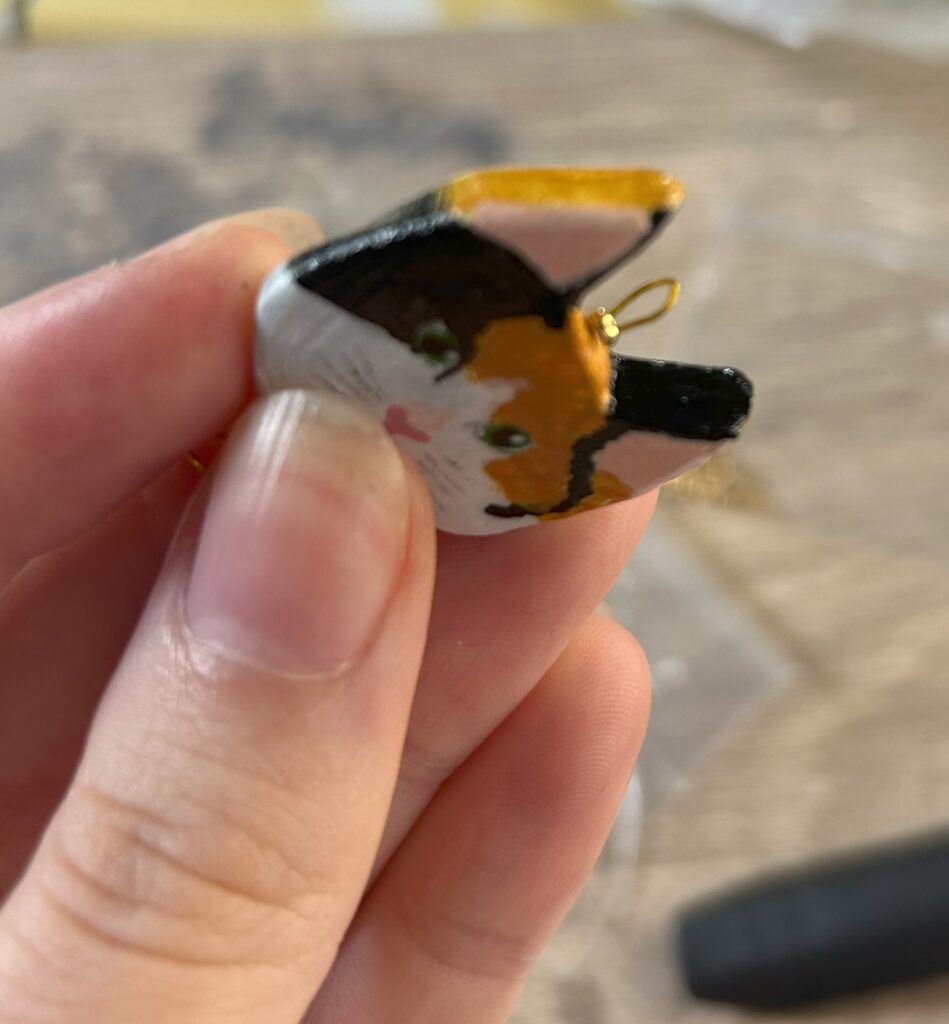
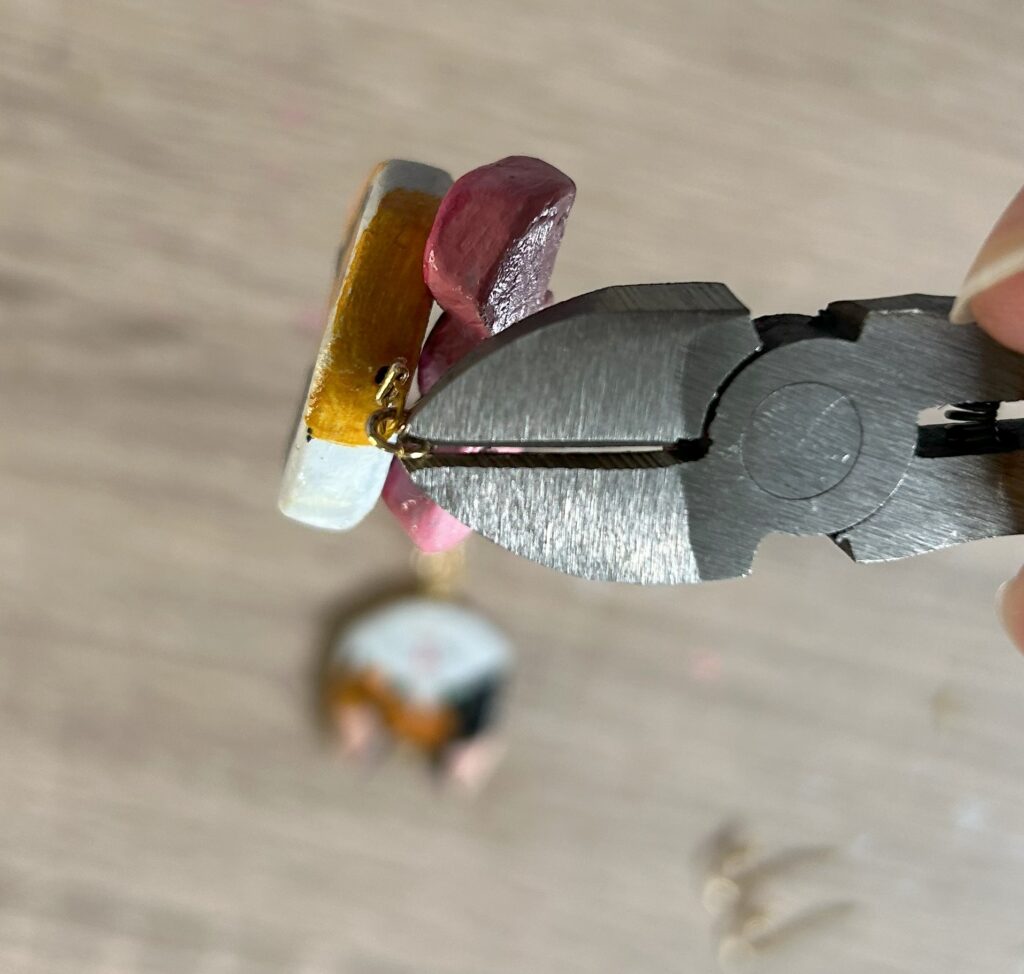
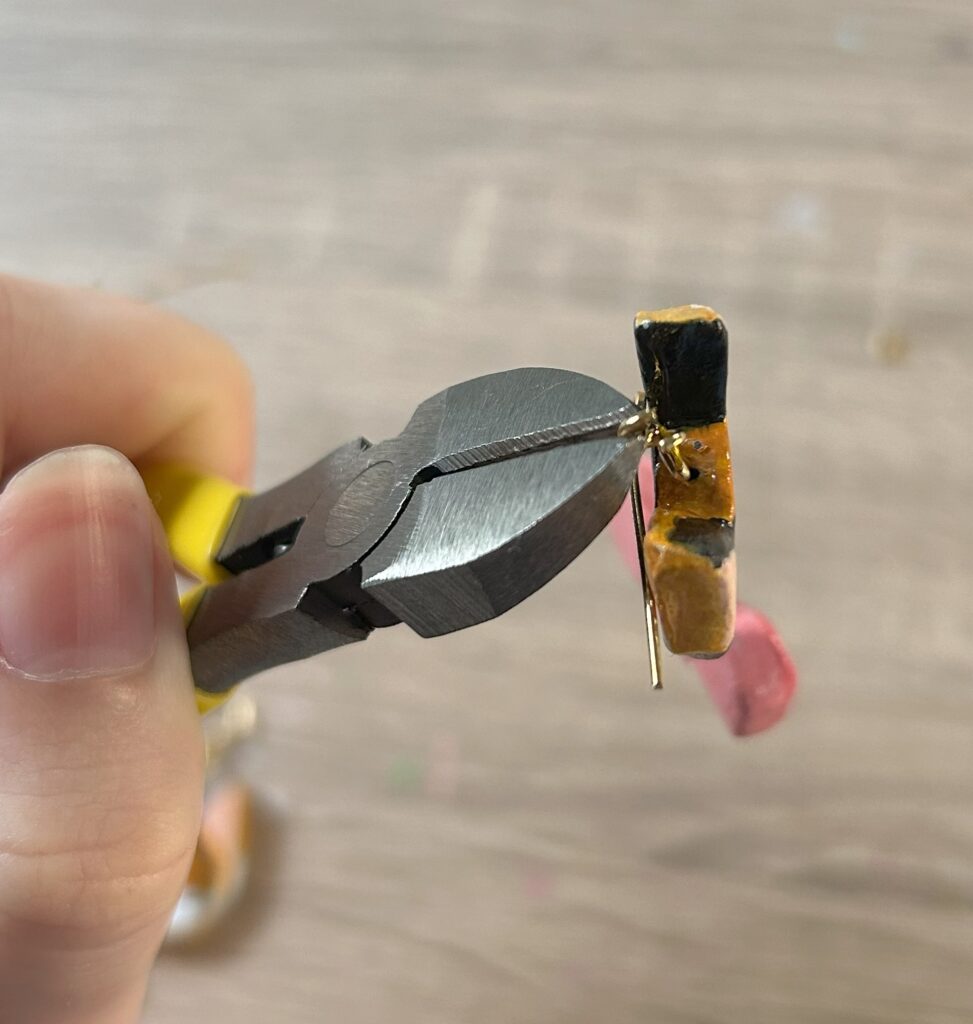
- I was able to use the flat pins for the clay bow charms but I had to think a little more creatively when it came to attaching my cat charms. I decided to use jewellery wire to be my connectors as it’s more malleable and I decided to try and create 2 loops on the tops and bottoms of my cats so I could attach the bows as well as the earrings.
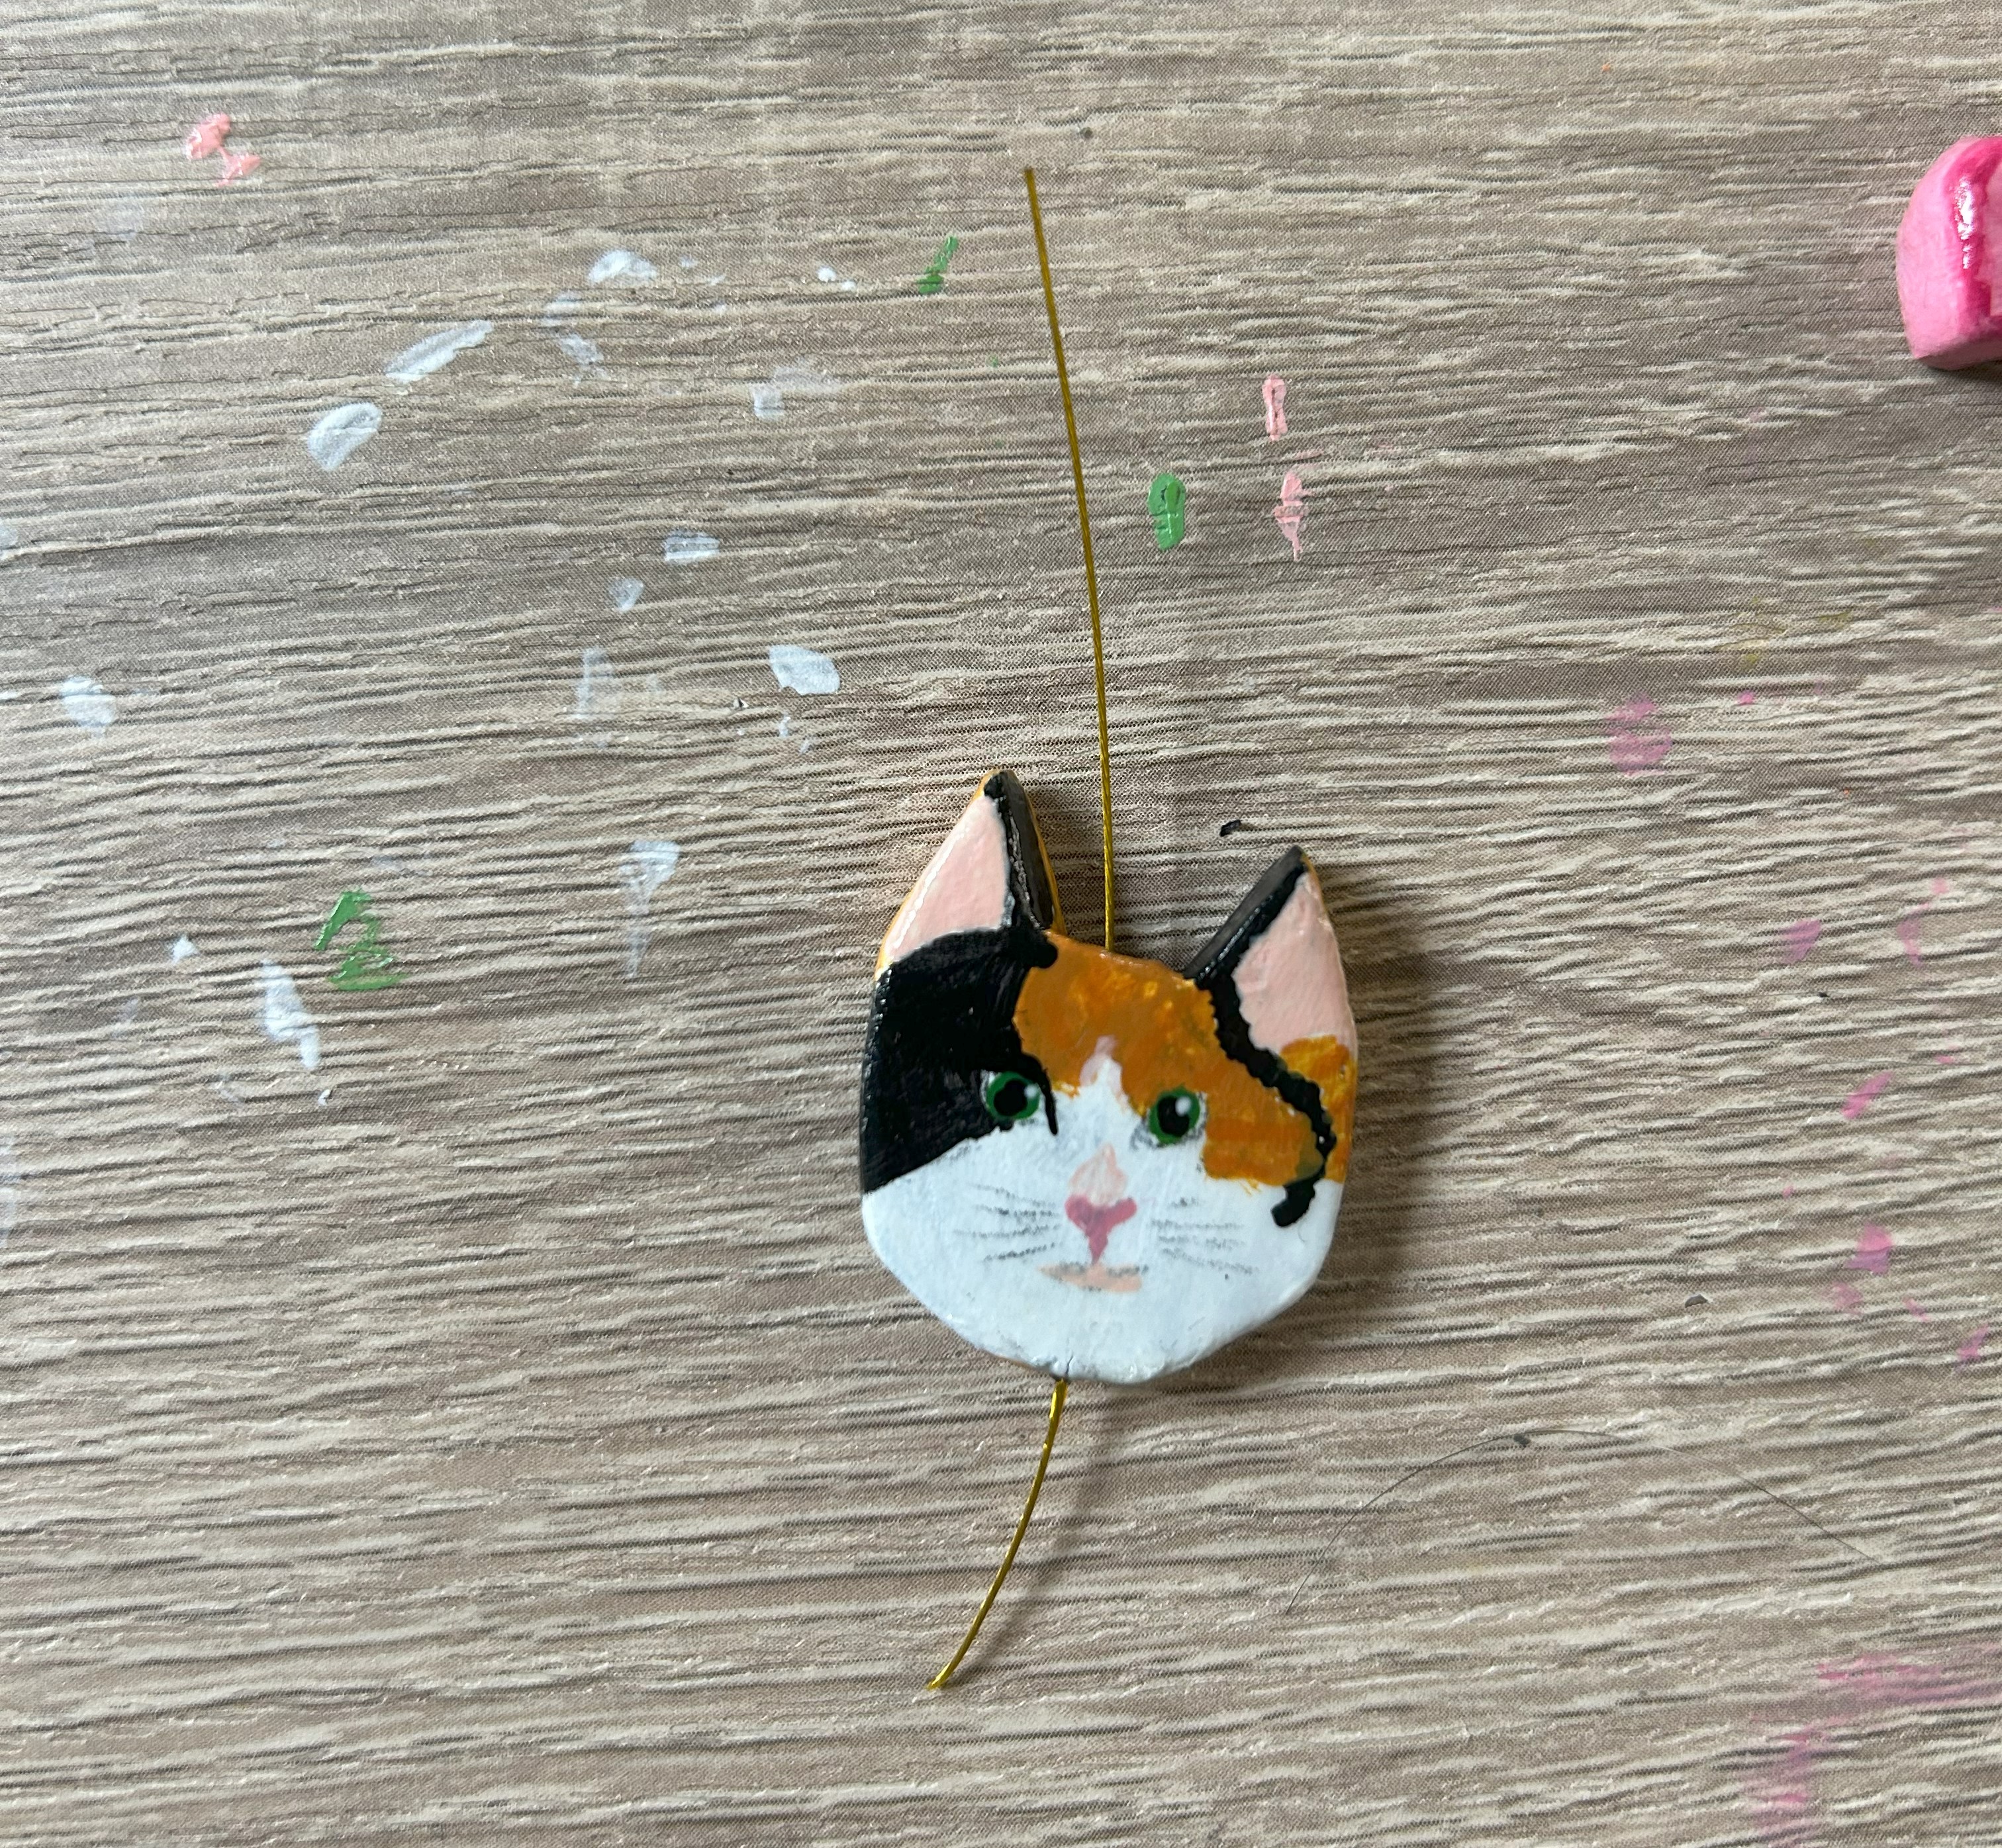
- The next step for this was to measure out how much jewellery wire I needed ( I went with more just in case). After that I threaded the wire through the holes in the cats.
- Once the wire was threaded through the cat charms, I got started on creating my loops. I got my crimping beads and threaded them first onto the wire and then I bent the wire (using pliers) until it created a loop, and I was able to thread the ends into the crimping bead. This part is so fiddly, but you’ll need to keep hold of the crimping bead when you’ve threaded it twice as it likes to push off of the wire.
- Once you’ve got your crimping bead in place you’ll want to crimp it down with some flat pliers until its secure in place. If you have a lot of wire left on the end of the crimped bead you can cut it with really any scissors you own.
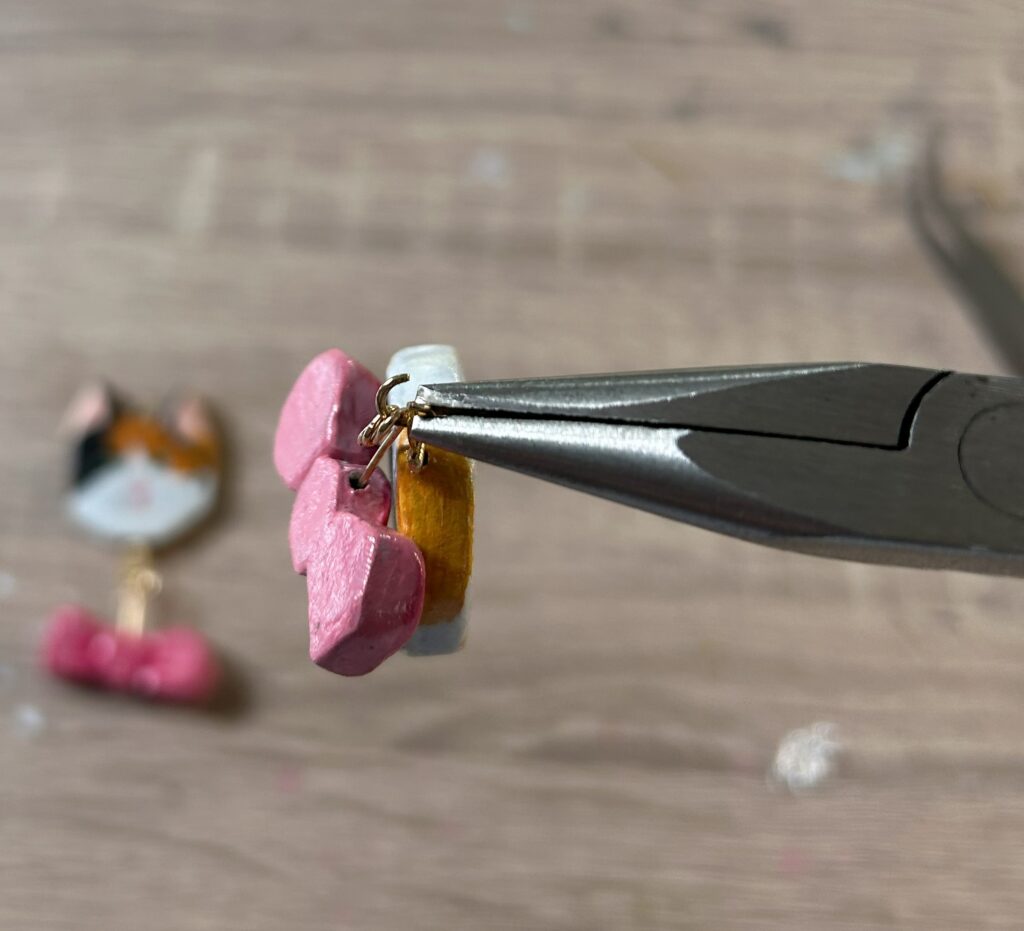
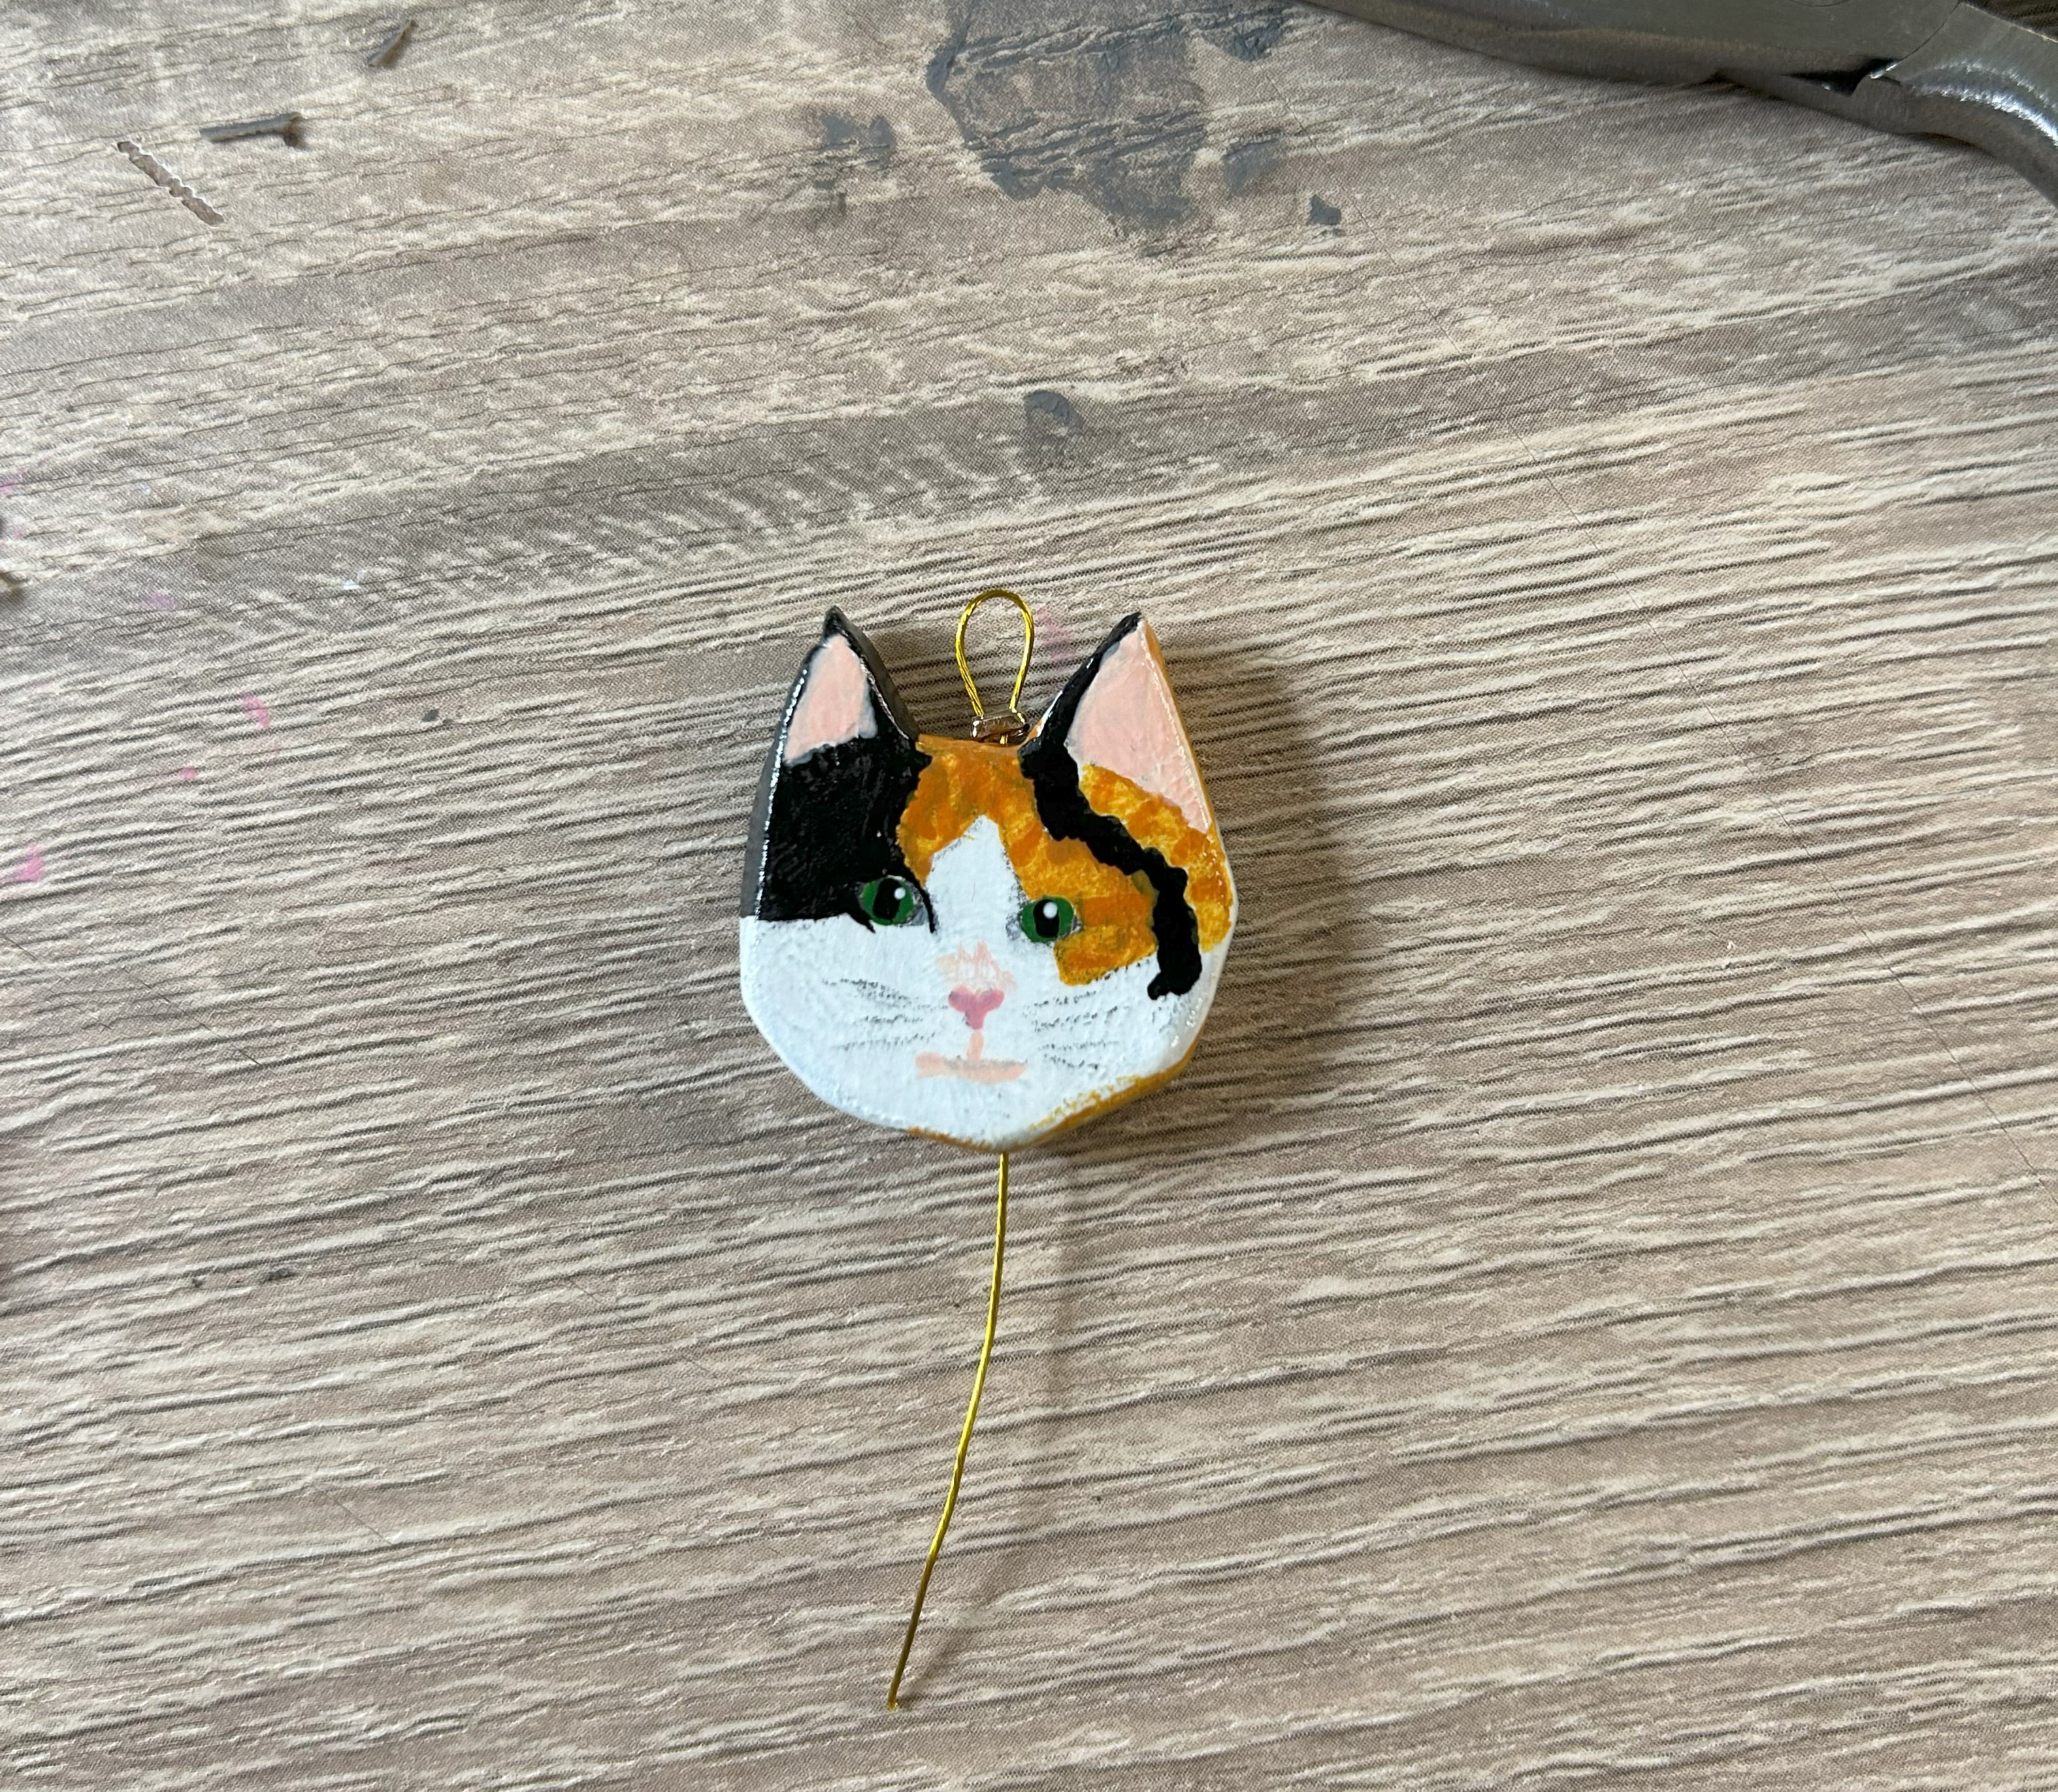
- Once you repeat these steps for the tops and bottoms of the cats, you’ll be ready to assemble the earrings! Refer to steps 3 and 4 for the rest of the jewellery wire and turn them into loops.
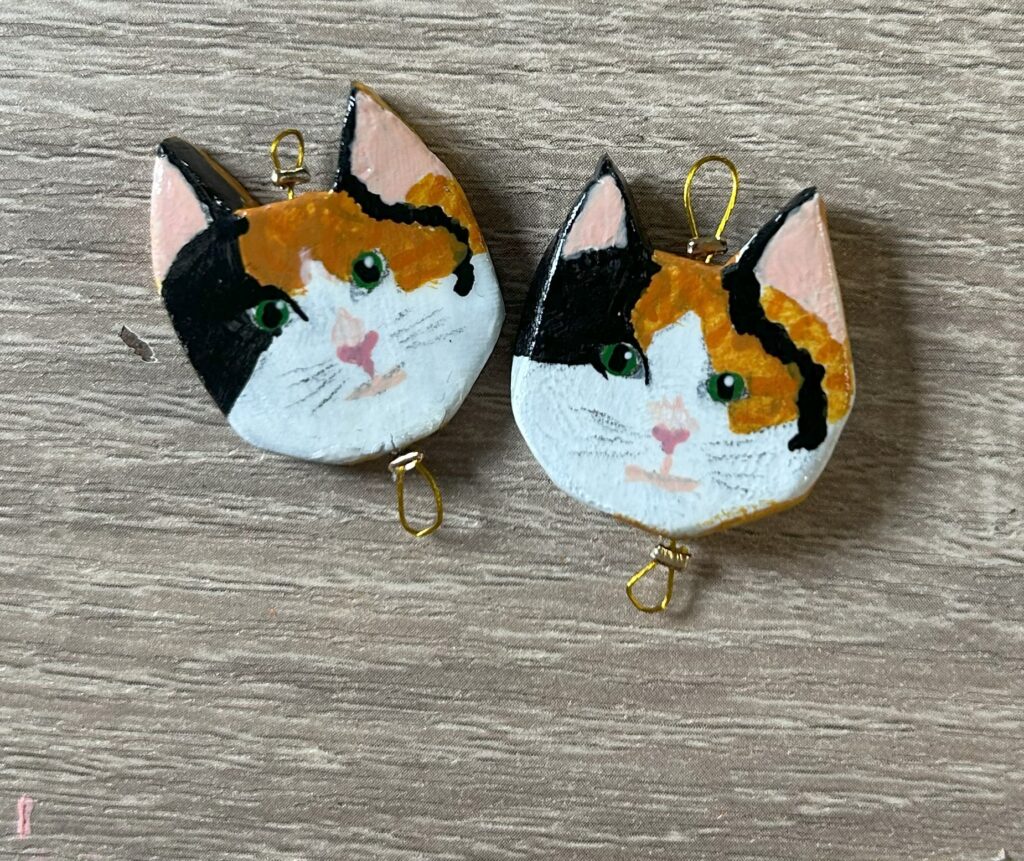
- Once your loops are completed, you’ll want to grab your metal loops once more and open them like in step 6 and I attached my bow to my cat with 1 metal loop. I then used another metal loop to attach the earring connector to the top of the cat’s head. Once I repeated that for the other cat and bow charms the earrings were complete!
All done!