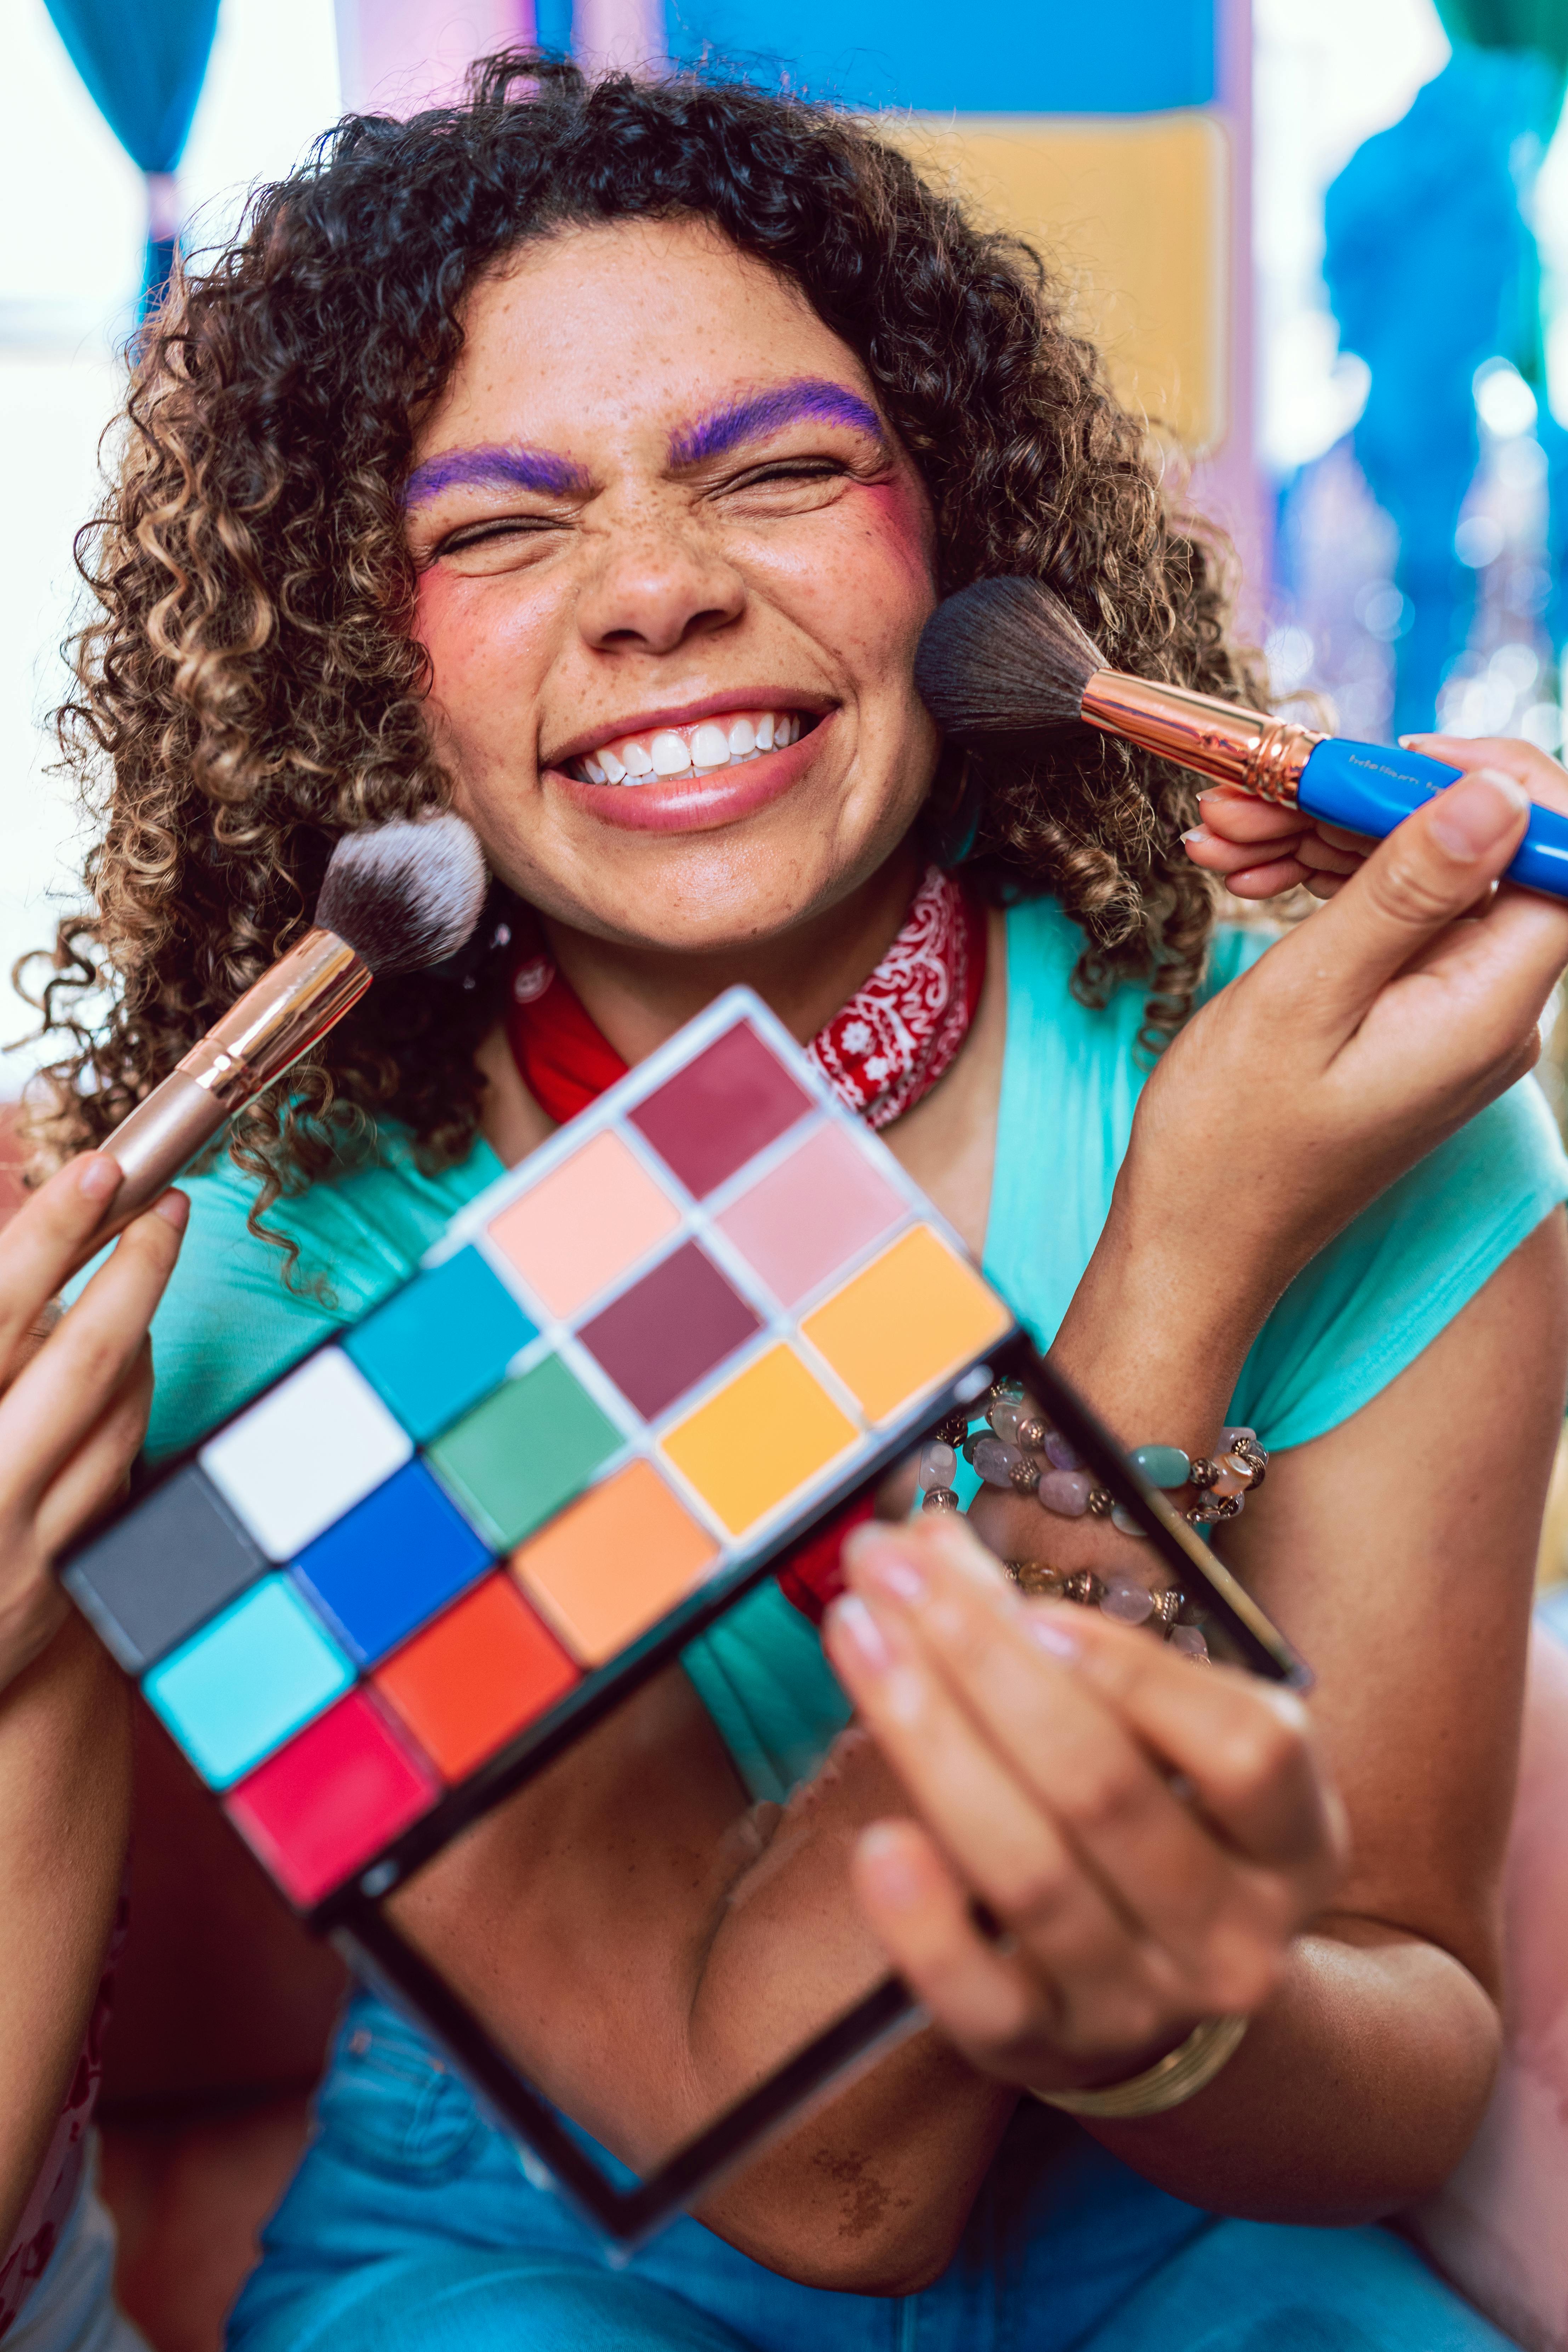
Have you been toying with the idea of adding more colour to your makeup looks?
Do you have a desire to experiment with colours but are worried the outcome won’t live up to your imagination?
If you said yes to either of those questions, you’re in luck! I will take you through 3 easy and beginner friendly ways you can start experimenting with colour TODAY! And don’t worry, you’re going to look AMAZING!
Tools I use:
I typically use either eyeshadow or graphic liner and I often mix the two together as well.
-Here is an amazingly colourful eyeshadow palette, if you don’t have all the colours that you desire!
-Here is the graphic liner palette I use if you’re searching for some cheap but great quality graphic liner to experiment with!
~Before we begin, I want to make it very clear to everyone that using specific colours don’t matter as much as we’re told they do. Just because I use a colour like yellow on my brown eyes, doesn’t mean that you can’t try it out if you have green or blue eyes! I don’t know about you, but I was told I couldn’t wear certain colours e.g Pink, because my eyes are brown and it’s not “flattering…”
Plot Twist, I love wearing Pink on my eyes, it’s probably my favourite colour to use! What I’m trying to say is don’t write off colours that you “think” won’t suit you or that you’ve been told won’t suit you because there are so ways to incorporate colours into your makeup looks. And I am a firm believer that colours (all of them) look good on everyone!
Let’s begin with colourful makeup look one!
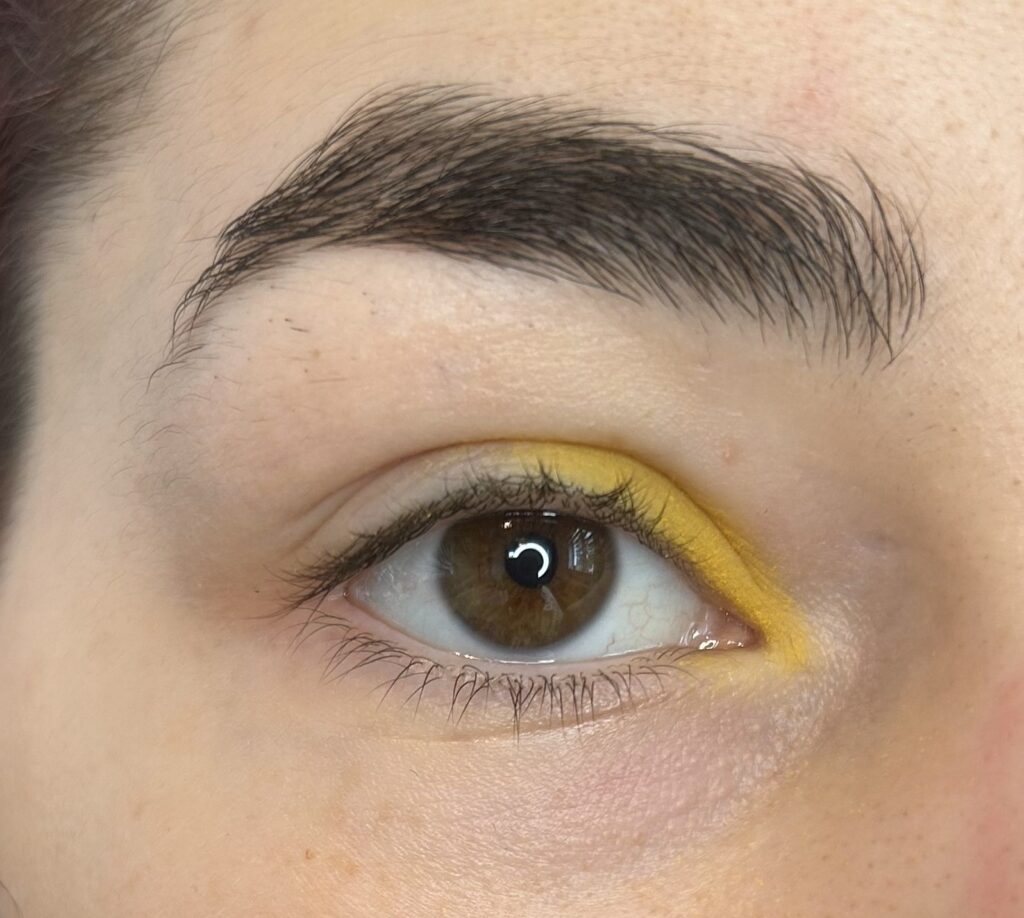
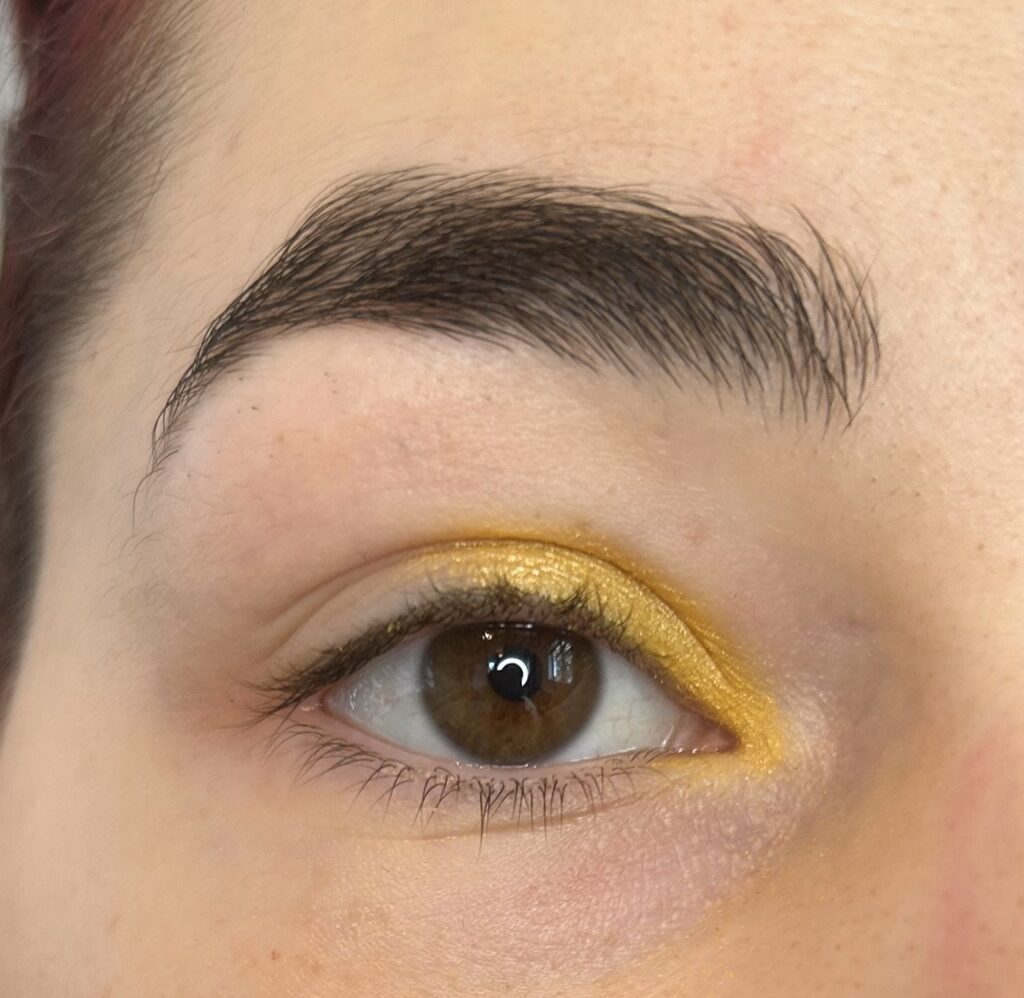
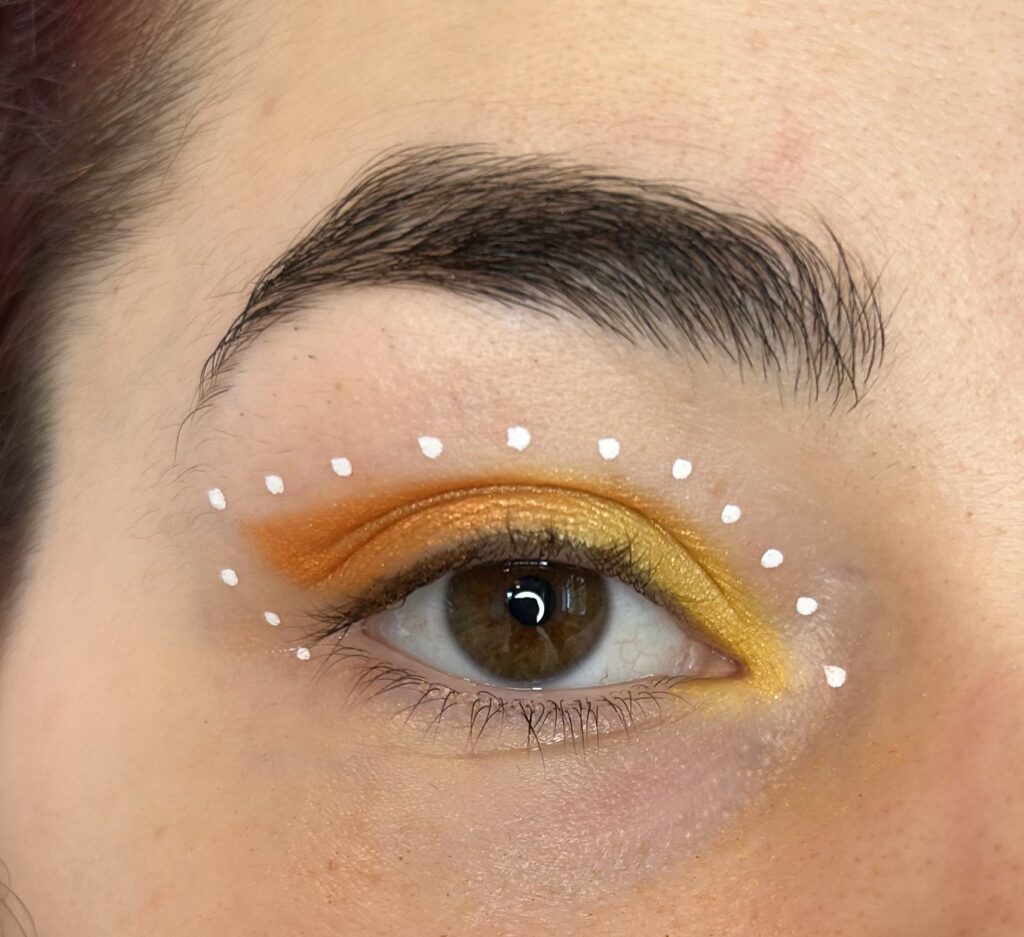
For this look, all you’re going to need is some eyeshadow. I used a yellow/gold eyeshadow as well as some orange eyeshadow. But you can choose any colours you’d like or have access to!
If you have graphic liner, you can use that for the second part of this look. But if you don’t have graphic liners at your disposal, just use a regular eyeliner pen or you can even use another eyeshadow to create the same effect (I’ll go into more detail).
Step 1:
-If you have oily eyelids, start with some moisturiser or a primer on your lids. Once that has dried, I like to start from my inner corner and then end with my outer corner.
Start by using either your fingers or a small brush and grab some yellow/gold eyeshadow pigment (whatever you have will work) and apply it to your inner corner until about halfway across your lid. Blend it out a little until it’s also above your natural eyeball crease.
Step 2:
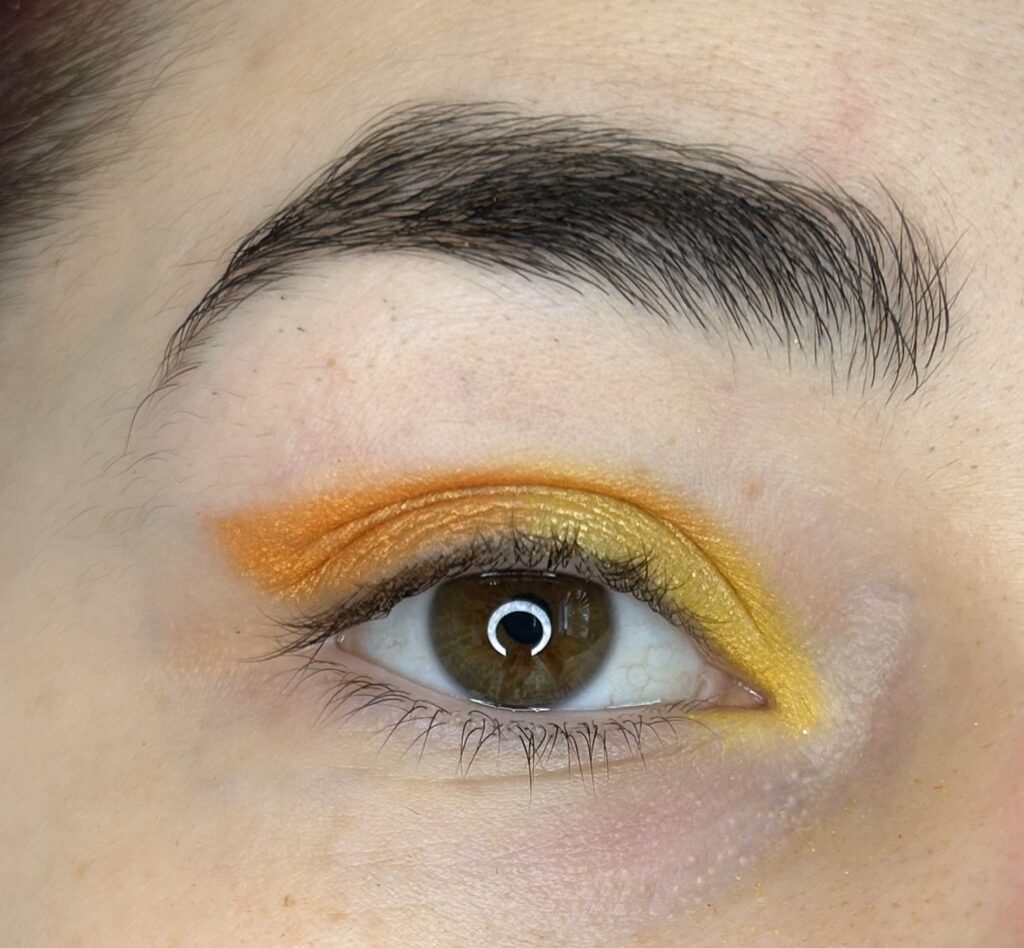
Once that is blended, grab some orange eyeshadow with either your brush or finger and apply that on the outer corner. I personally like to add a triangular shape to the end of my looks as it helps my eyes look less hooded. You can use whatever shape you prefer, or you can try out the triangular shape.
-All you need to do is grab a small, pointed brush and dip it into your orange eyeshadow and apply it to the very ends of your eyes in an upwards diagonal direction from your lash line. Then you’re going to blend the orange over the top of your eyeball crease and blend into the yellow from the beginning. You’re going to connect the line we created with the brush to the line that we blended into the yellow and that creates your triangle shape.
Step 3:
Now that your eyeshadow is applied. It’s time for the details! This will be done with either the graphic liner, eyeliner or eyeshadow. All you need to do if you don’t have a liquid eyeliner or graphic liner is find a toothpick or something as thin and pointed as that. Once you’ve found the right tool, you just need to poke the tool into the eyeshadow you want to add to this look. Then all you need to do is poke your skin with the eyeshadow coated point and it should transfer onto your skin!
Now that we are all on the same page; I have found the easiest way to start playing with graphic liner or liquid eyeliner is to start off easy with simple dots. Starting from the inner corner of your eye, you’re going to add dots that will act as an outline for the shape you created with your eyeshadow. You can even use more than 1 colour for the dots and alternate them!
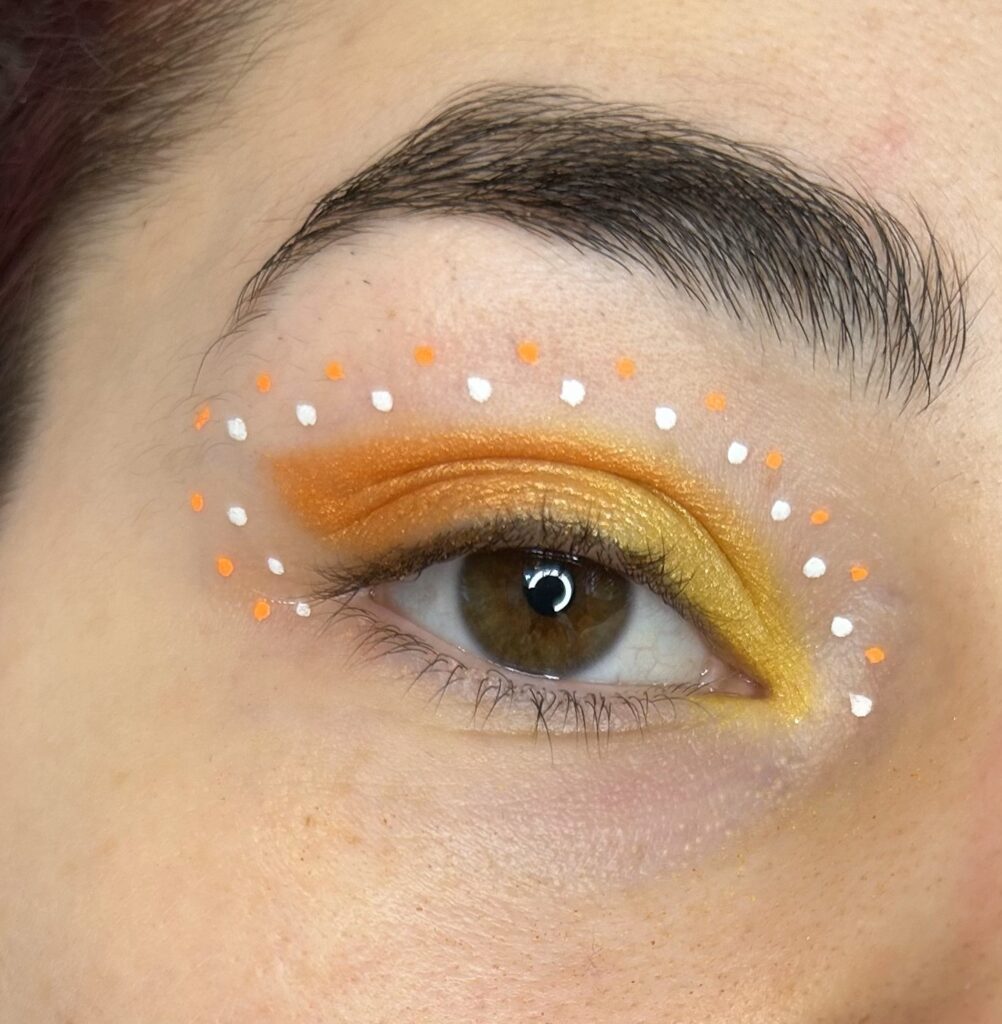
And that is colourful makeup look 1 completed!
And onto Makeup Look Two!
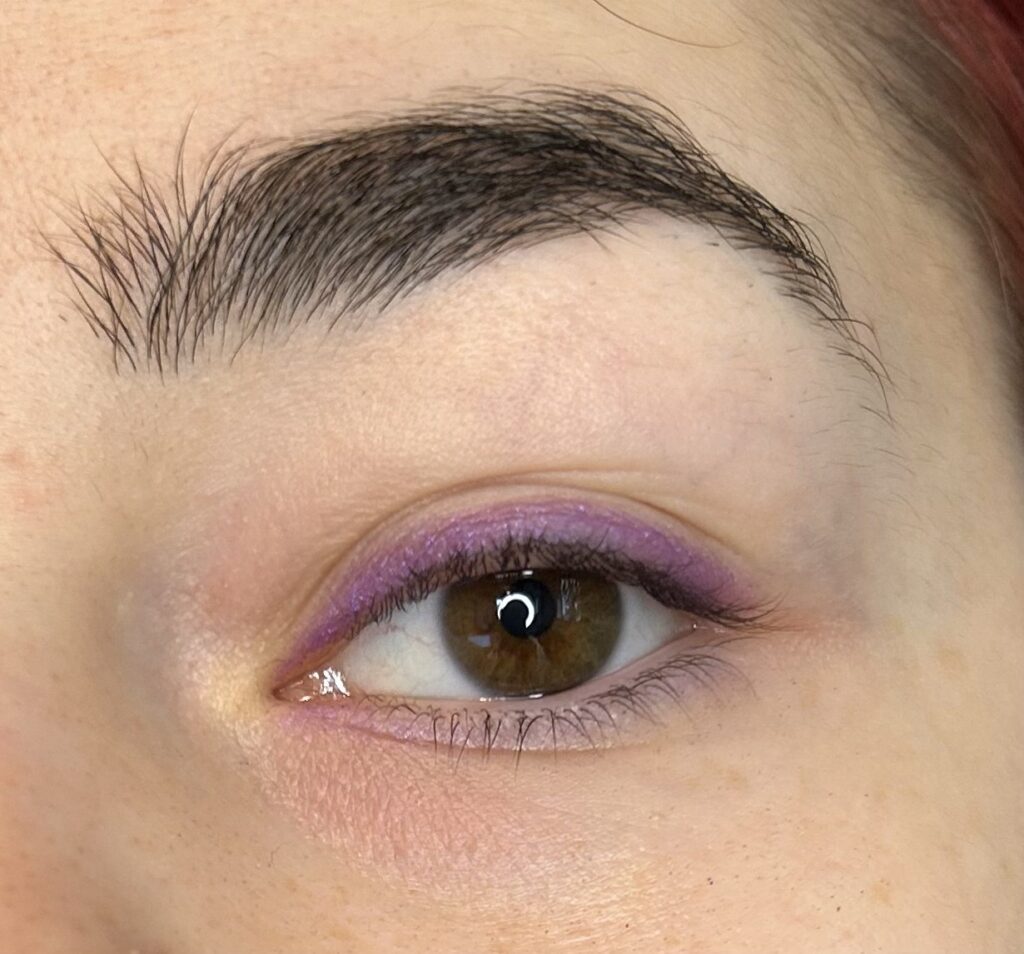
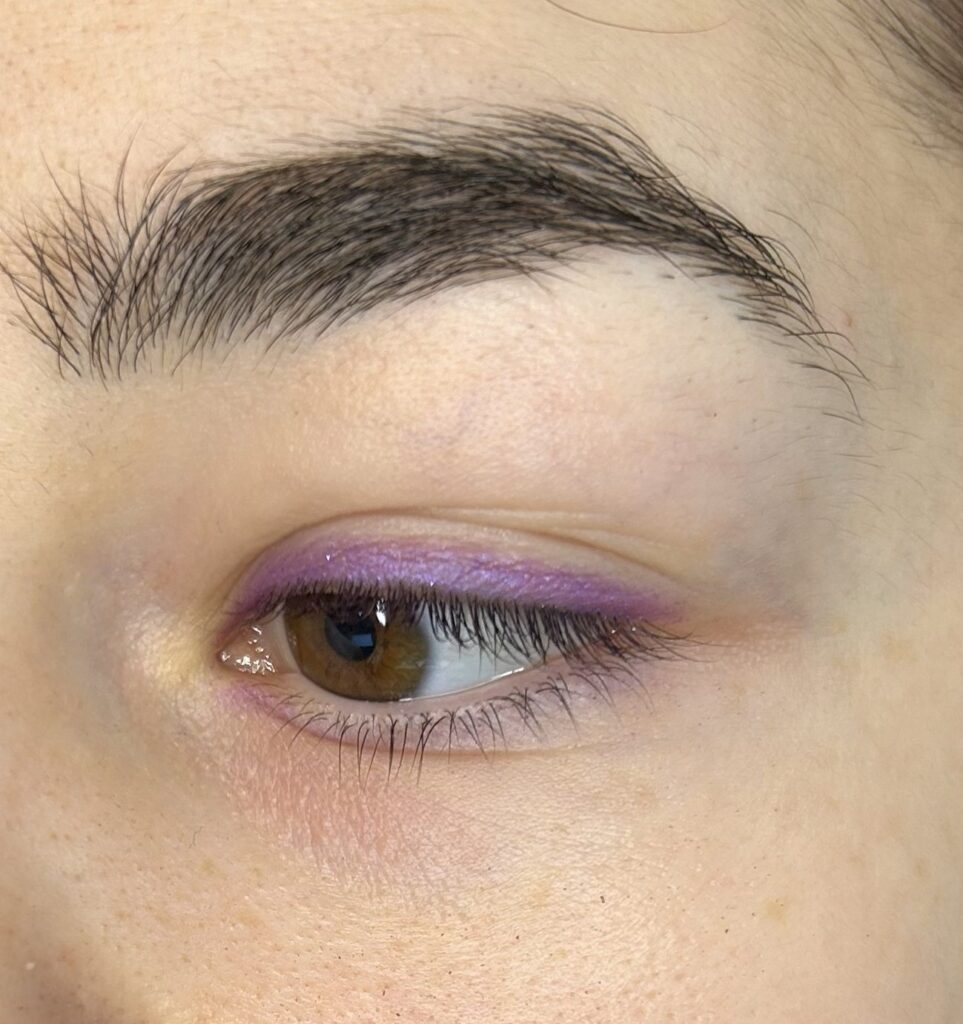
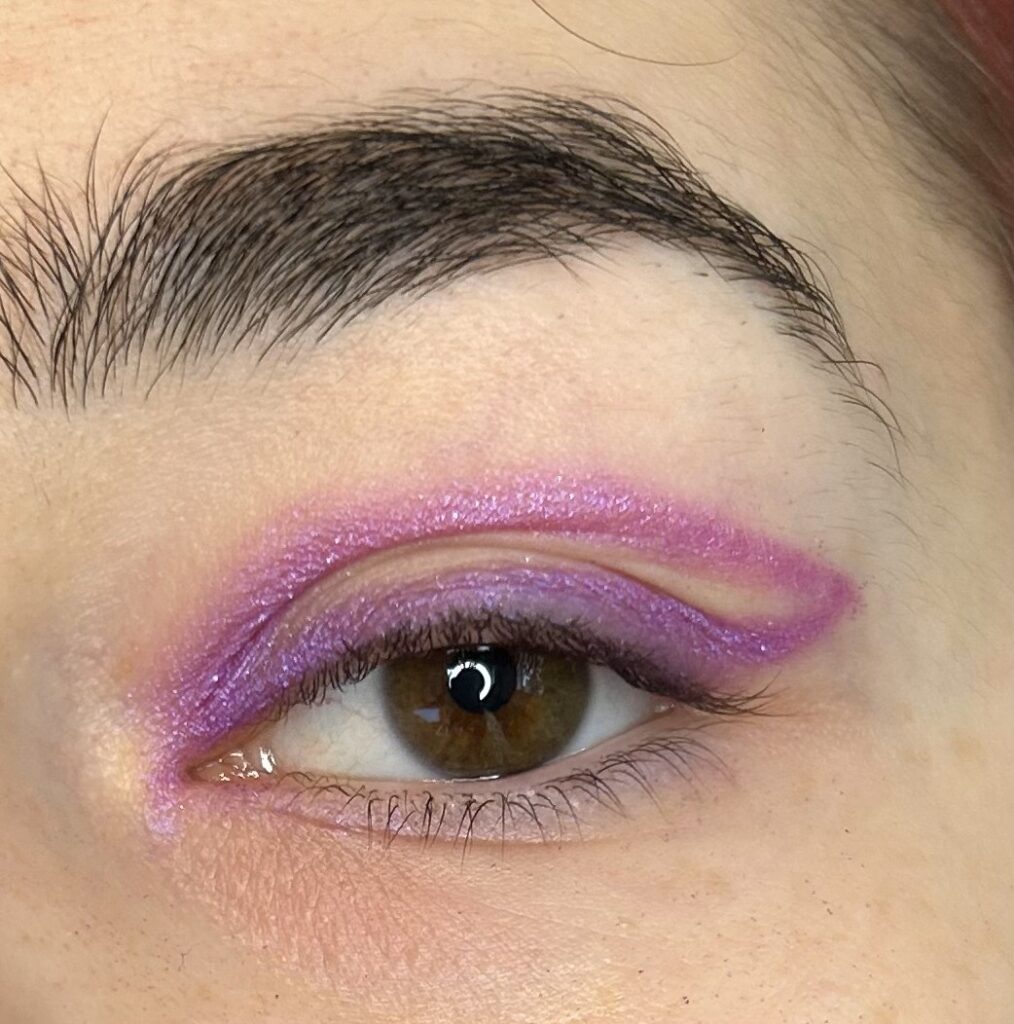
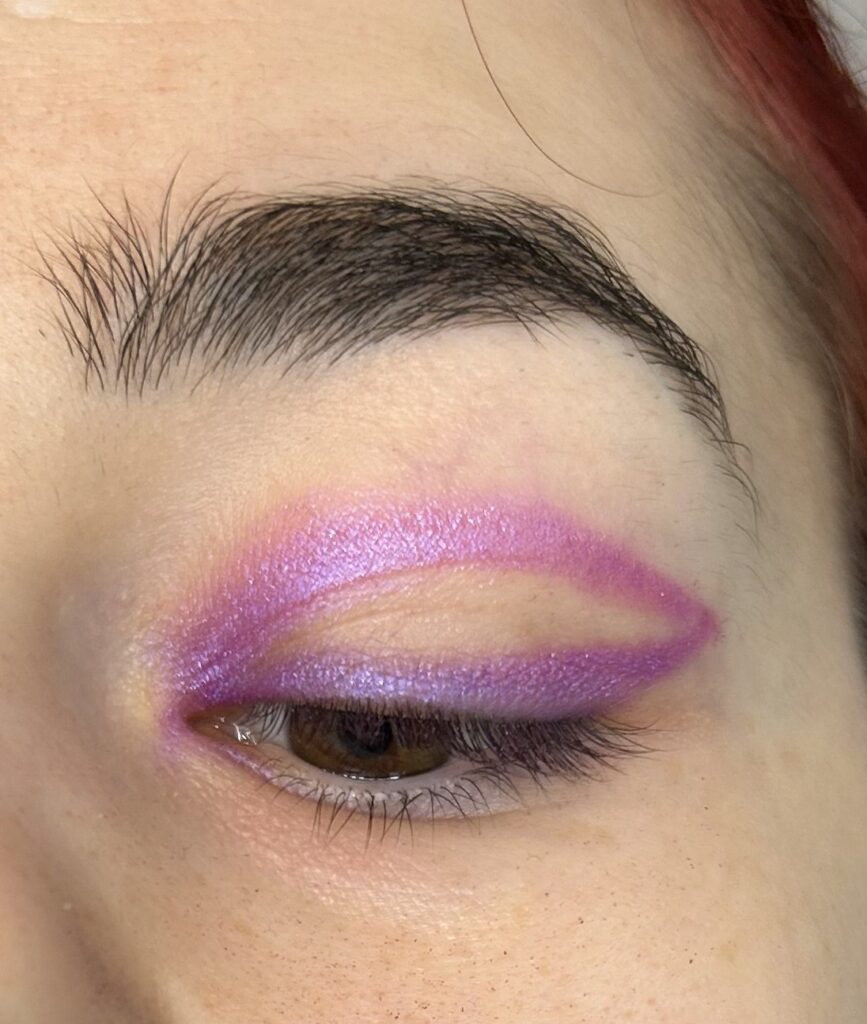
This makeup look will have purple as the main colour (you can swap it out for any colours you have on hand etc). This look is going to be simpler than the first. All you’re going to need is your eyeshadow of choice and a flat thin eyeshadow brush. Again, if you have graphic liners, use those. If you don’t, use either a liquid eyeliner or some eyeshadow and a pointed tool.
Step 1:
The first step will always be start with some moisturiser or a primer on your lids. Once that has dried, you’re going to dip your brush into the eyeshadow you’ve chosen and you’re going to apply it to your entire upper lash line, almost like eyeliner but with eyeshadow.
This is a trick I’ve picked up that allows me to have any colour eyeliner whenever I want!
Step 2:
Now you can leave that as it is if you like the shape of it but I again like to create triangular shapes on my eyes. So the next step is to create a flick at the end of the eyeshadow line we created. Once our flick is created, you’re going to dip your brush into more eyeshadow and start from the end of the flick, dragging the brush back to the inner corner of your eye above the first line.
This will create a super interesting triangular shape, but it won’t be too intense if you’re wanting a more understated colourful makeup look.
Step 3:
If you’re like me and don’t know when to quit… let’s add more!
The next step is going to be using either graphic liner, liquid eyeliner or your eyeshadow and pointed tool. What we’re going to do is add a flower! I absolutely love having flowers on my face. I’m adding my flower on the end of my eye just below my eyebrow tail.
The easiest way I’ve found to do this is by using dots! So pick your colours and here we go! All you need to do is add 5 dots with a empty middle; 1 at the top, 2 for the middle on either side of the empty space and 2 at the bottom on either side but you want the 2 bottom dots to connect at the bottom. Then if you want to add a middle to the flower you can choose a complimentary colour and dot it in the middle! And you’ve created a flower!
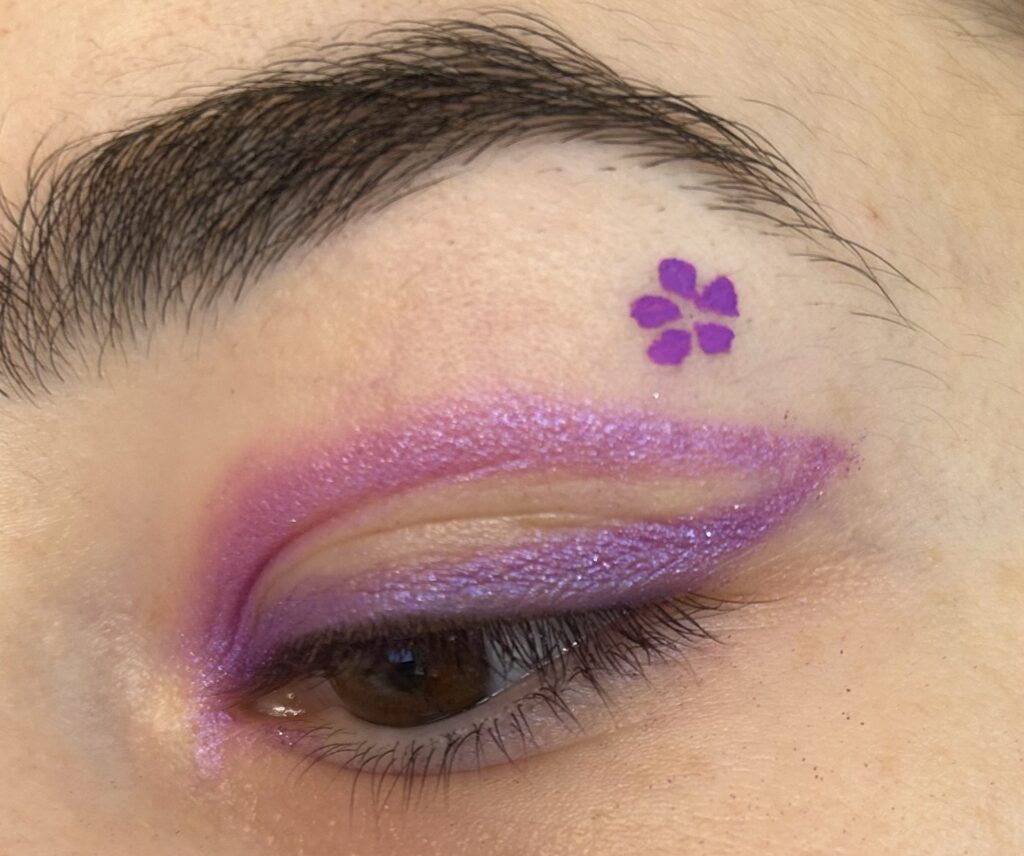
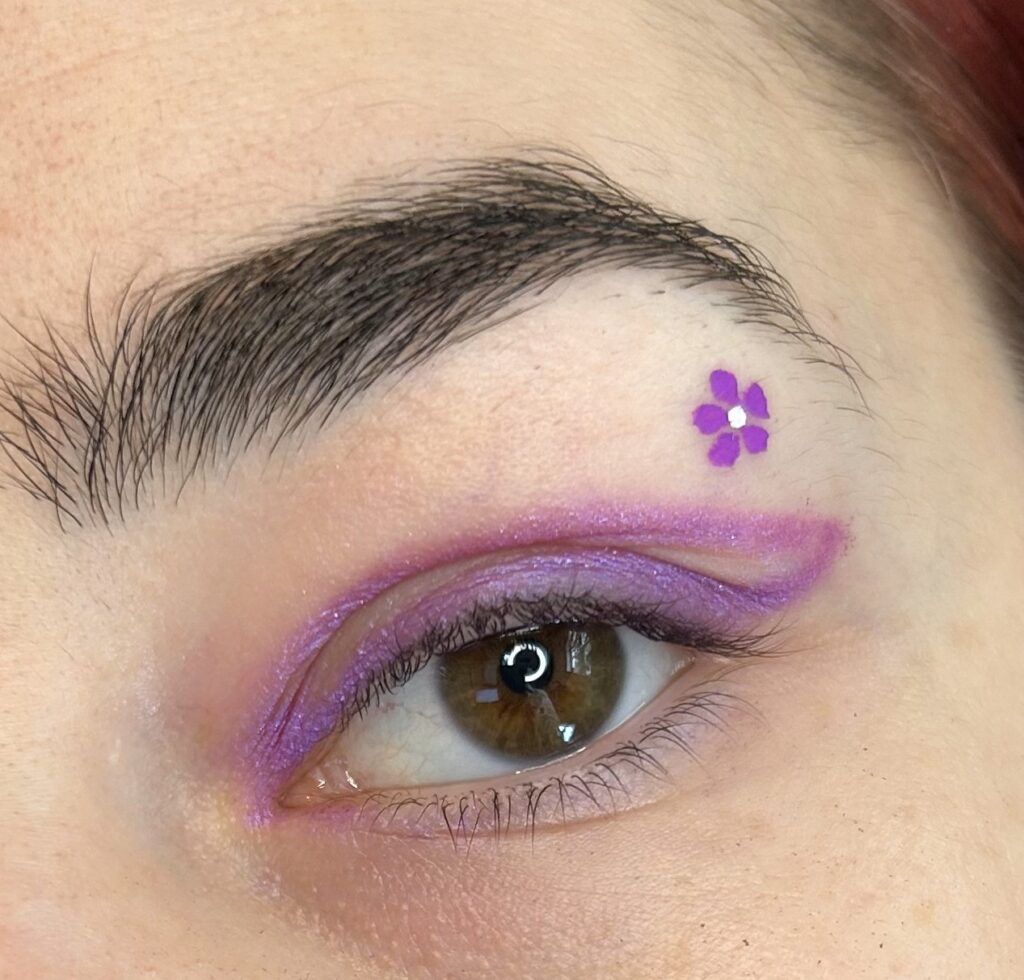
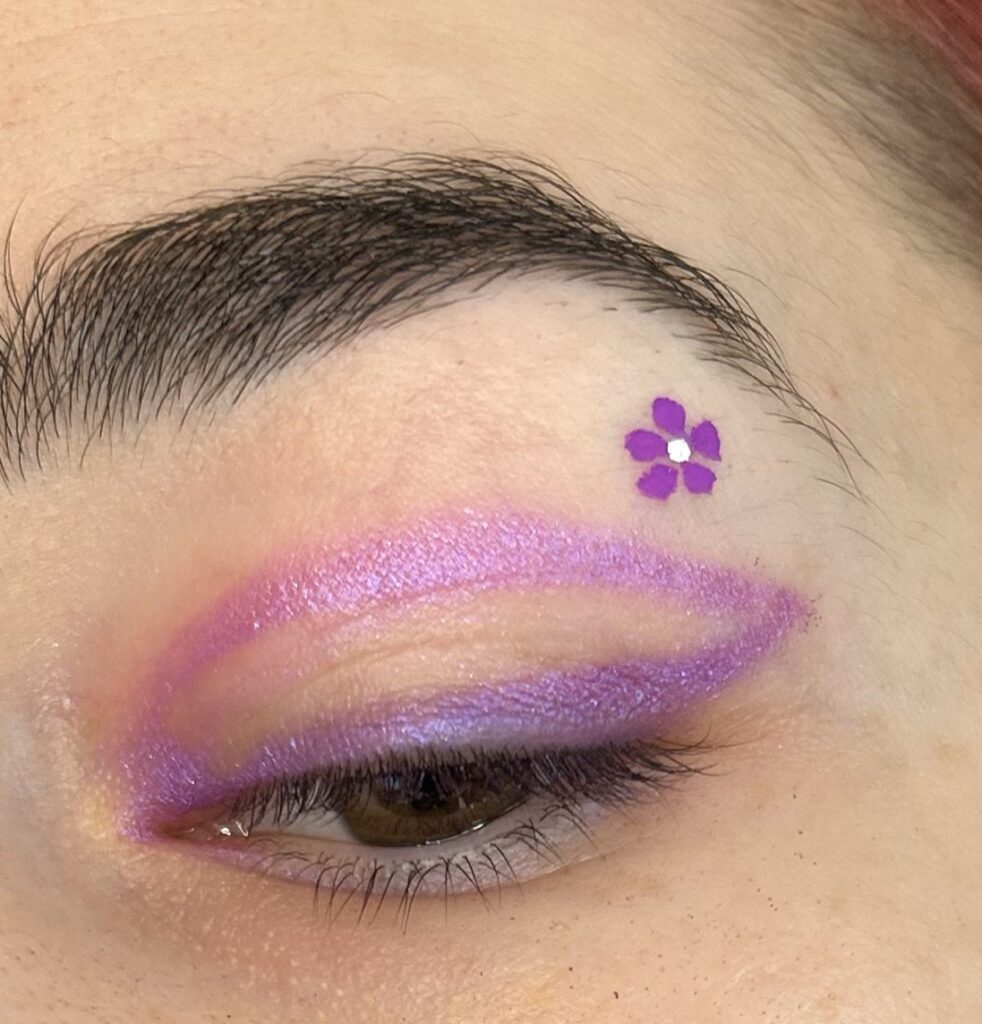
That’s that for Colourful Makeup look two!
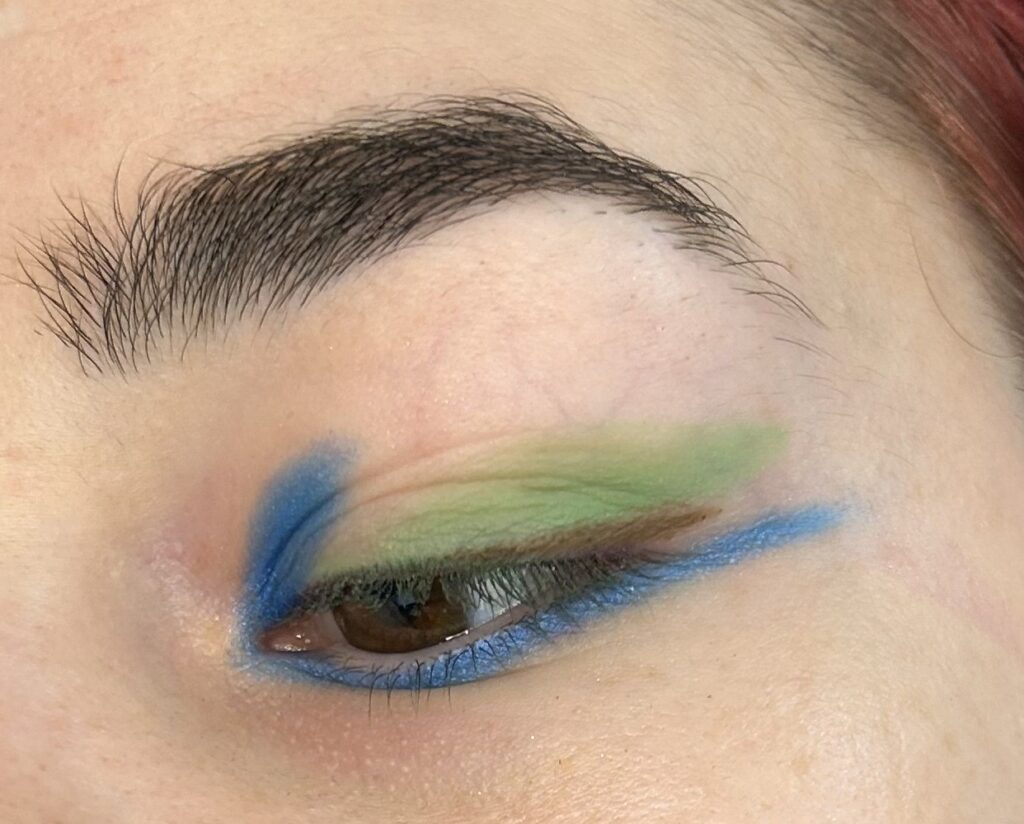
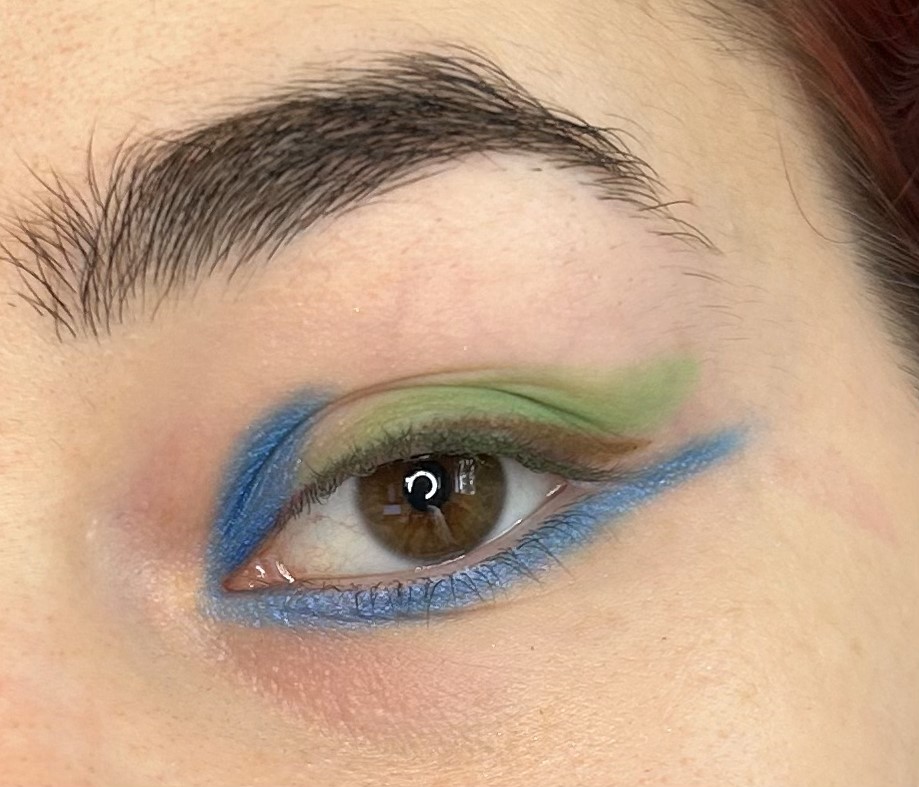
And onto the Last Colourful Makeup Look!
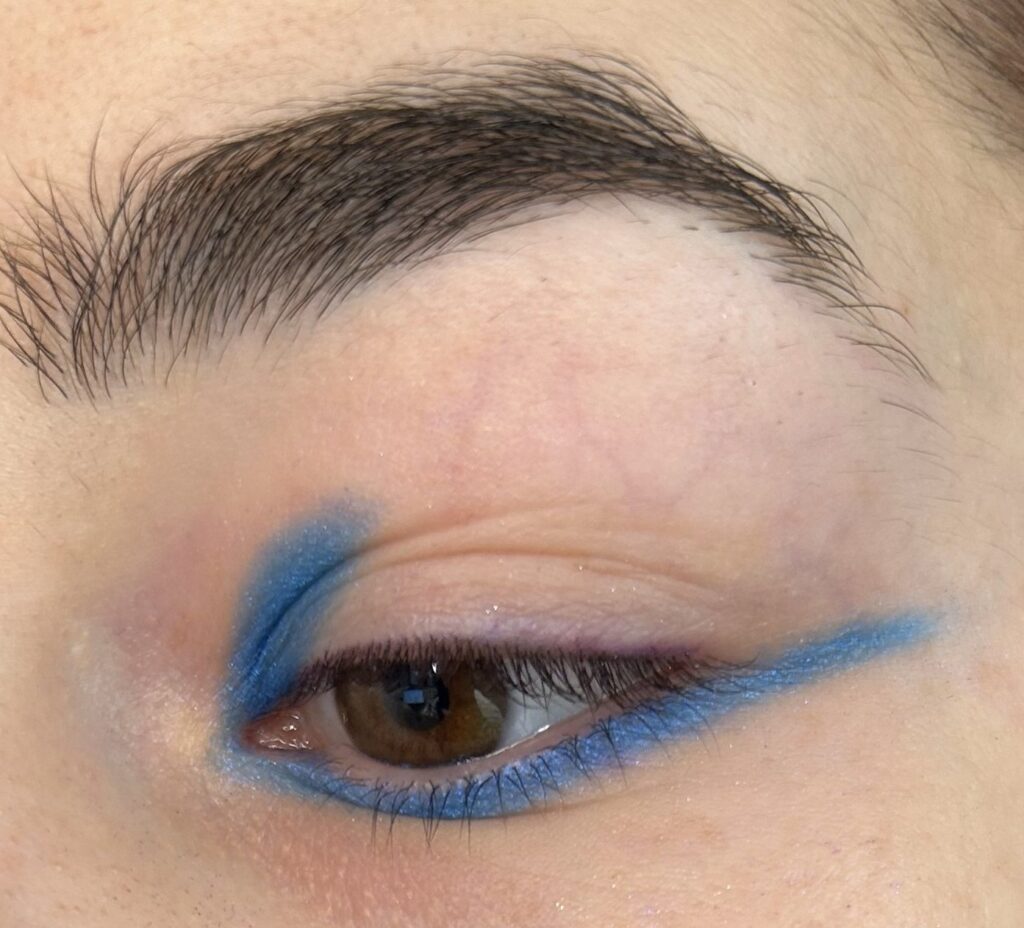
This look is for those out there who want to be a bit fiercer! The tools for this look are going to be a flat thin eyeshadow brush again and 2 eyeshadows of choice. I am going to be using Green and Blue.
Step 1:
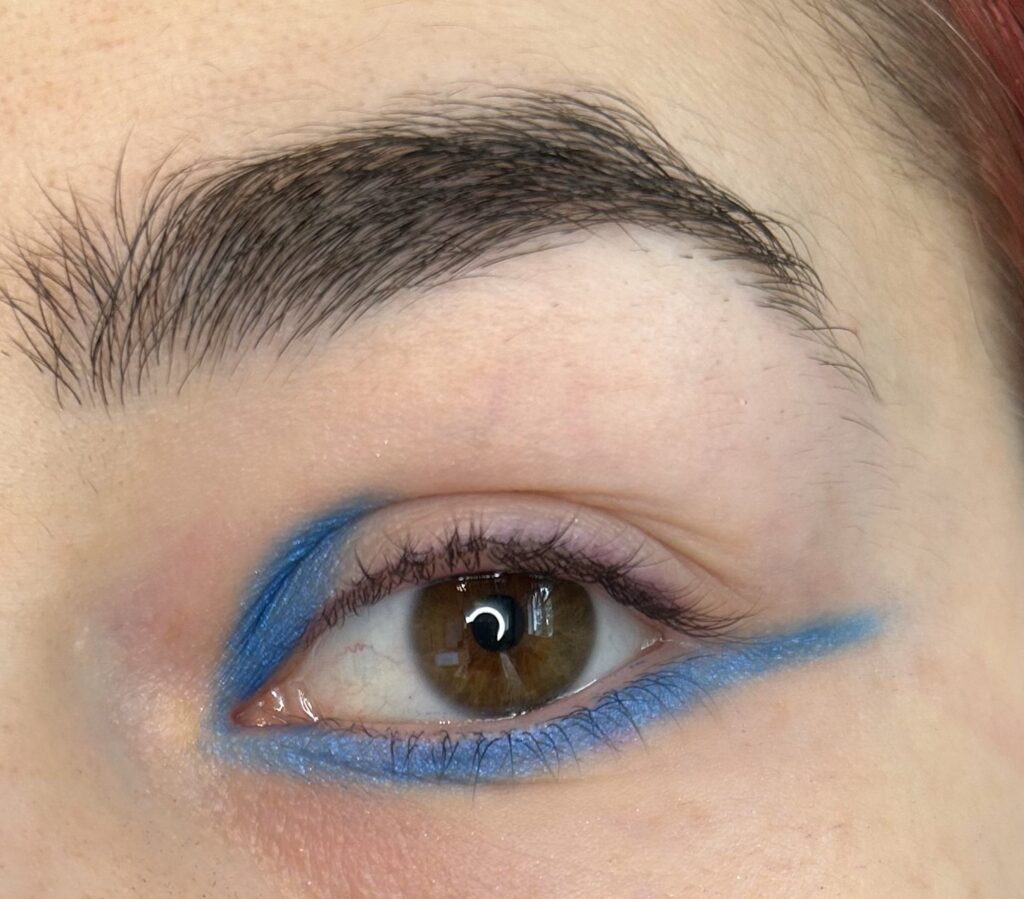
As always, start with some moisturiser or a primer on your lids. Once that has dried, you’re going to dip your brush into the eyeshadow you’ve chosen (blue for me) and you’re going to apply it to your inner corner until its visible when you open your eye.
Next, you’re going to use that same colour and apply it to your lower lash line until you get to the end of your eye and then you’re going to extend it even more until you are satisfied with the length.
Step 2:
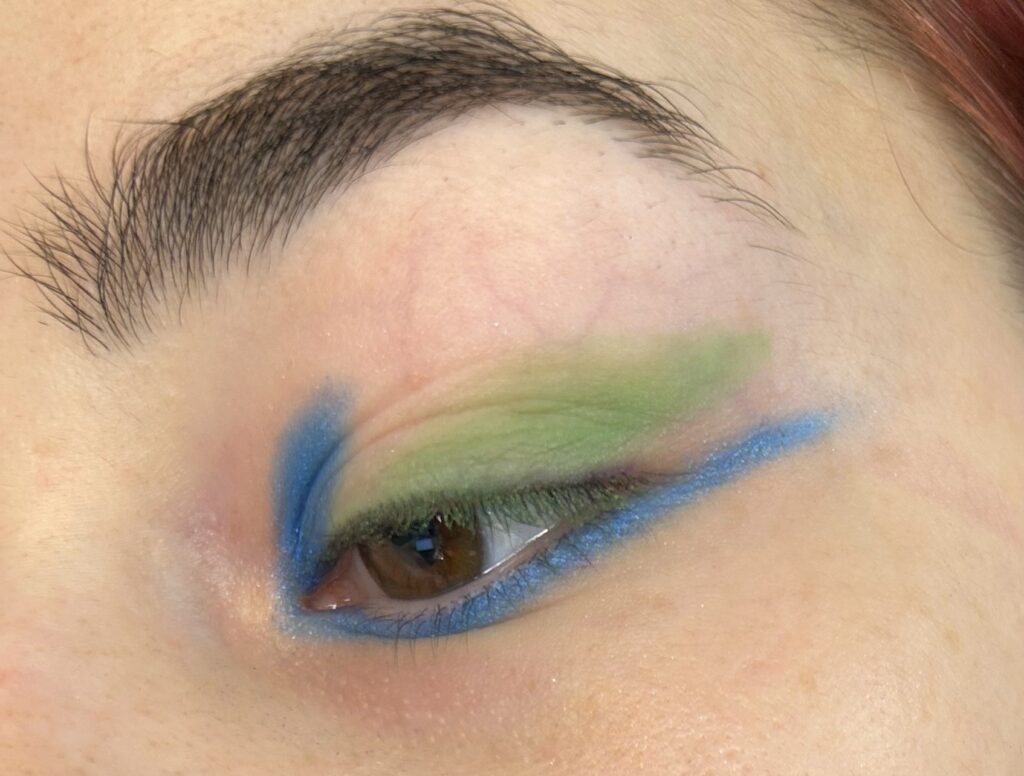
The next step is where the other colour comes in. Grab your Green (or whatever you chose) and create a flick from the outer corner of your eye and bring it into the centre of your eyelid . Try and match the length of your bottom lash line that we added. Then you’re going to add some more pigment to the outer corner of your eye and make sure the green is as pronounced as the blue.
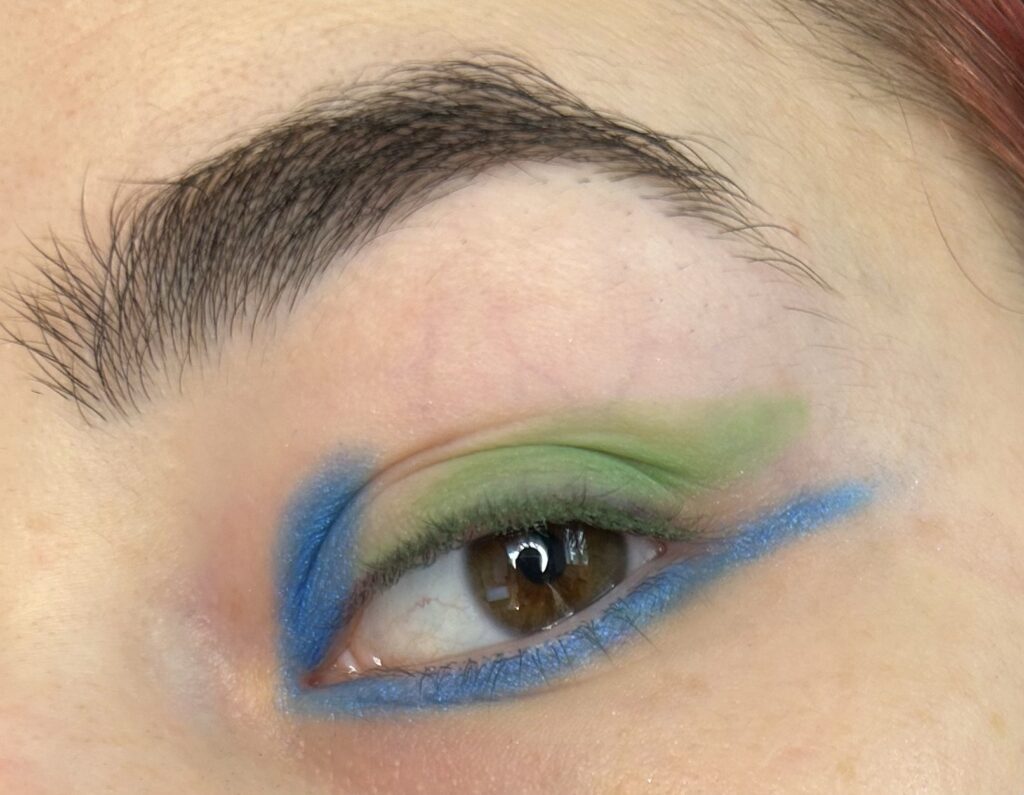
Step 3:
You can of course leave it there but that’s not what I’m going to be doing. The next step for me is to add another colour to our upper lash line and create a baby flick with either brown or black eyeliner/shadow. This will add more definition to the whole look and it’ll make your eyelashes look longer and fuller!
And there you have it!
3 Gorgeous and Super simple Colourful Makeup Looks that you can play around with and figure out what works best with your eye shape, colour etc!
Let me know if you try any of them out or if you have a favourite!
If you have any questions, please don’t hesitate to comment them and I will answer as soon as I am able to!