Being able to upcycle and rework your clothing to suit your needs and wants better is such an important skill! The world really becomes your oyster! Once you understand the basics of sewing you can already start to tweak your clothes or even upcycle them fully! For example, I have only really ever made a pillow case and a really ugly potato sack dress, and I was able to completely turn a skirt into a full outfit of a mini skirt, a headband and a top! I think it’s so crucial in the world today that we know how to create things ourselves.
The world is becoming more and more bizarre, and it sometimes feels like its sucking the life out of you! When we create things as humans, we get so much dopamine which is something all of us humans are searching for in one way or another; not to mention, we are sharpening our skill set! Another thing to mention is that when we create things for ourselves with only ourselves in mind, we are fostering our creativity as well as getting to understand ourselves better! And as Aristotle said, “Knowing yourself is the beginning of all wisdom.”
This post will show you 5 ways you can rework and upcycle your clothes so that they can better serve you in your day-to-day life! If you are unsure of the possibilities then let this be your guide, you can create anything and you can also apply these upcycling ideas to anything!
1 – This Morgan De Toi skirt is the first item to be upcycled!
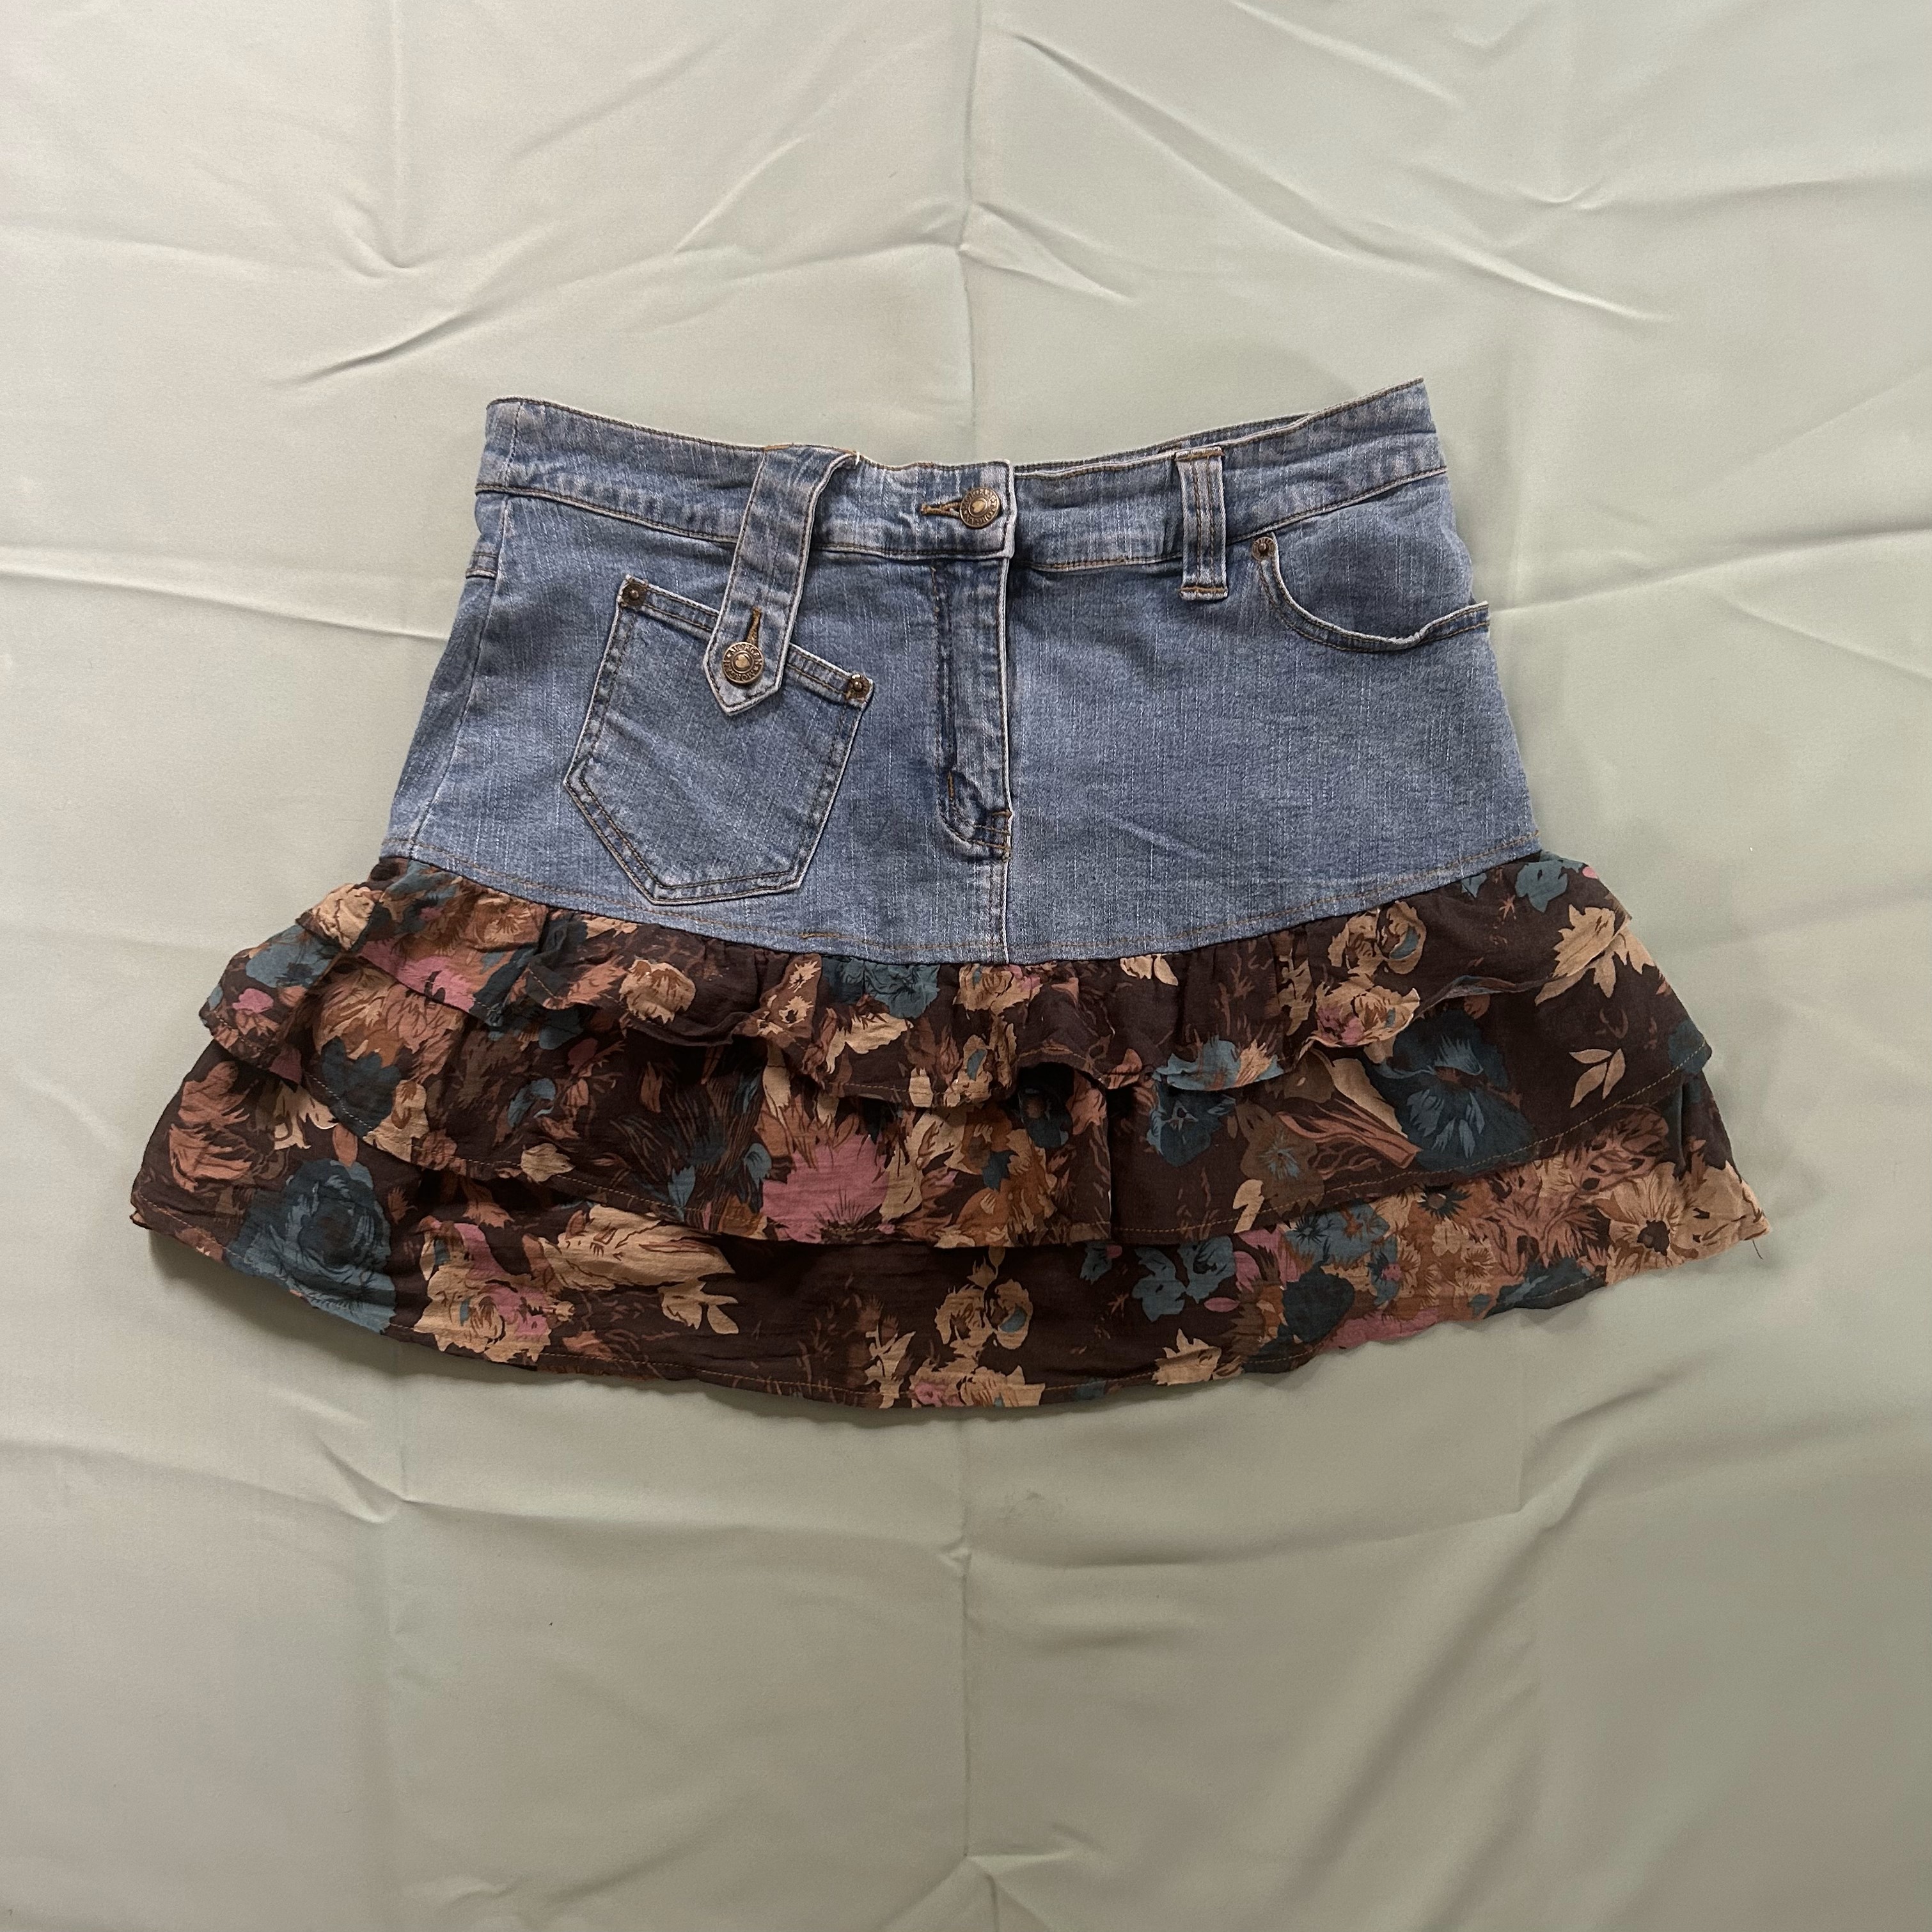
The first item I reworked to suit me better was this gorgeous Morgan De Toi denim mini skirt. I am quite short at 5,2” so for most things I buy I usually have to tweak them to make them work for me. Thankfully, this skirt was a really easy fix! Since the skirt had 3 layers of frilly fabric: I thought why don’t I just cut the last layer off… So that’s what I did! All I used were some scissors and I just cut the last layer off of the skirt and I was done! I didn’t need to sew anything as I didn’t cut any seams open! The end result is exactly what I wanted when I bought this skirt in the first place! If anyone is interested, I bought the skirt from Vinted for around £7!

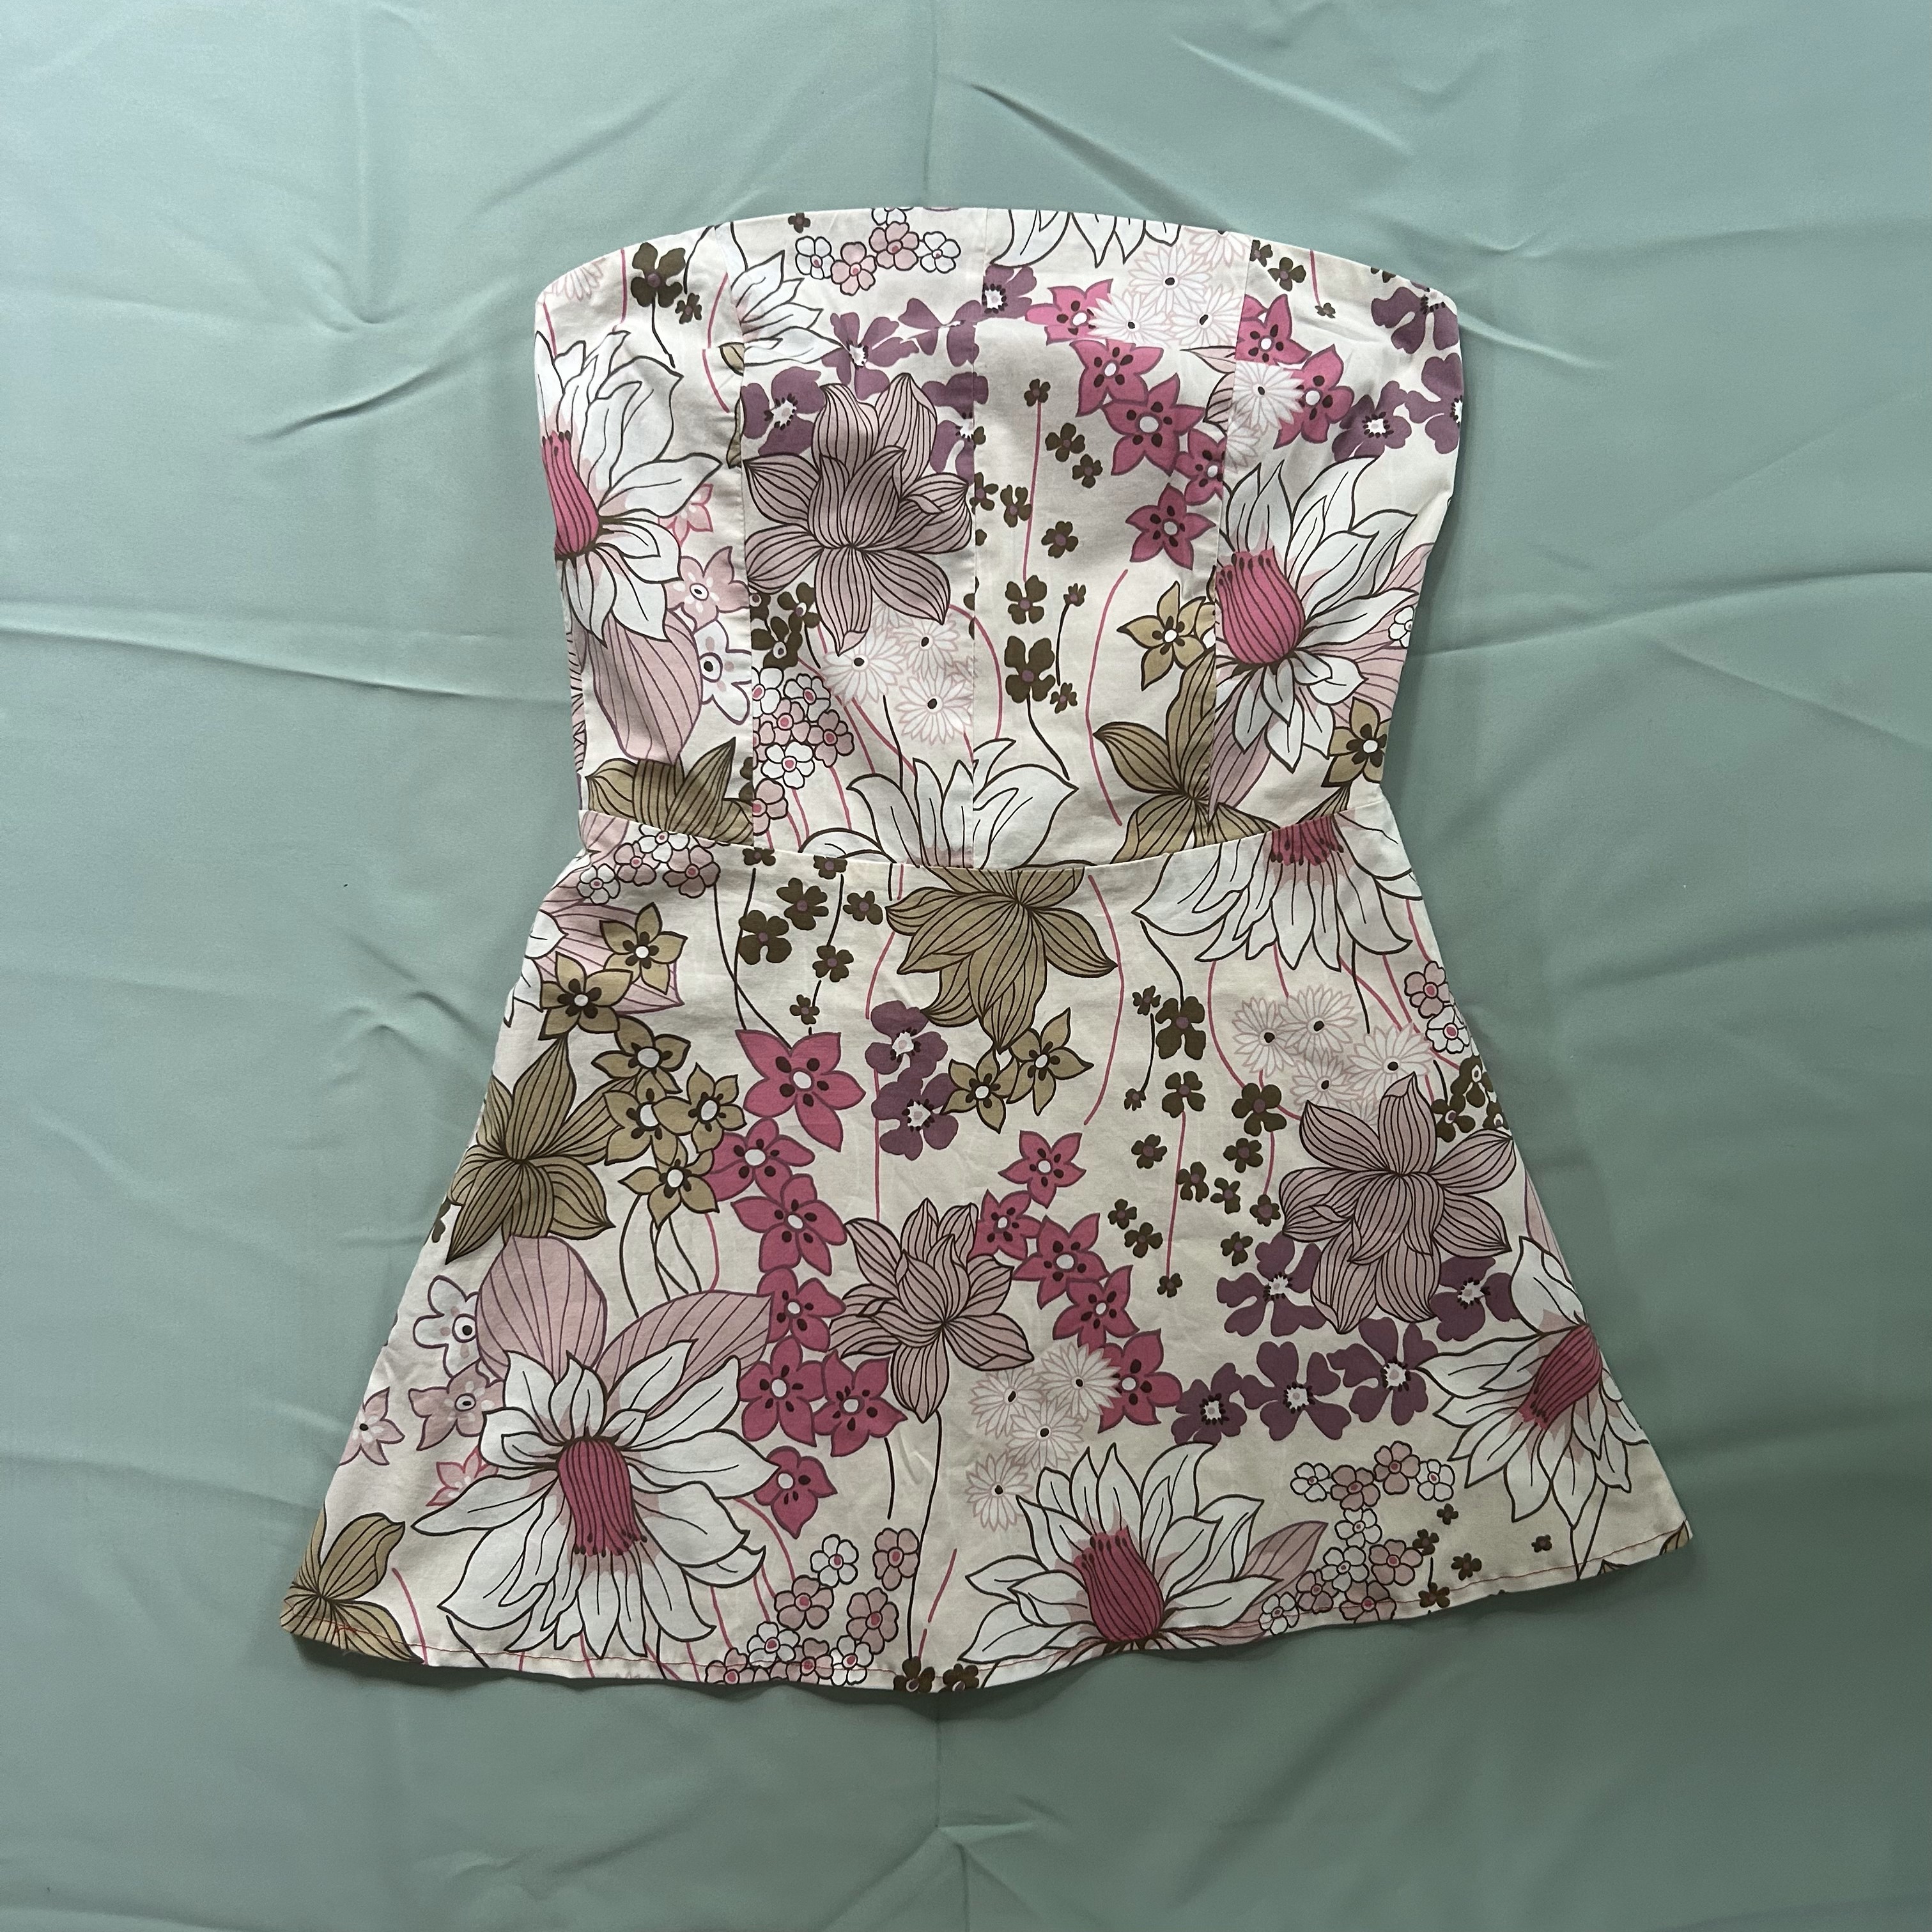
2 – This gorgeous strapless Apricot dress is the next upcycled item!
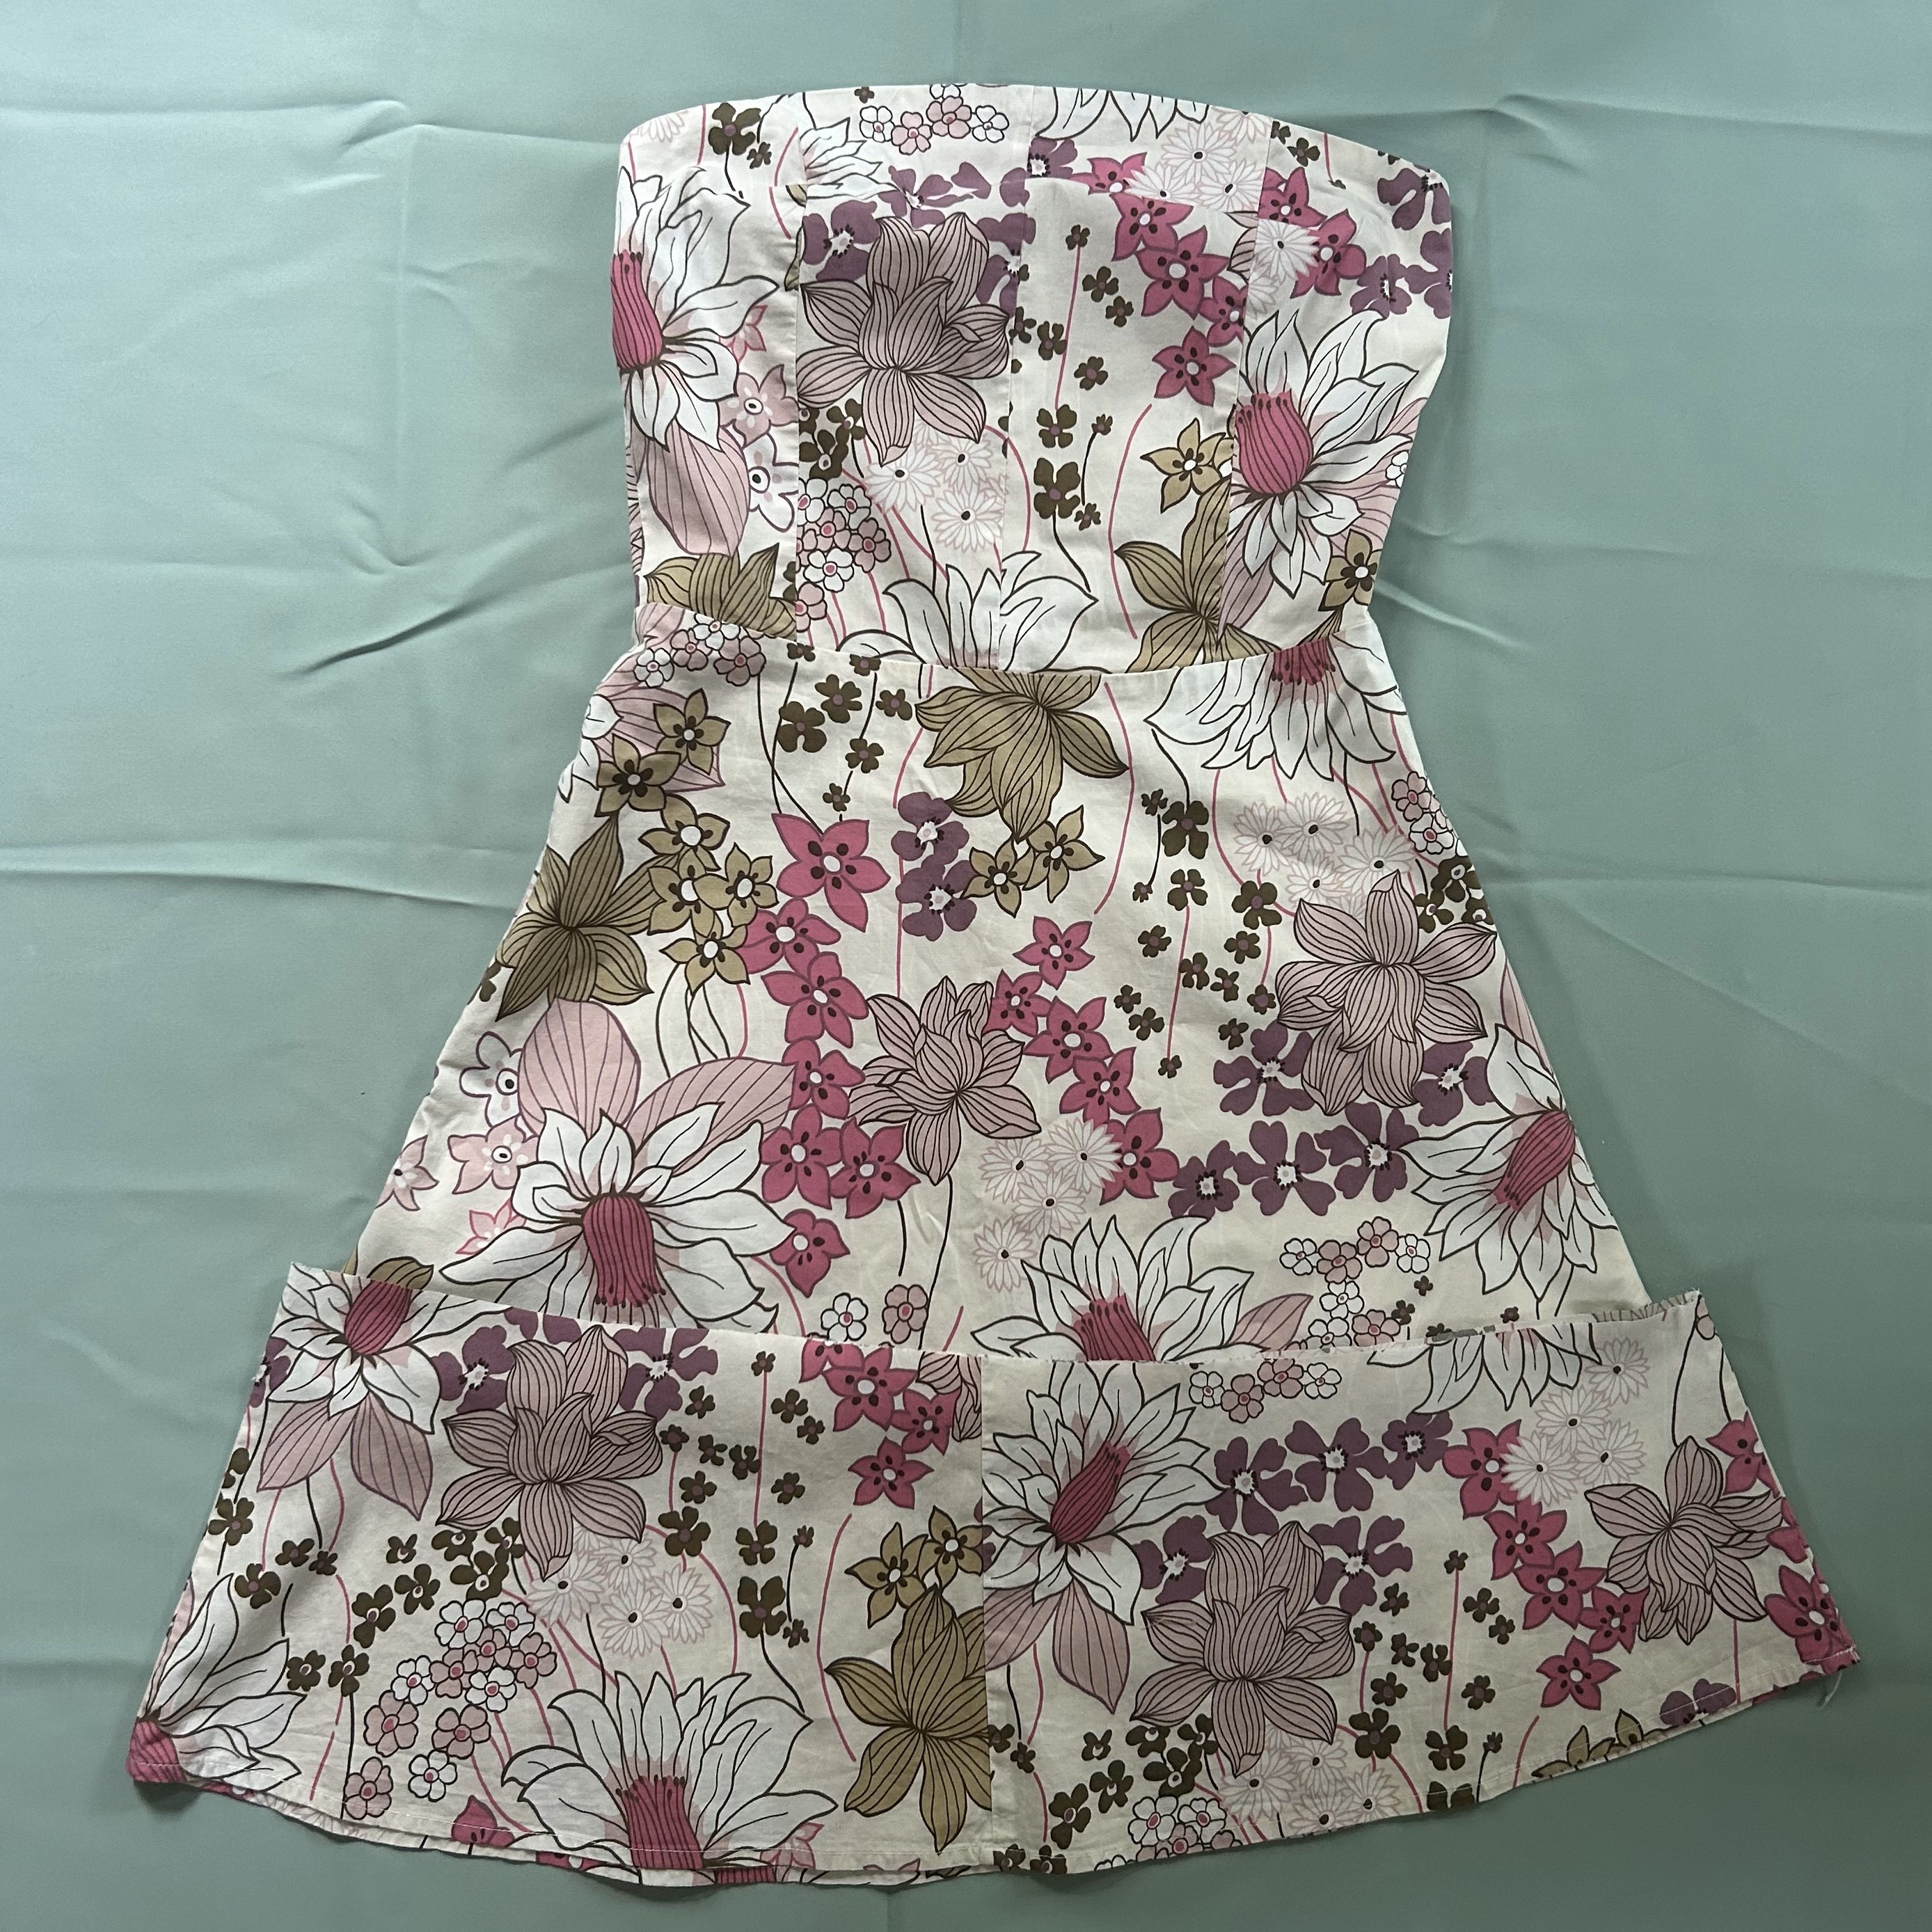
The next simple upcycling project was to shorten this beautiful Apricot strapless dress! This was also a super simple fix; all I did was try the dress on, marked where I wanted it to hit, and I cut the rest of the fabric away! All I did after that was fold over the hem, iron it flat and I hit the sewing machine! A really helpful tip when sewing is to make sure to iron your material flat, it makes sewing so much easier and straighter! I only recently even bought an iron and a cute little ironing board and its worked wonders!
Another tip is to make sure that you are cutting the item of clothing with the seam allowance in mind; I can’t tell you how many times I got overly excited when cutting and cut it too short! But never fear! If you do end up making your garment too short, you can always attach the rest of the fabric as a pleated bottom or even attach another piece of material to the bottom to elongate it as well as make it extra special and interesting!
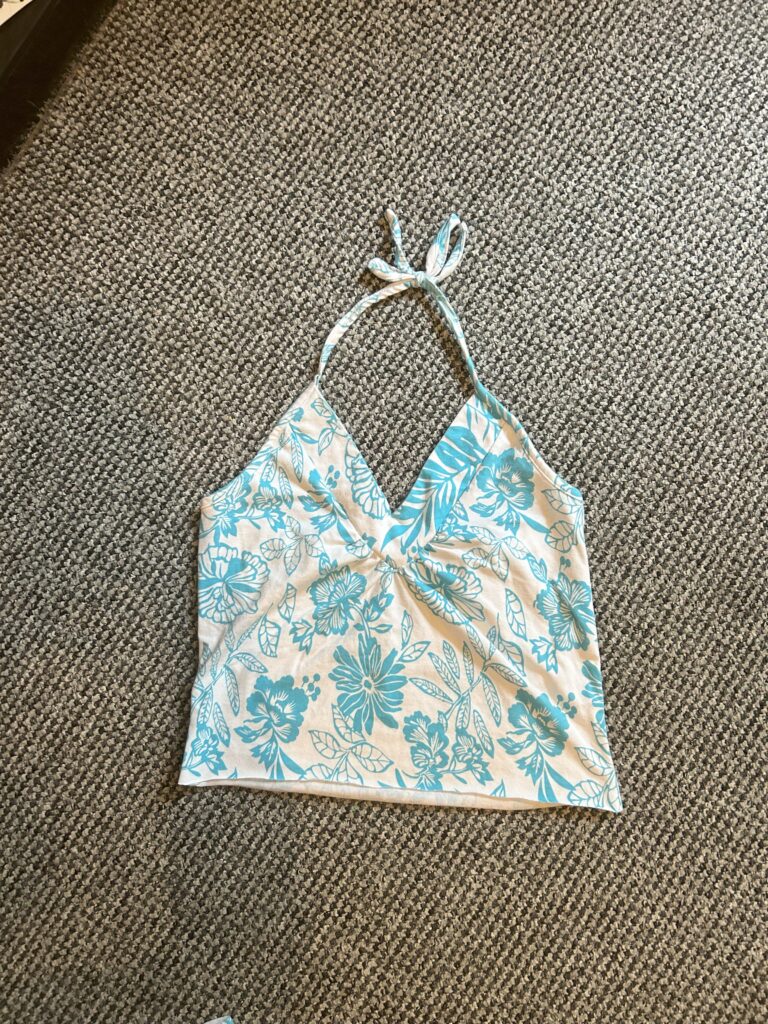
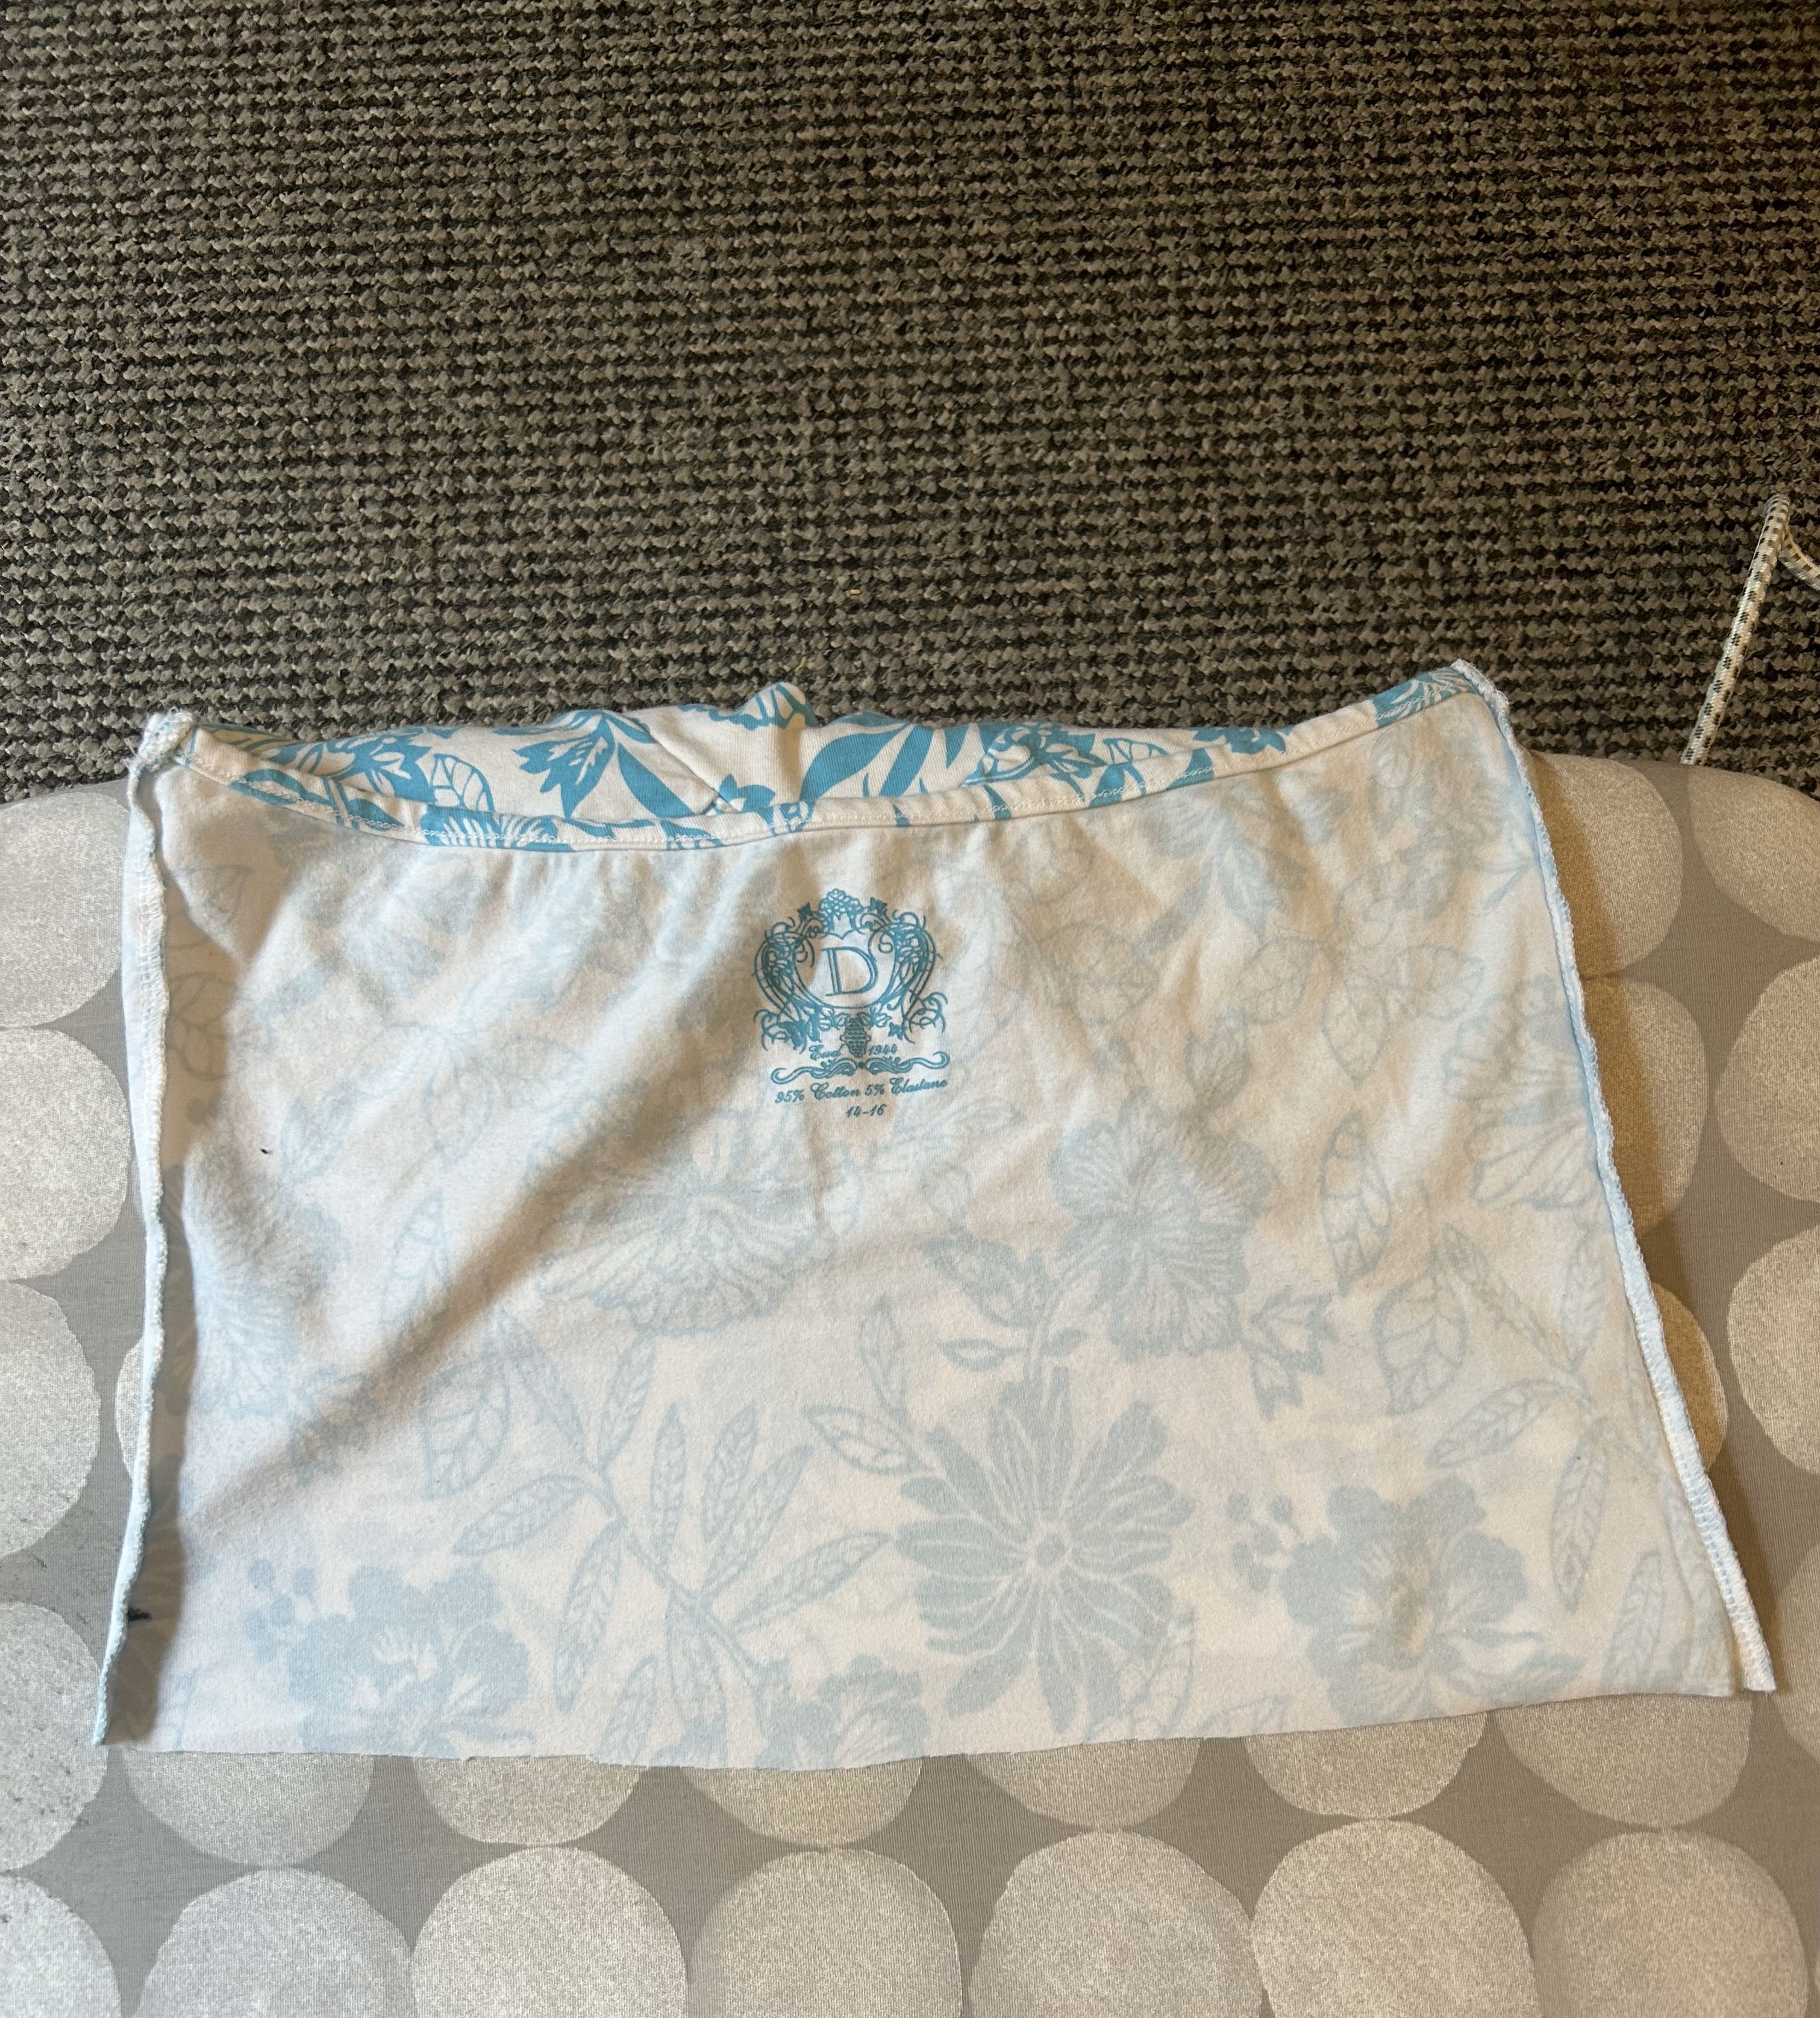
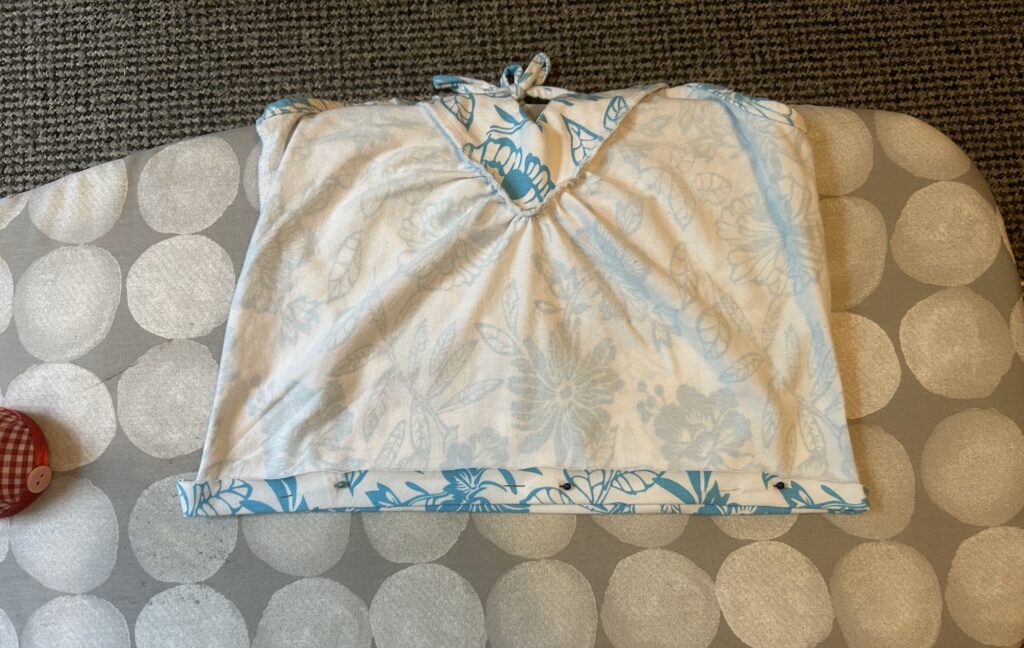
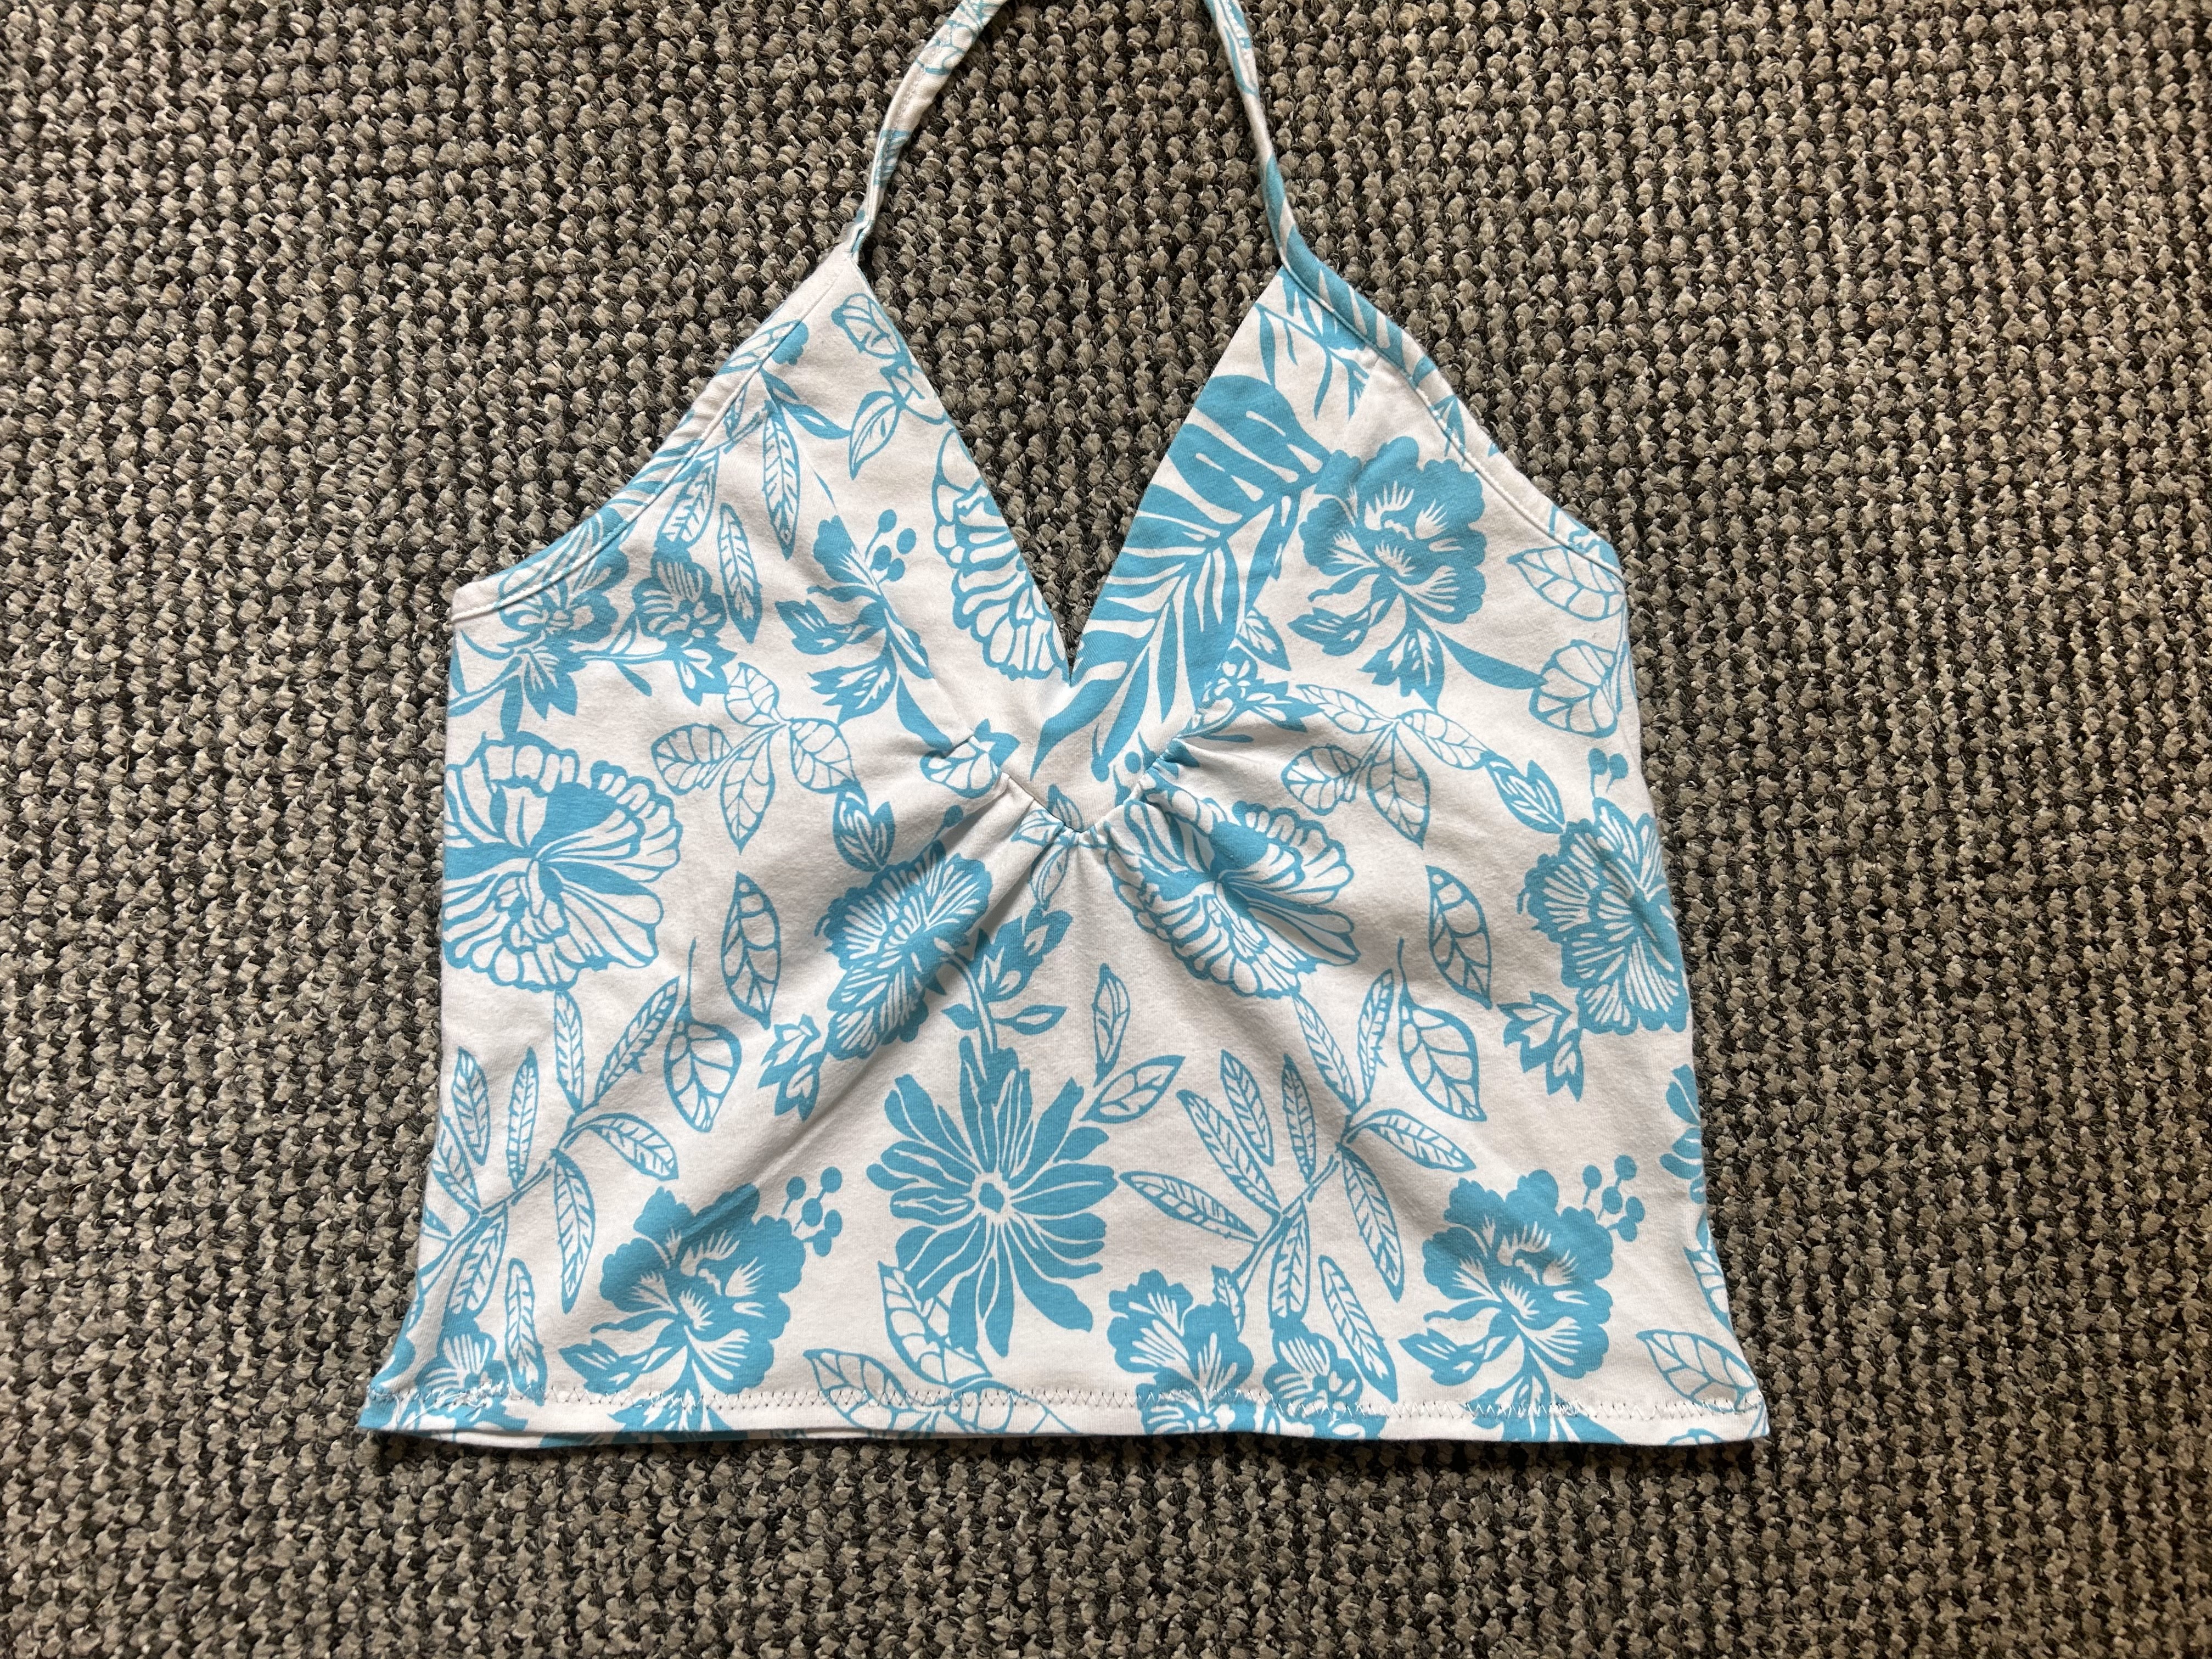
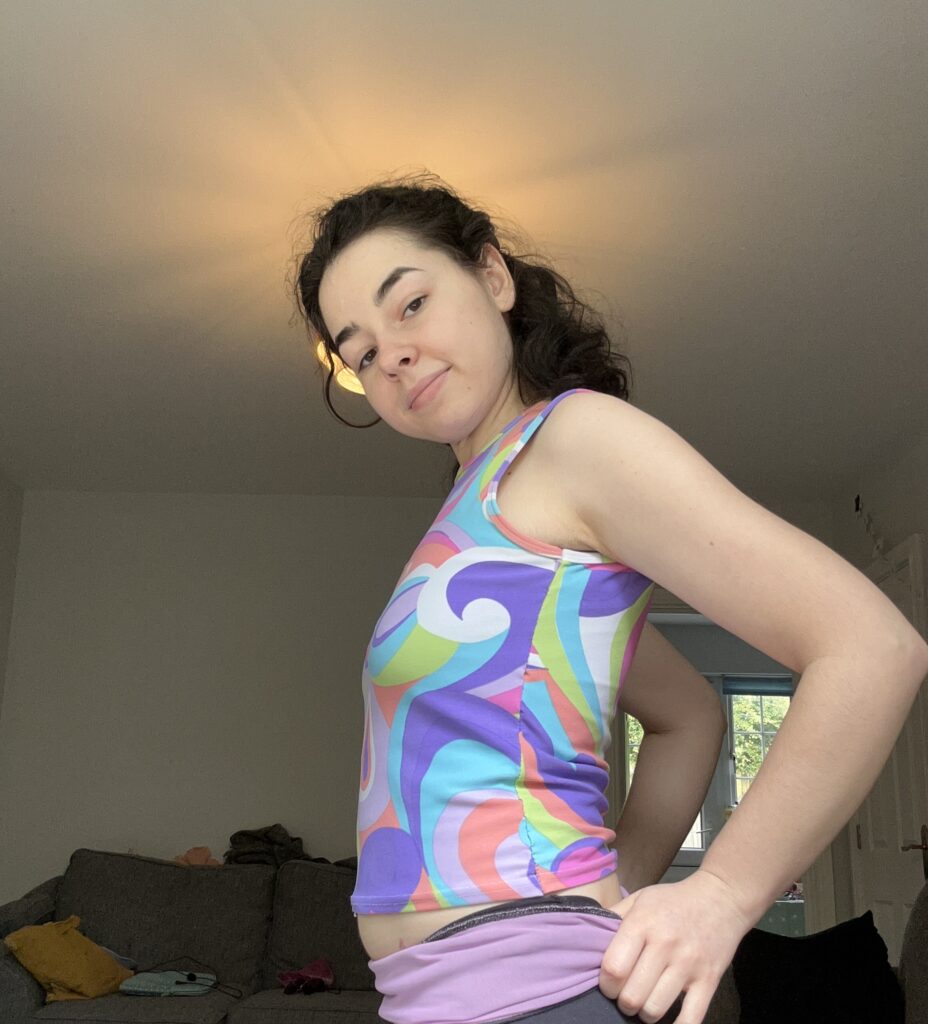
3 – This beautiful Blue and White cotton top is the next upcycling project!
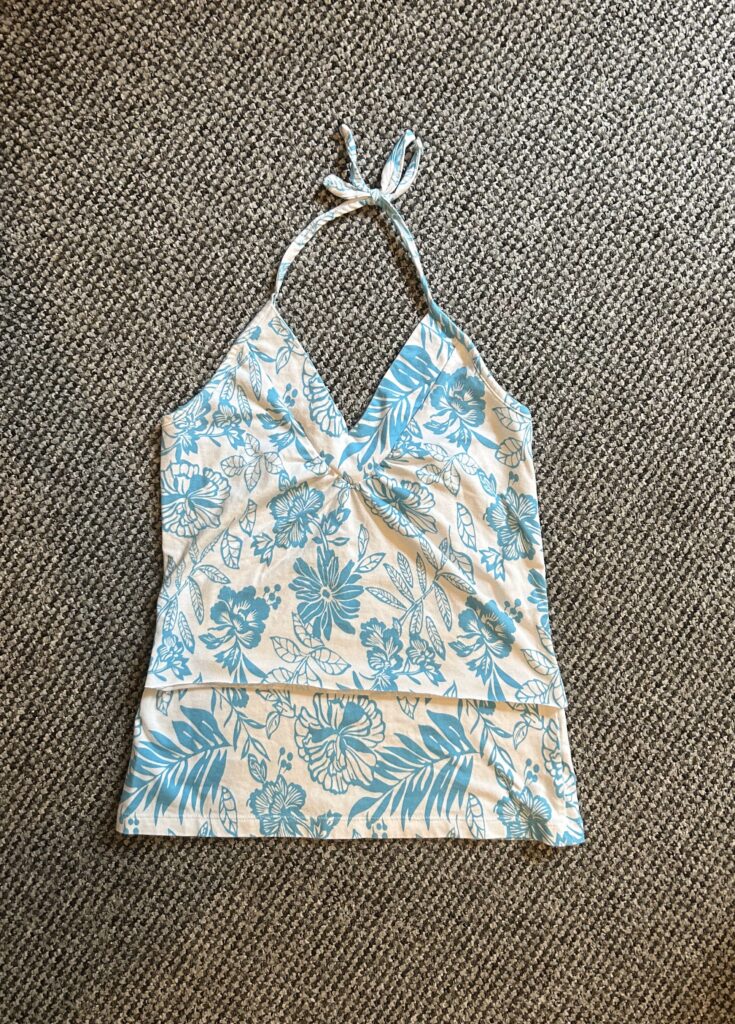
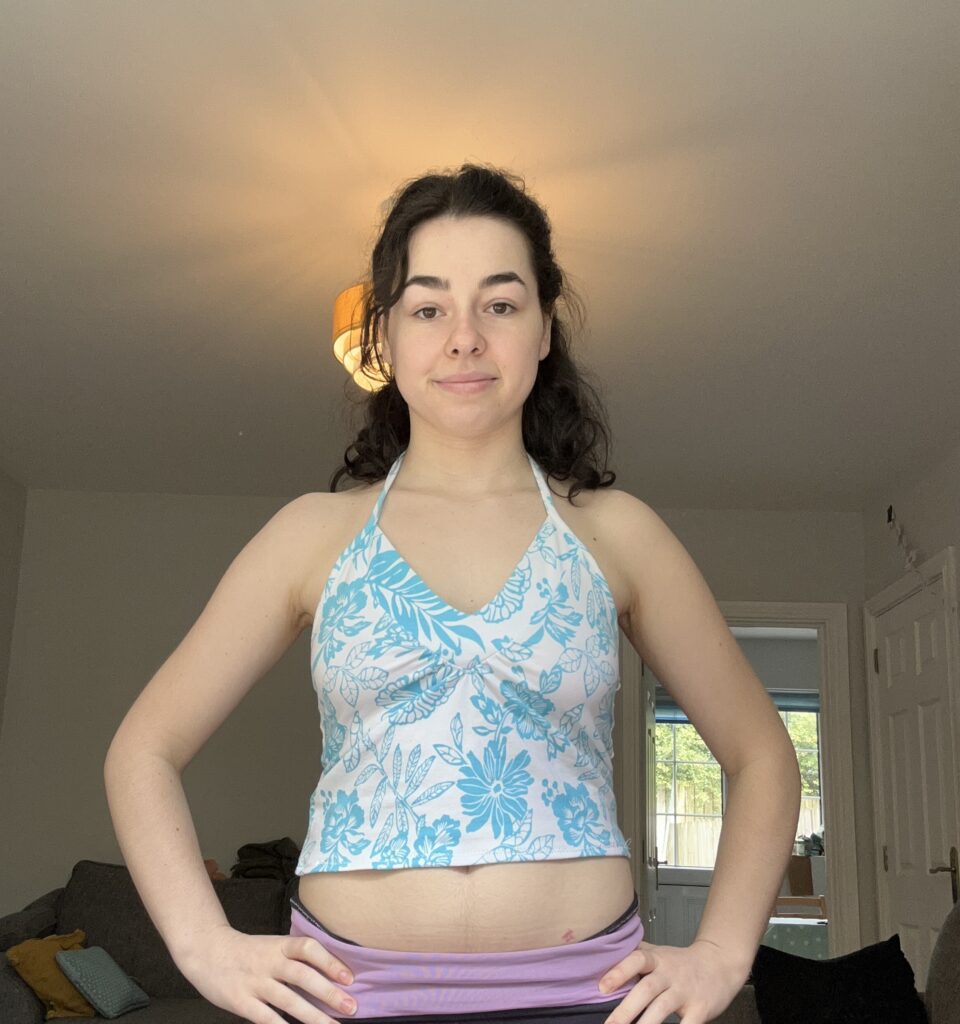
Up next is a super simple upcycling summer hack! This little summer tank top was way too long for me and made me look like a sack of flour, so I decided to crop it! All I did to start was try it on, mark where I wanted it to be cropped and then I cut it! After it was cut, I then ironed down the hem (where I am going to sew it closed) and then I pinned it and sewed it! I love the colours of the top and now it looks like it was made for me specifically! To be honest, I’m still wondering if I should use the excess fabric to create a little frilled bottom to the top… That may be my next project.

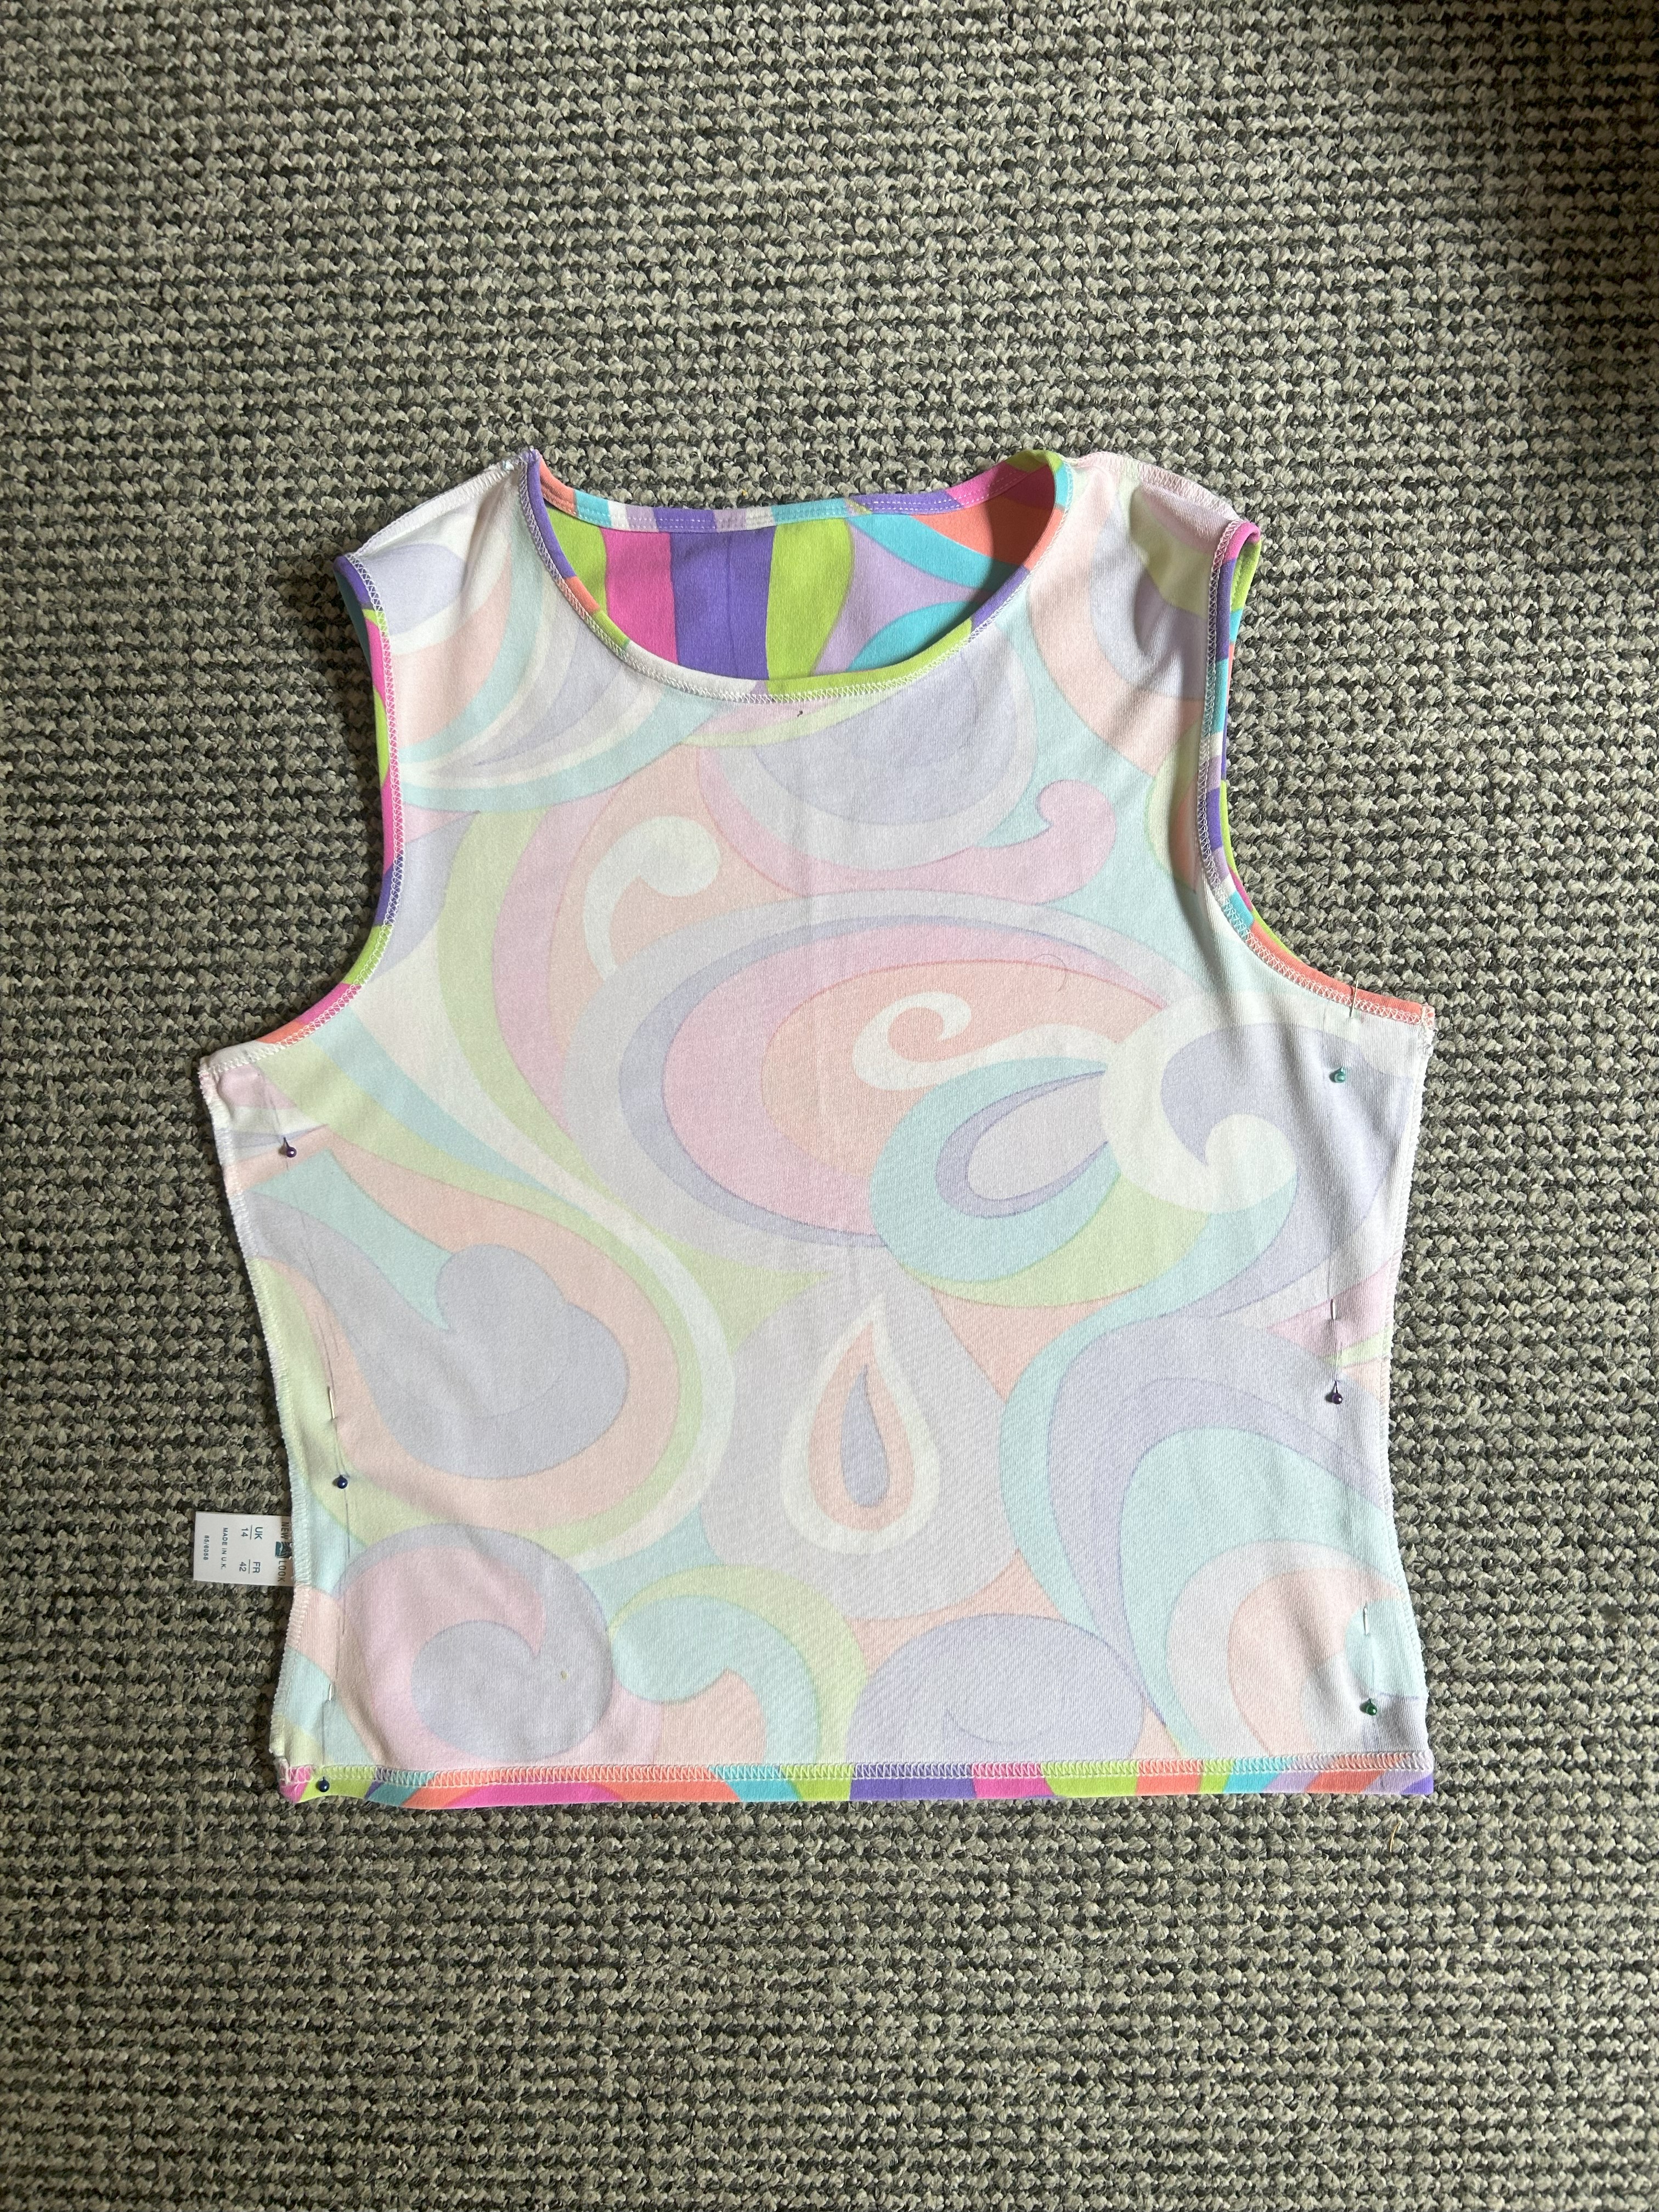
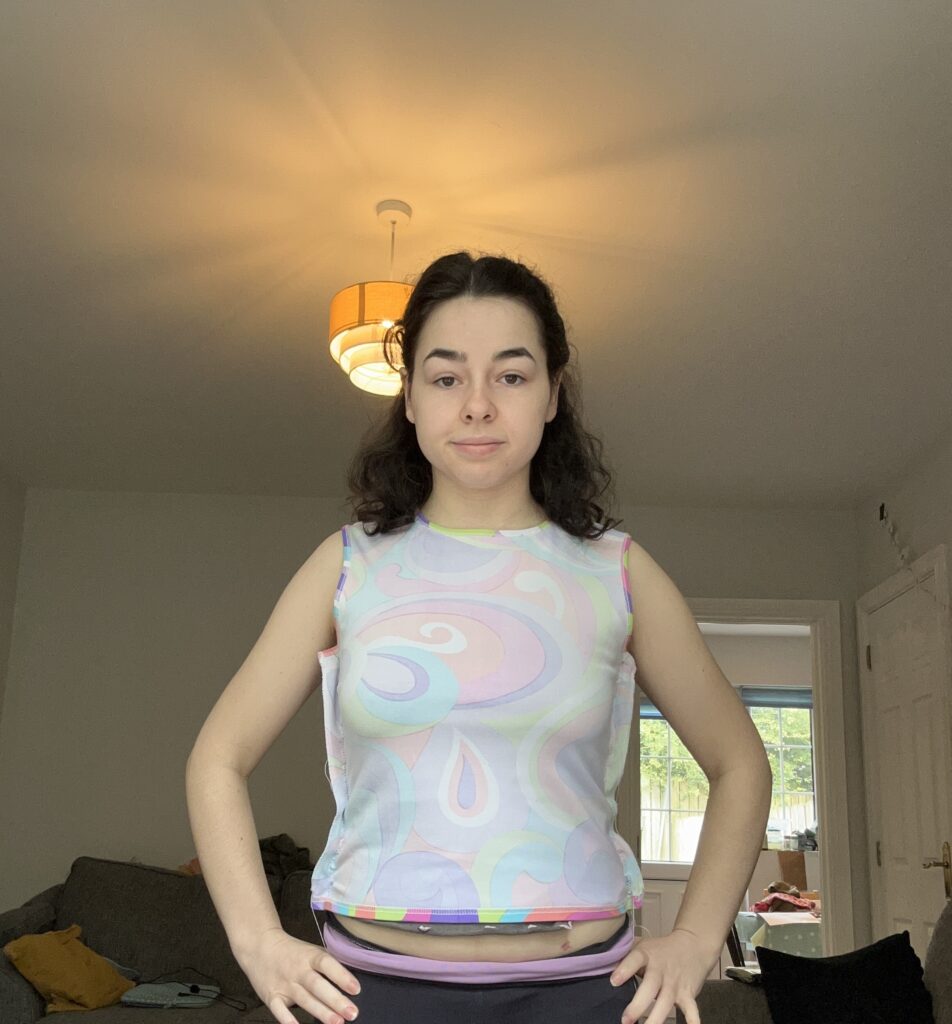
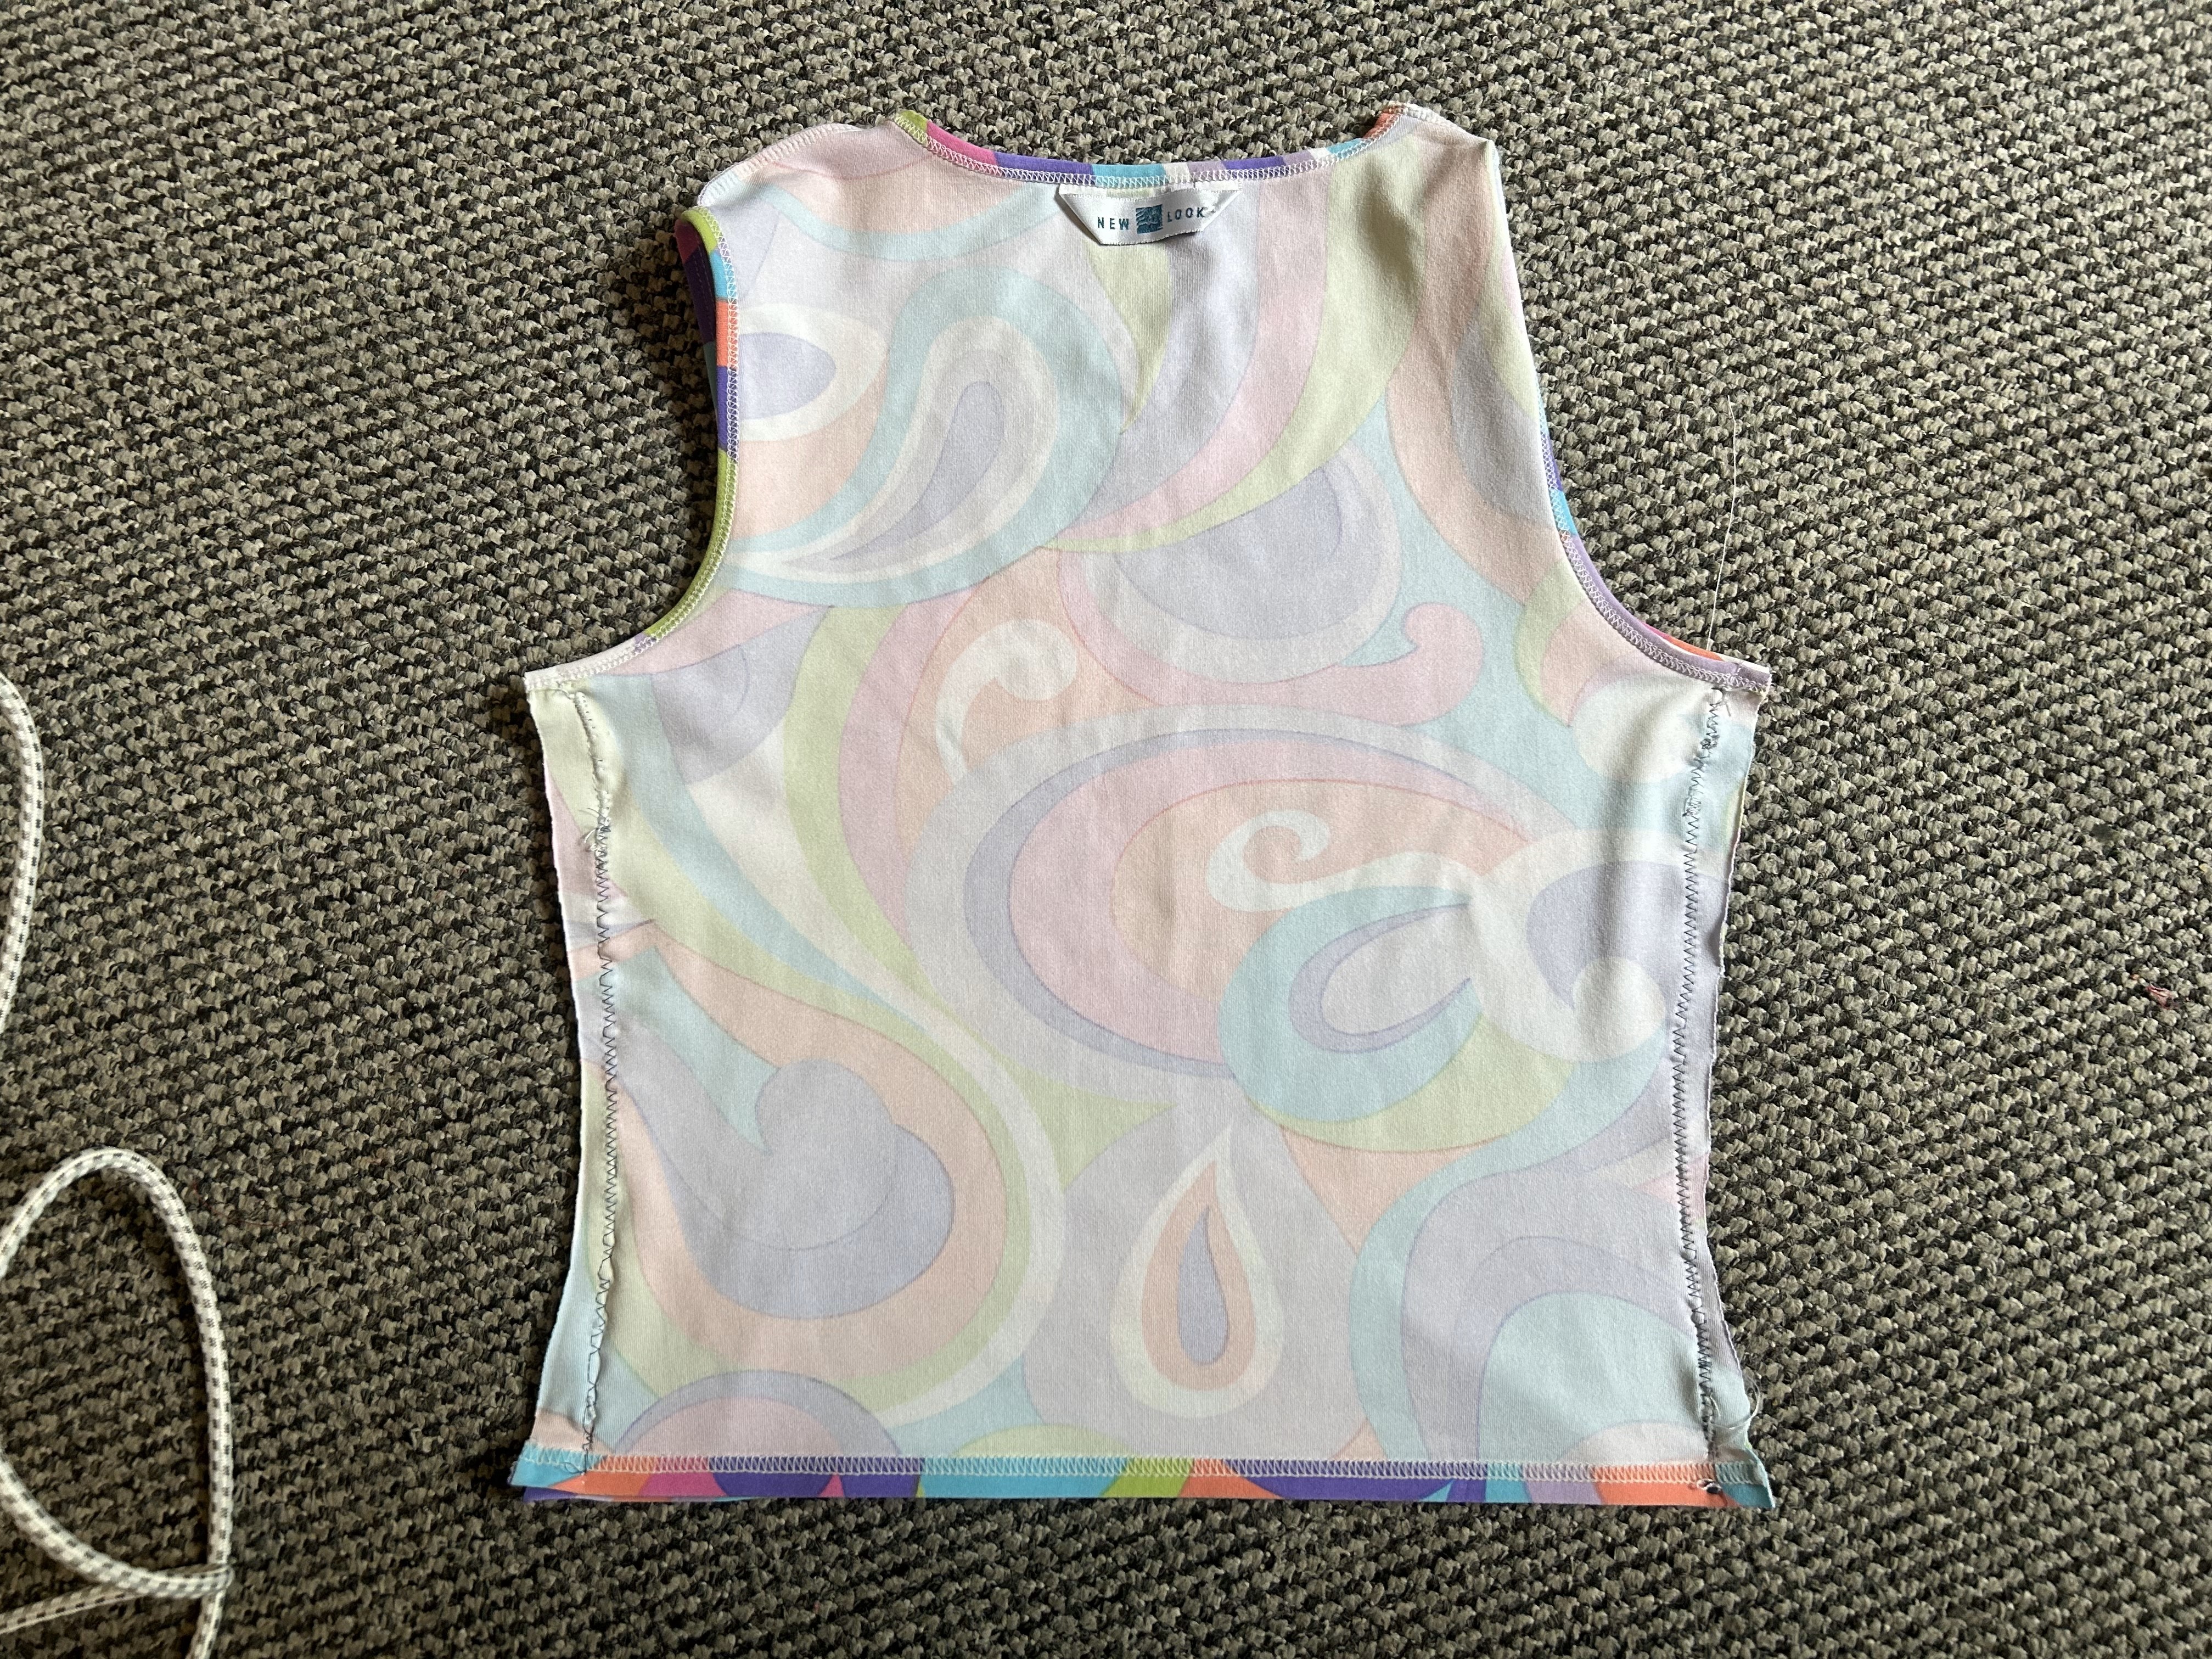
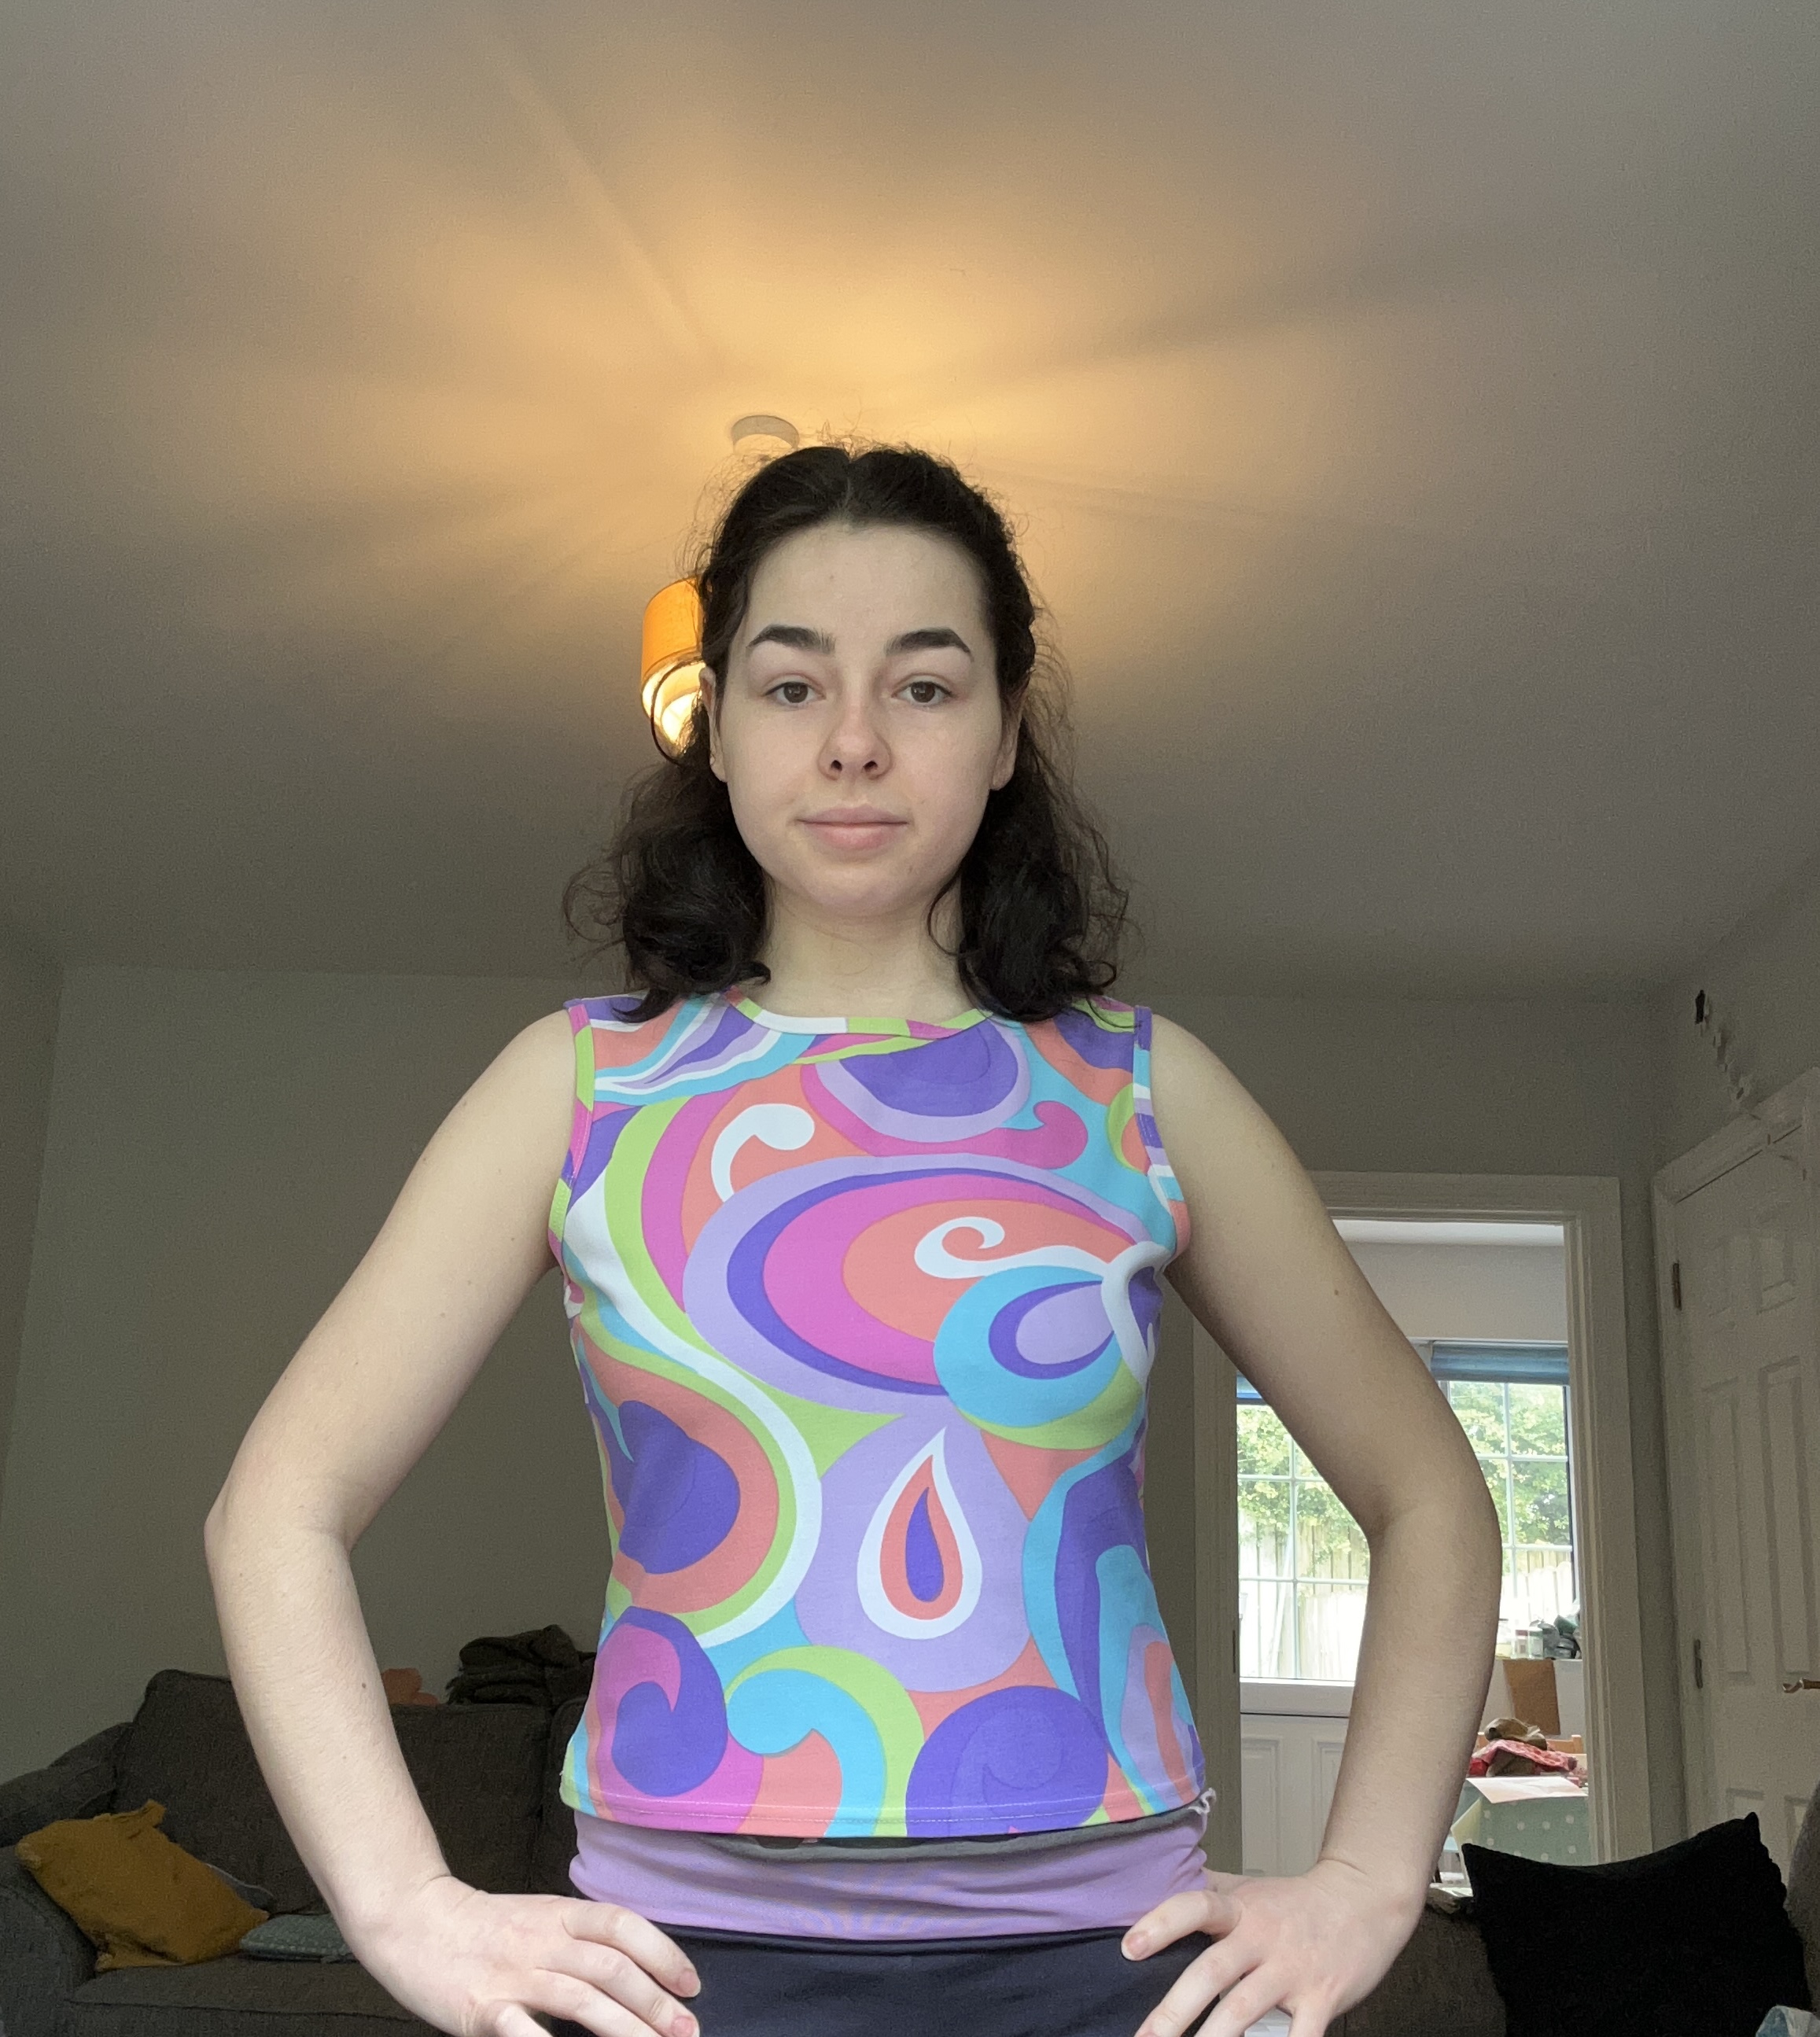
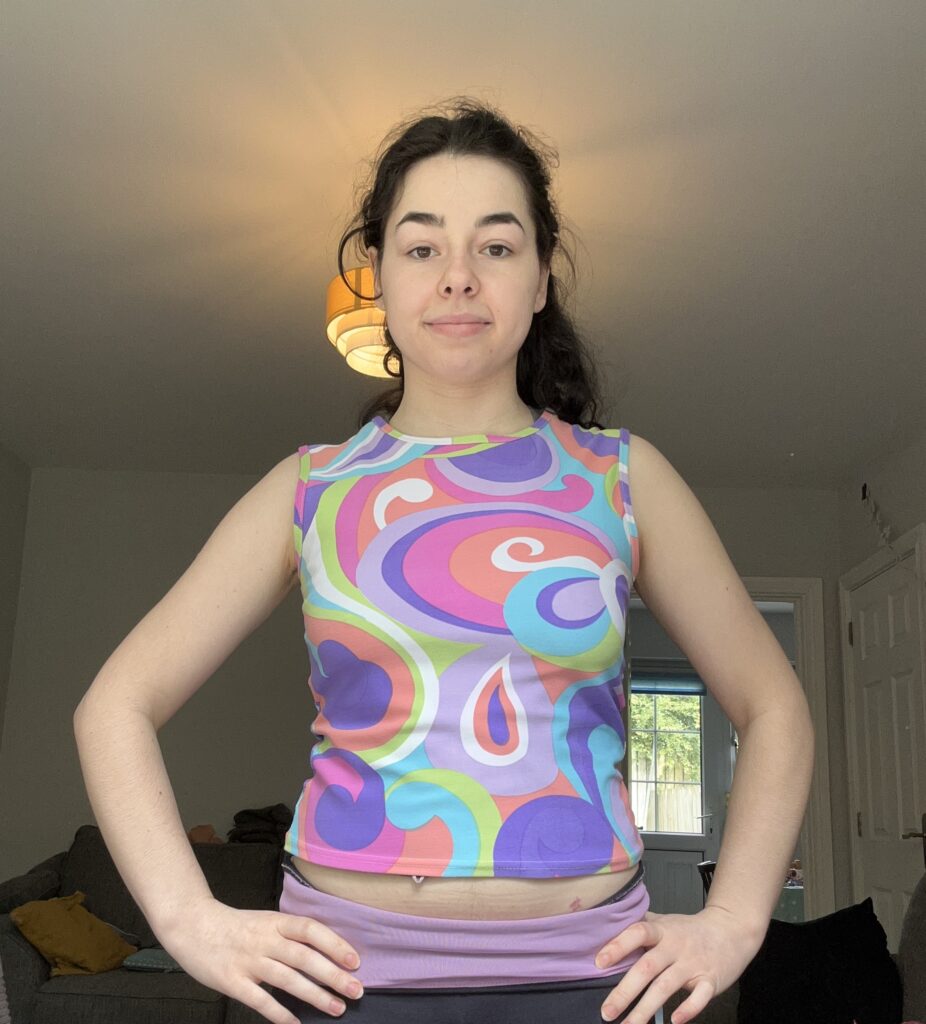
4 – The next upcycling project is this groovy vintage New Look Top!
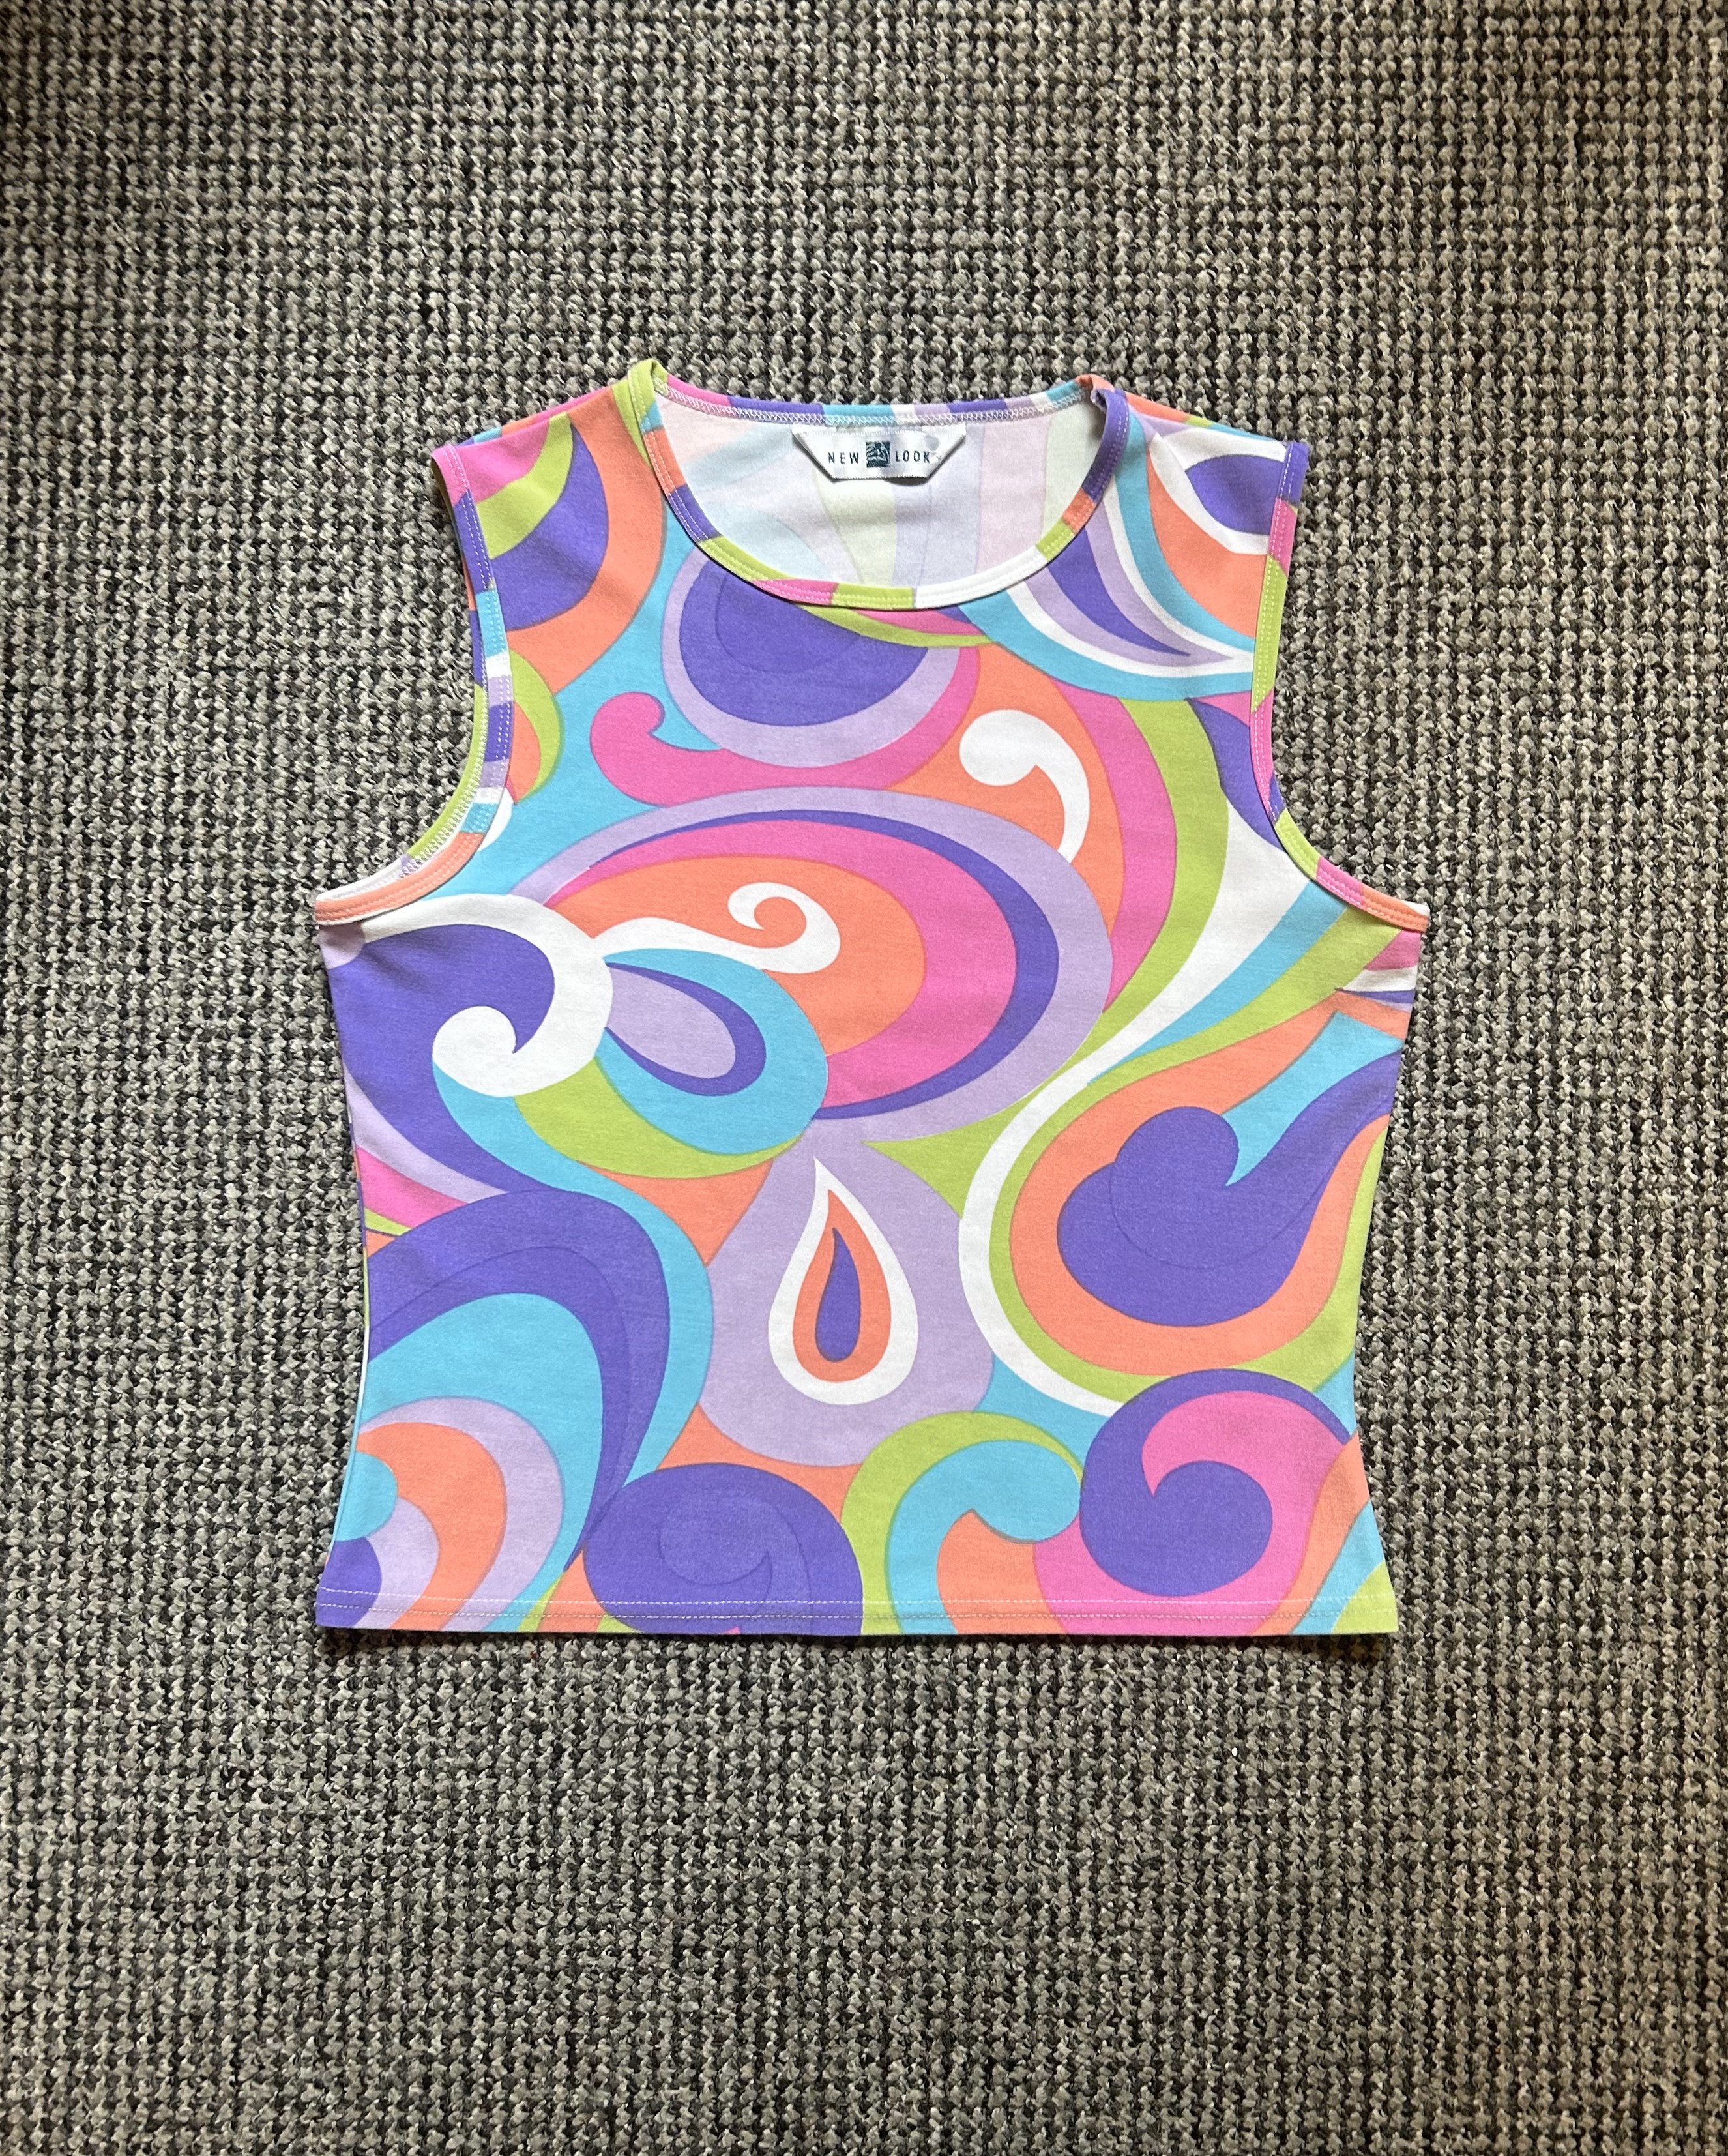
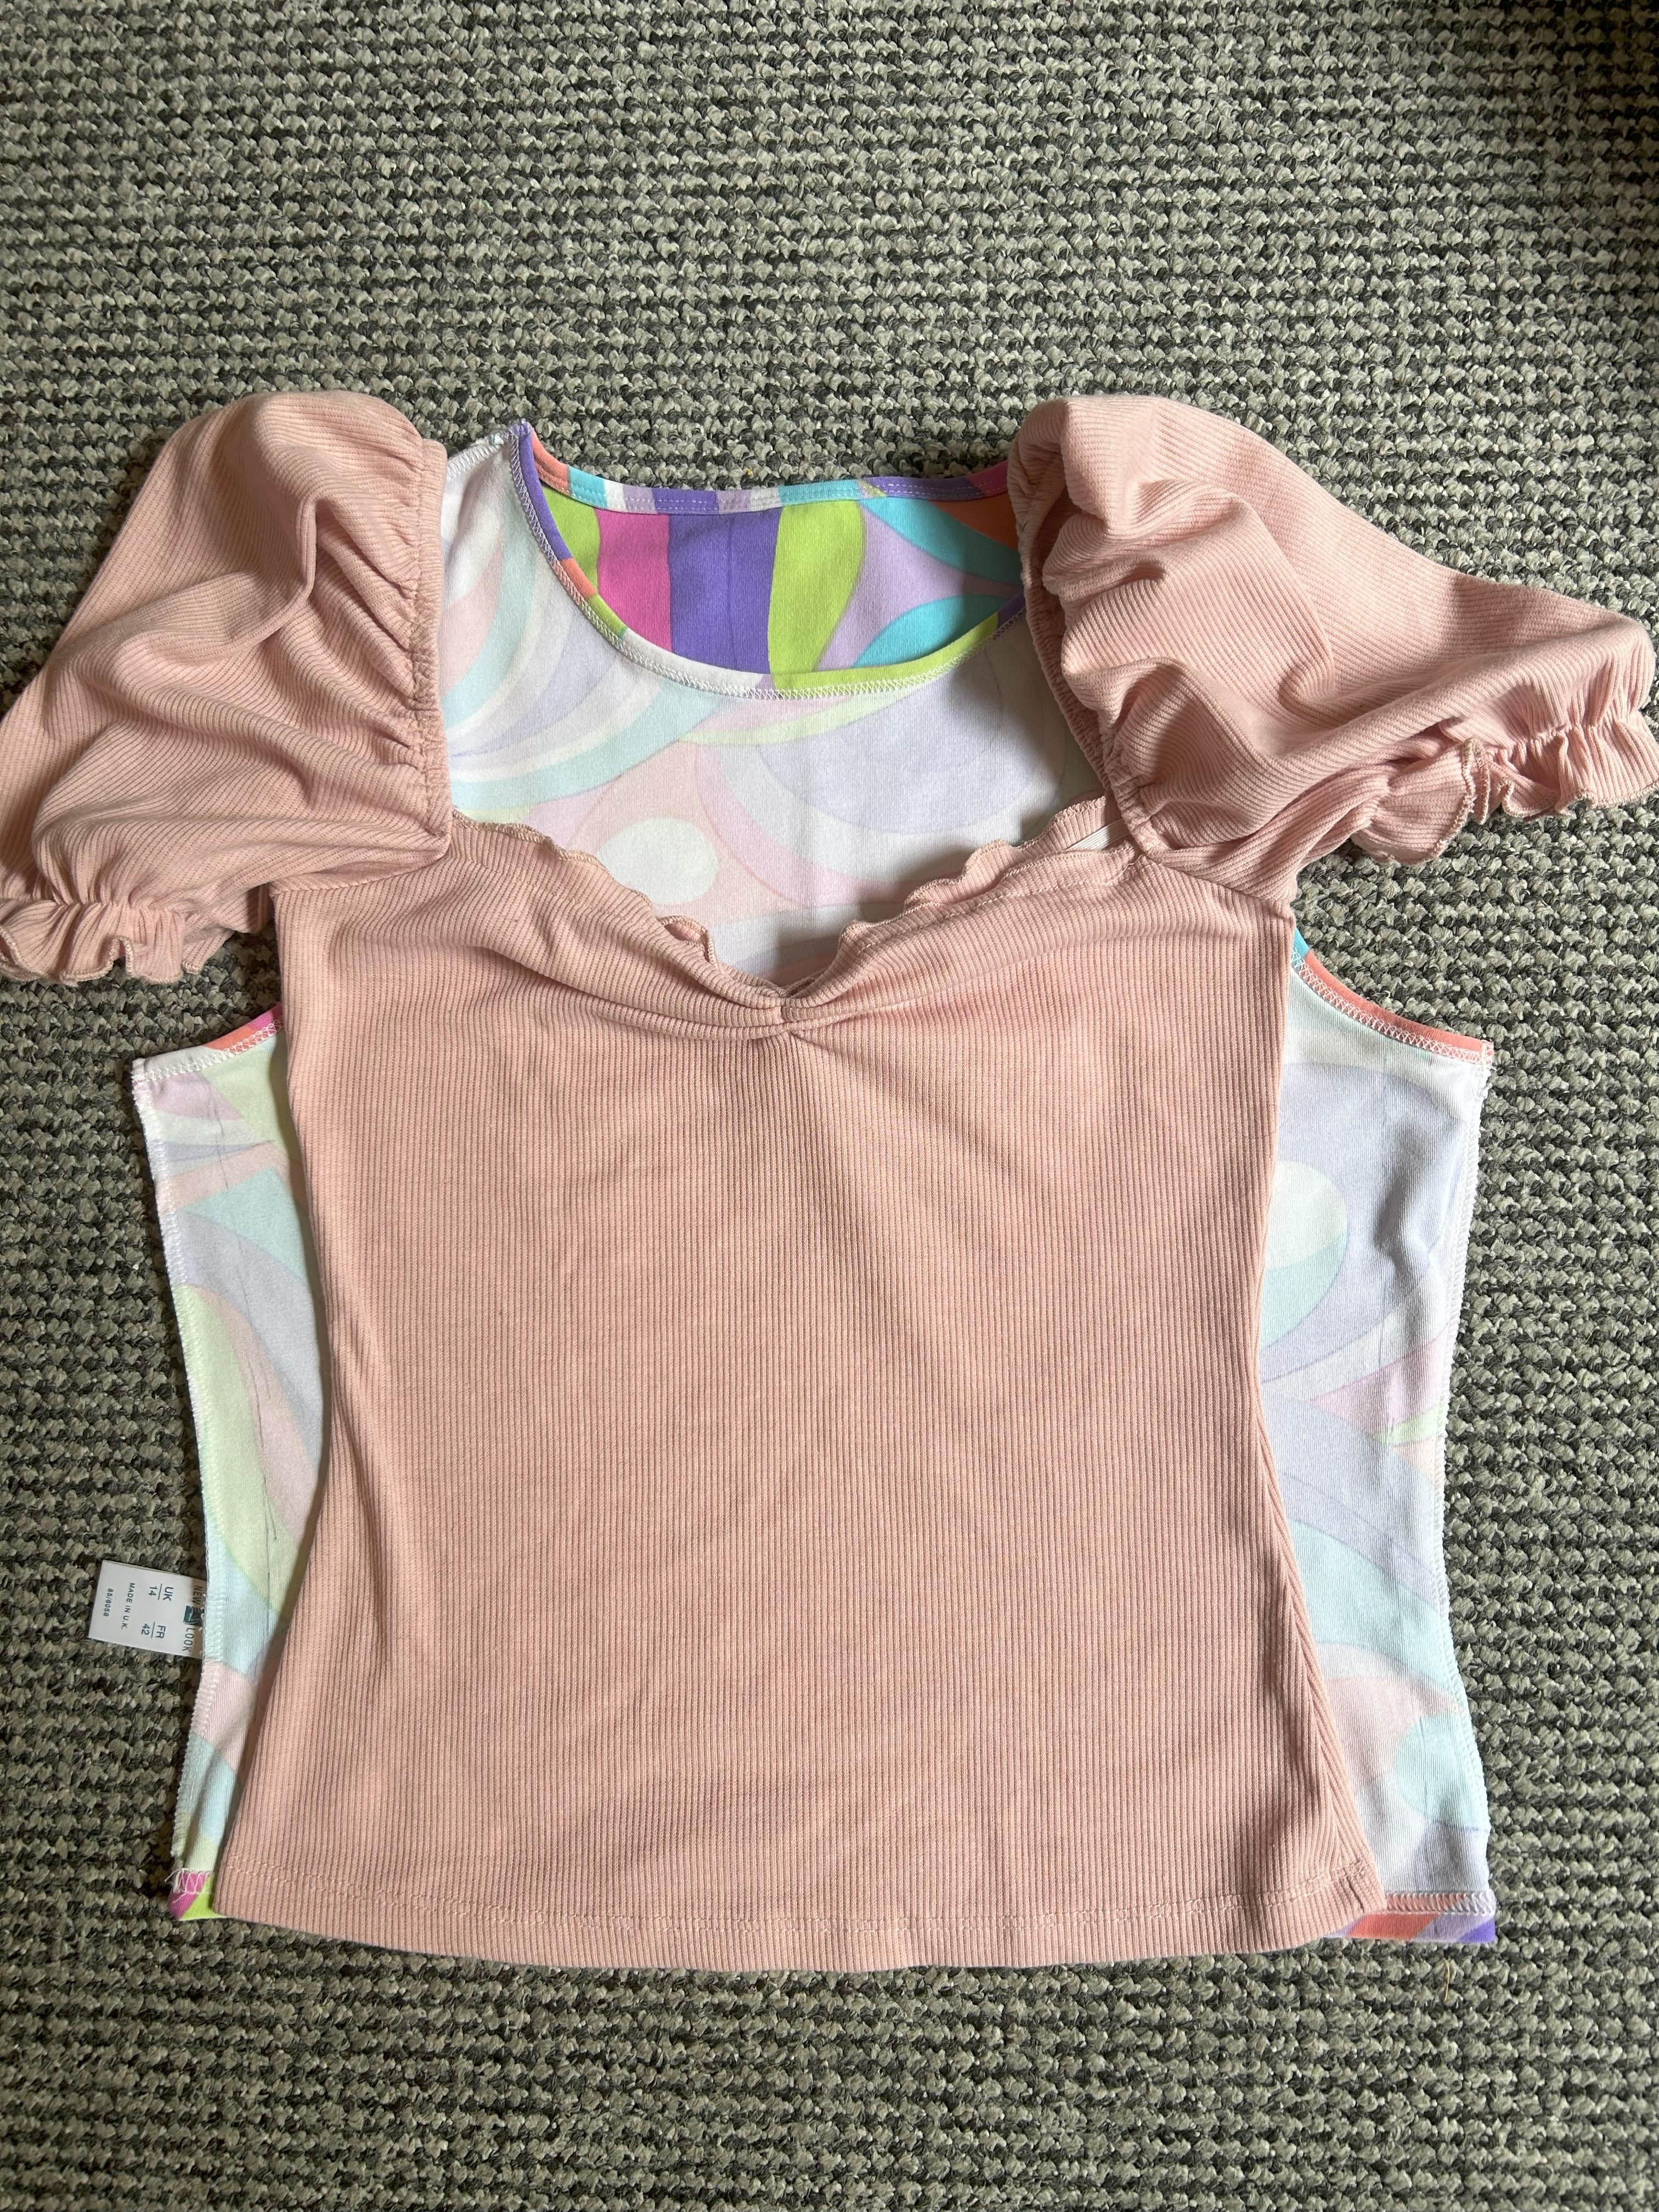
This is another SUPER simple way to upcycle a tank top that doesn’t quite fit how you want it. I bought this top from a charity shop for about £2 and I loved the pattern, but it was a size 14 which is a few sizes bigger than what I usually wear so I decided to fix it! The vision I had in mind was for the top to be a bit more form fitting, and I wanted the gaping arm holes to not gape anymore! So I started off with turning it inside out and making sure it was all flat.
After that I put another stretchy top that fits me well on top of the New Look top so it could guide me on how much I wanted to sew. I then drew the line in pen that would guide me when I started sewing and I pinned the fabric in place. I’m not going to lie; this stretch fabric was almost match for me! If you’re not familiar with sewing stretch fabrics it is an absolute nightmare!
But I won in the end and the sides were sewn; and after that I just tried it on again to check that the fit is what I wanted. Since I was happy with the fit, I then cut the excess fabric off from the sides and I had to hand sew the underarm and the bottom hems closed because my sewing machine really wasn’t up to the challenge! After all that I now have a gorgeous top that fits me as if it was made for me!
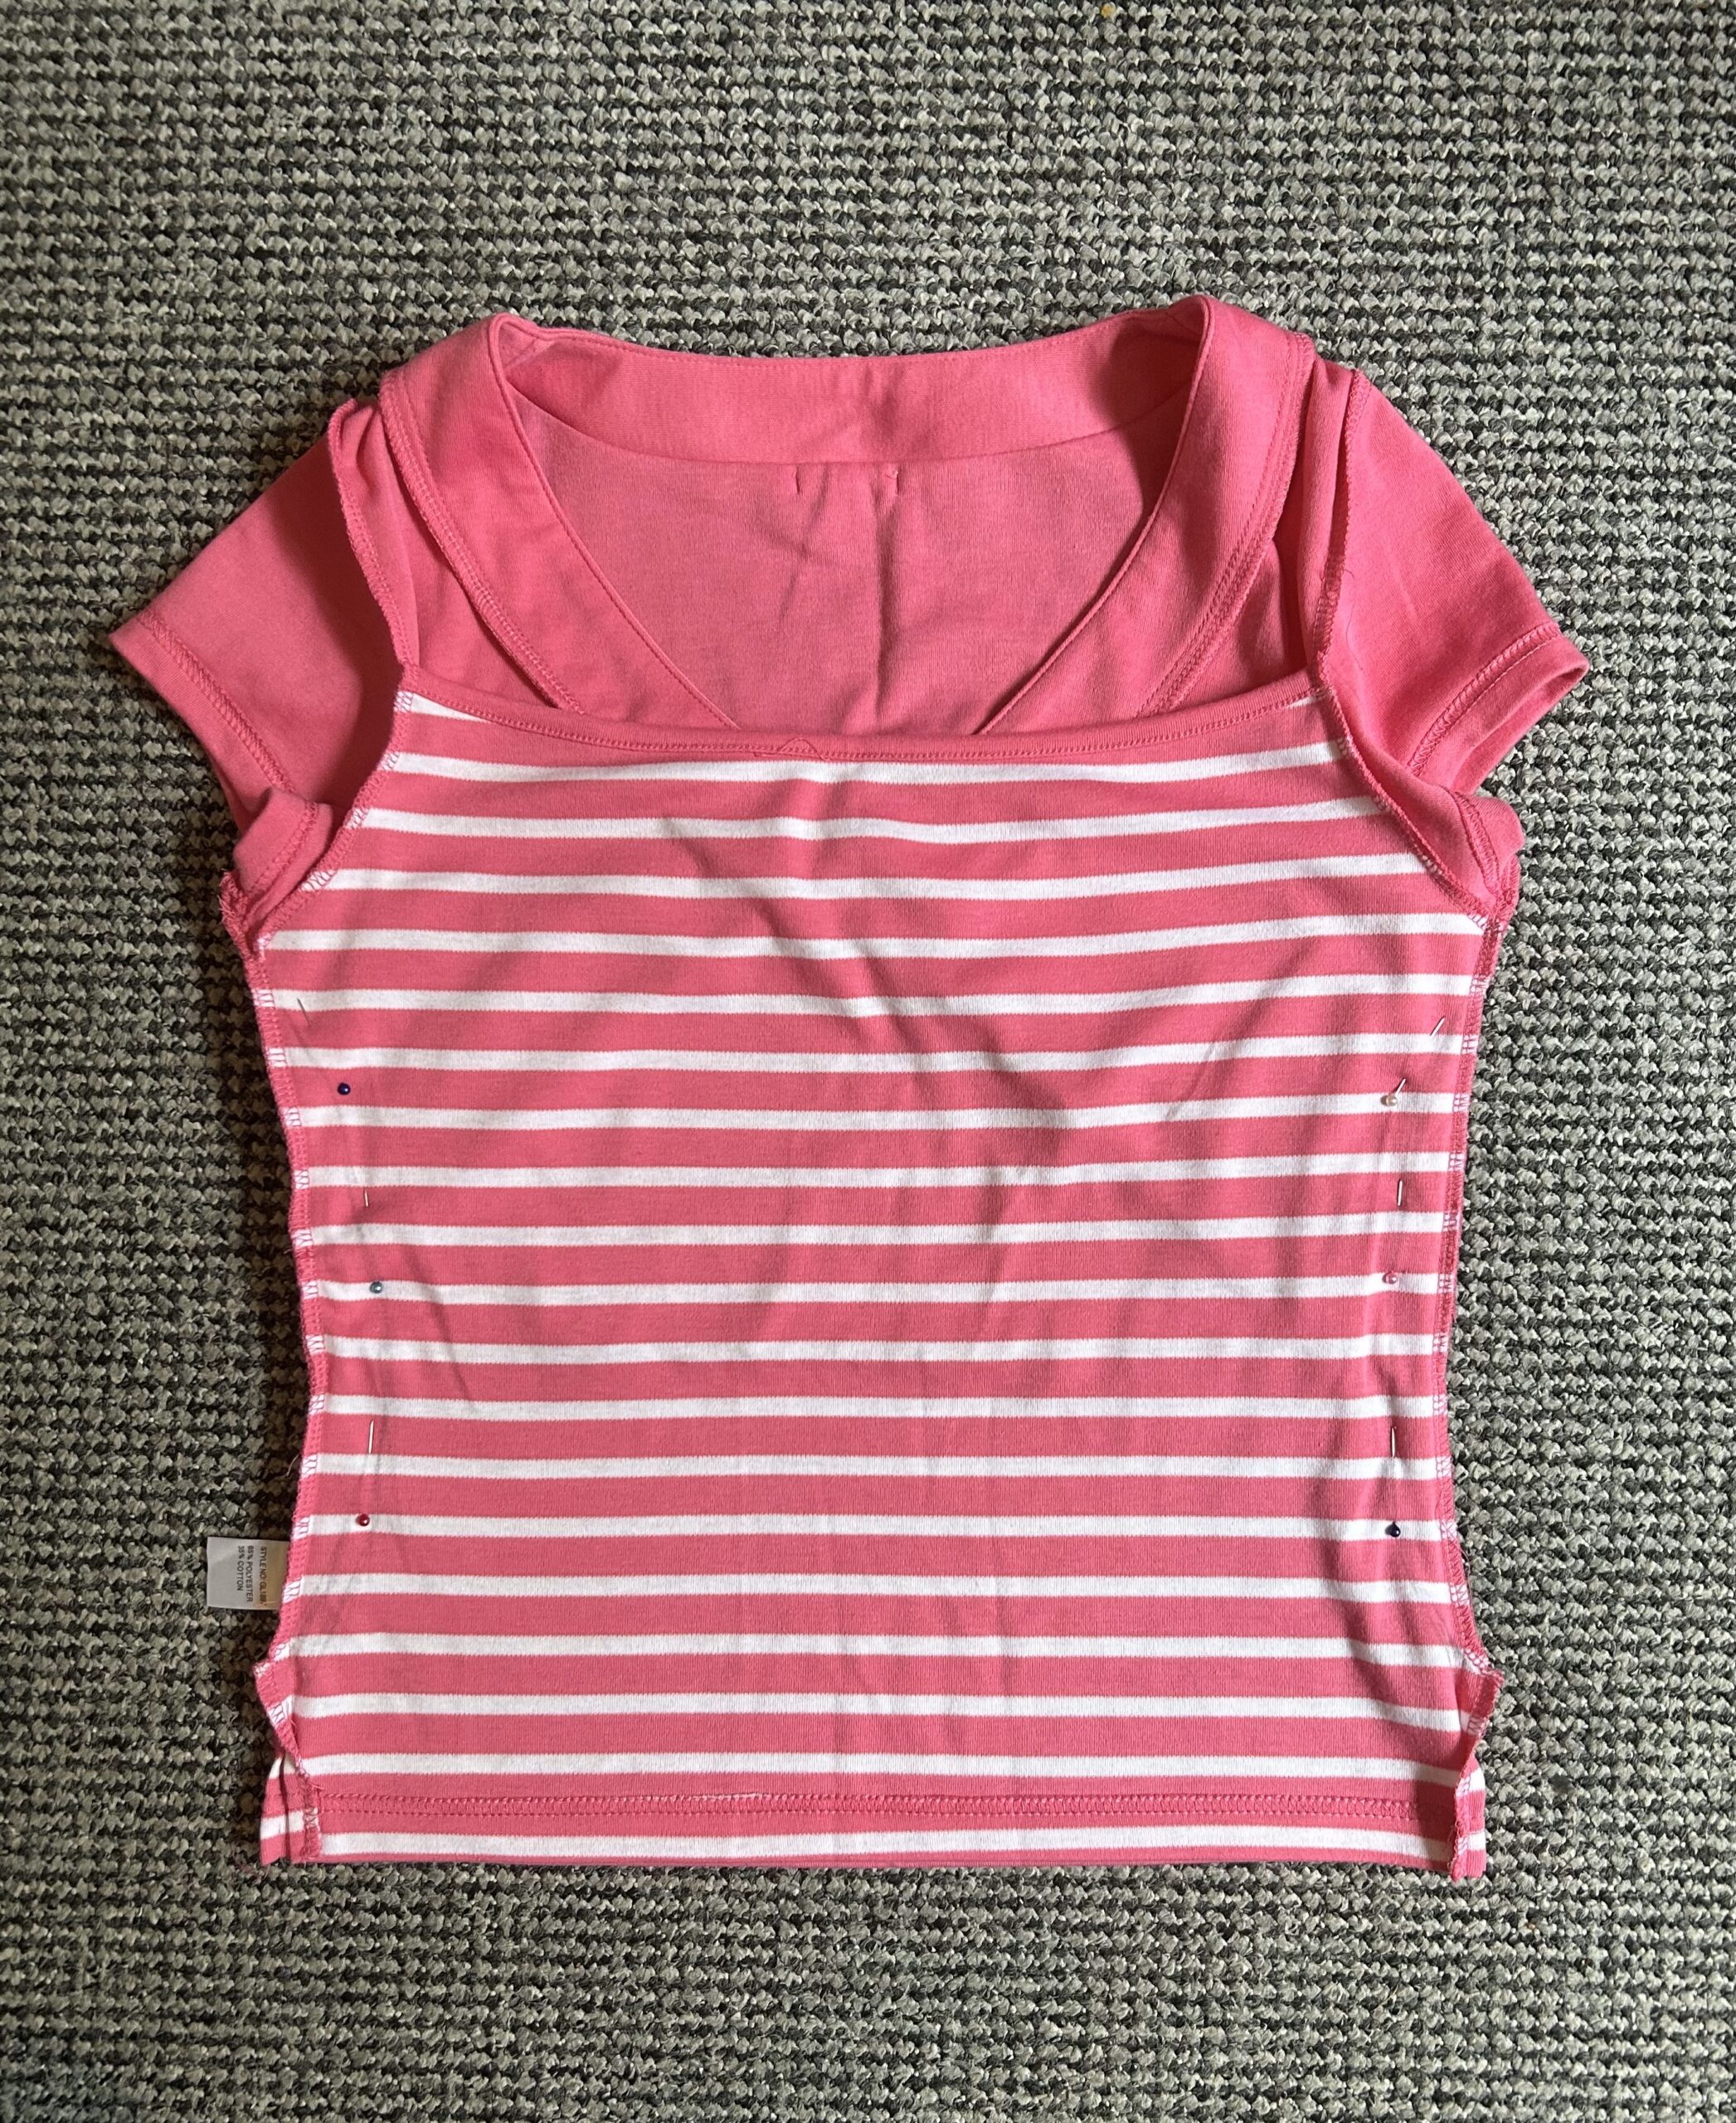
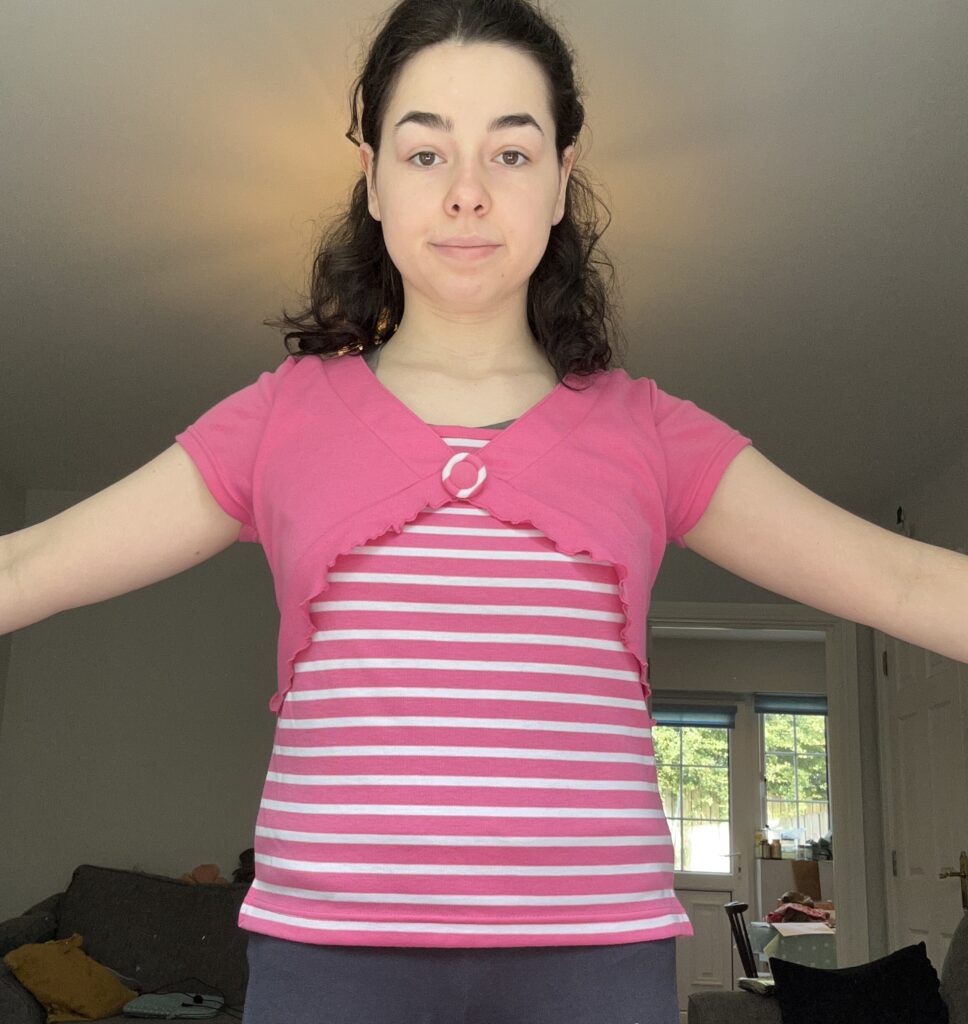
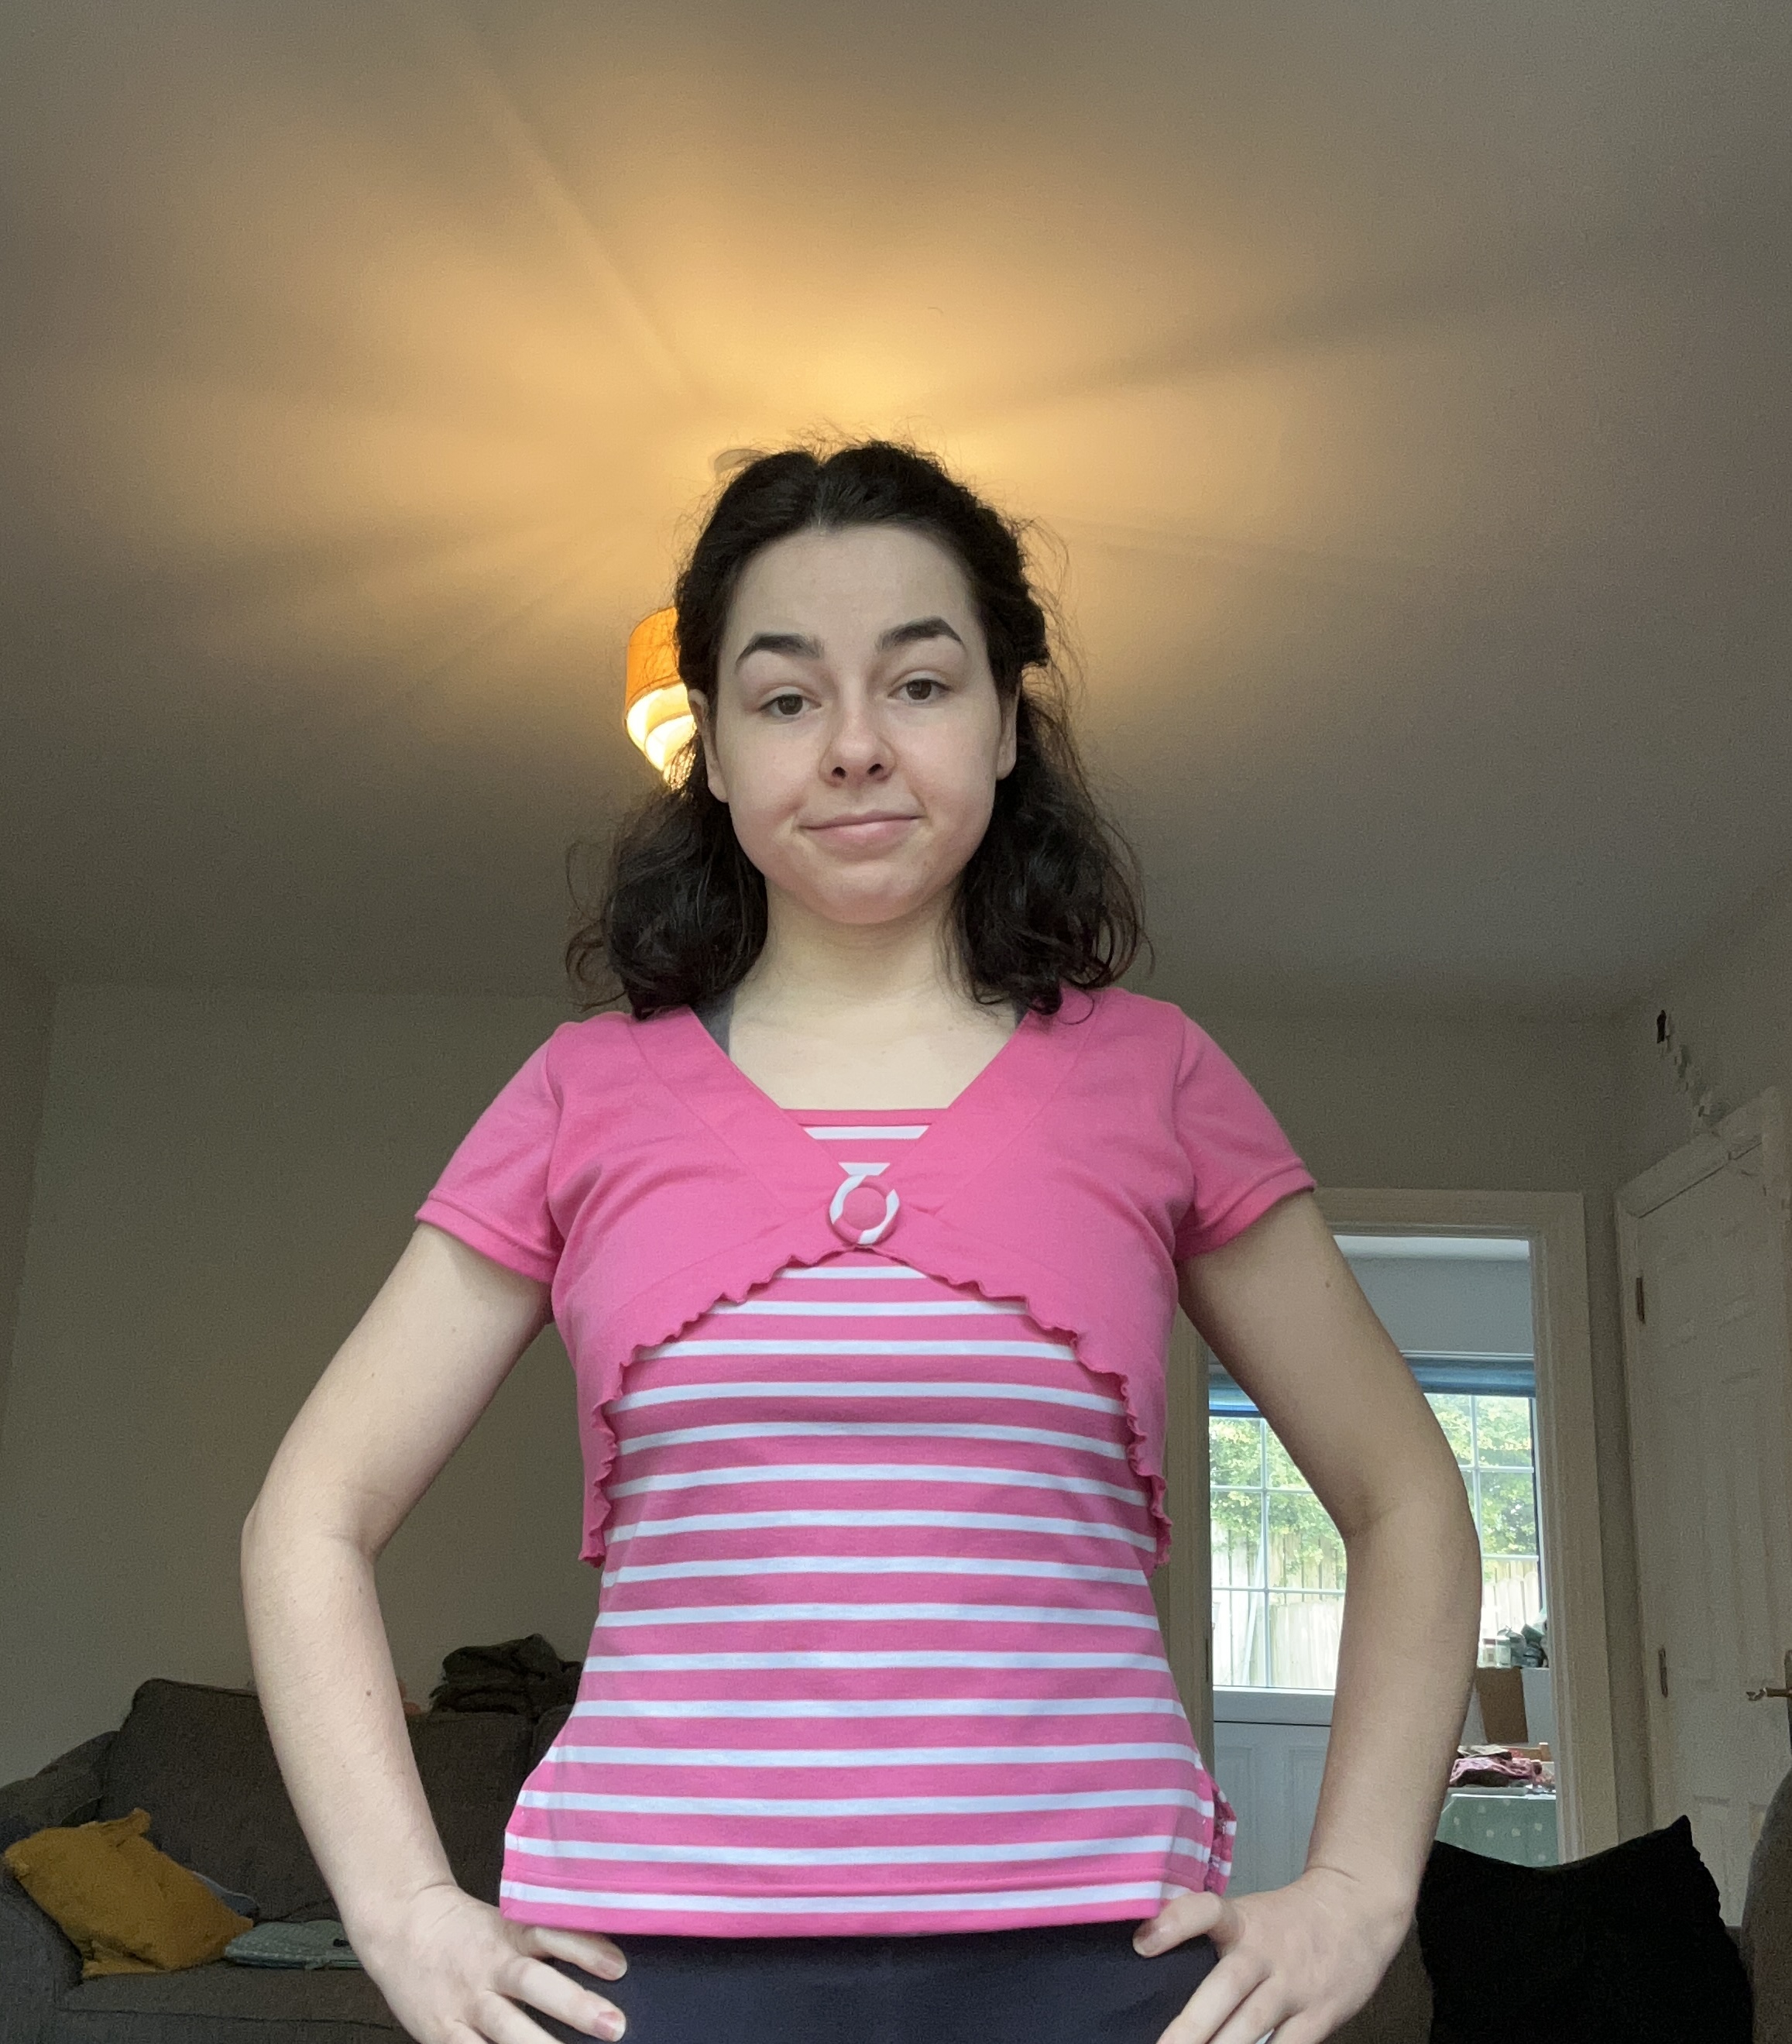
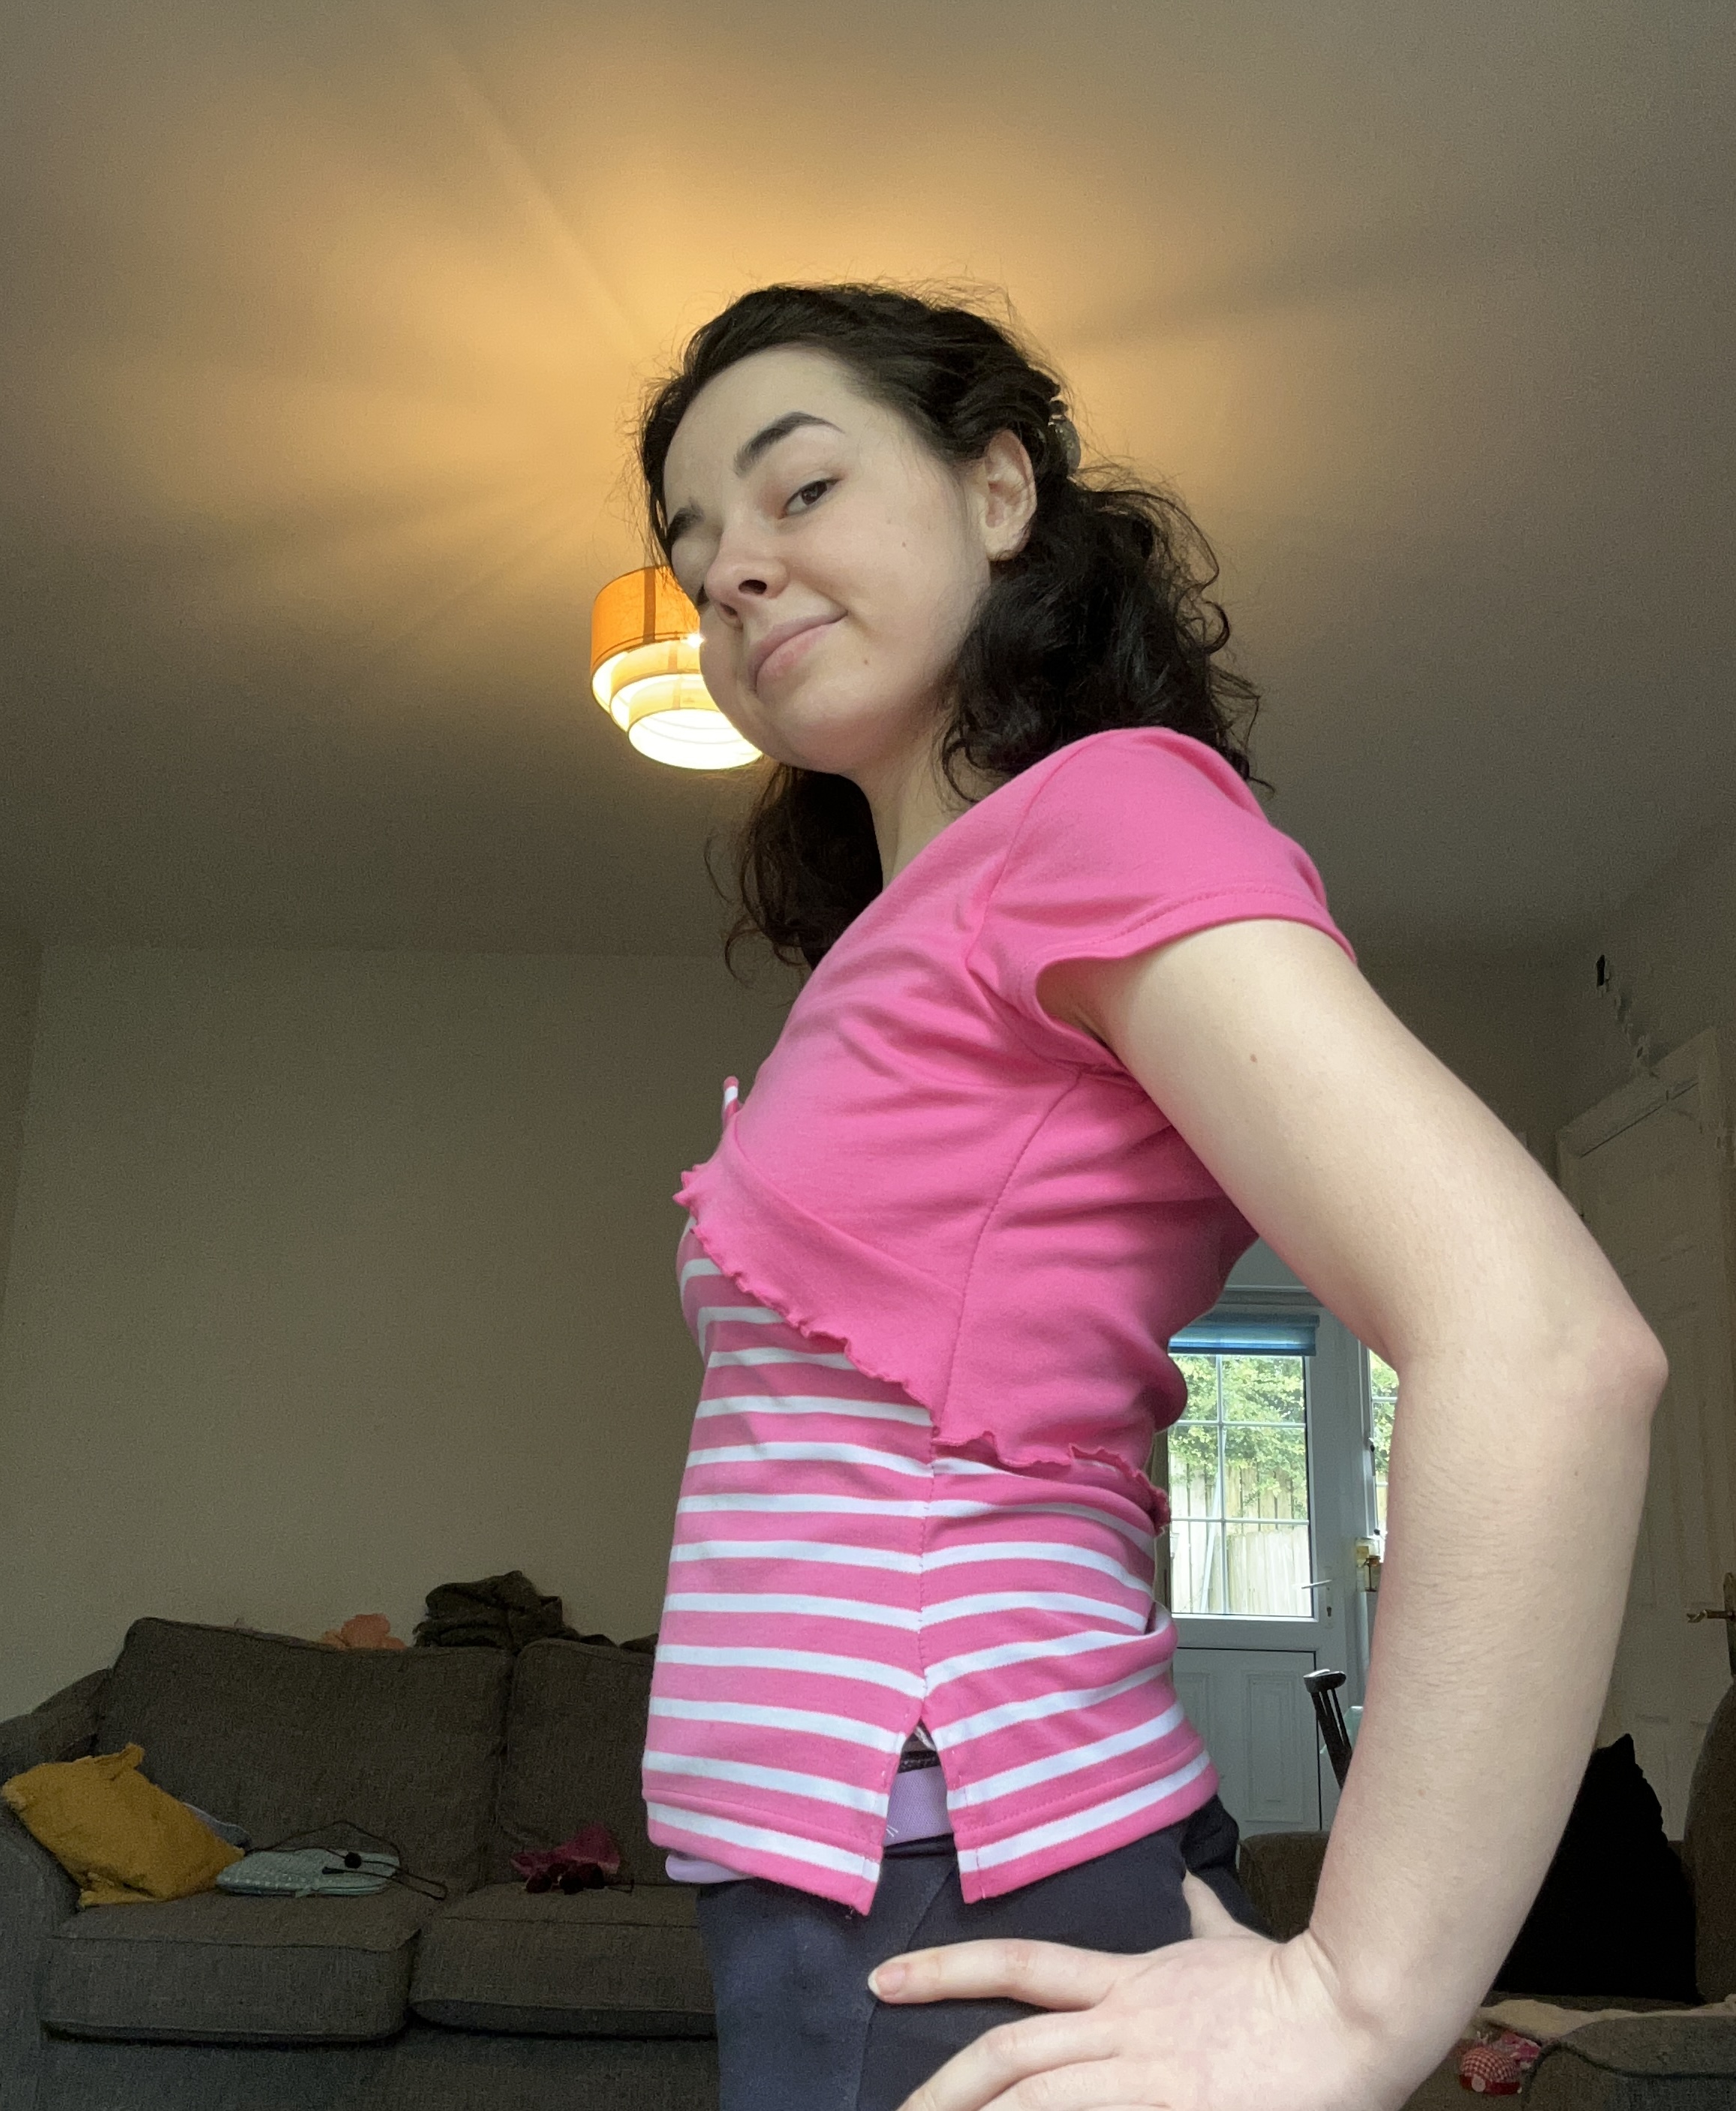
5 – And lastly, lets upcycle a Pink bolero top!
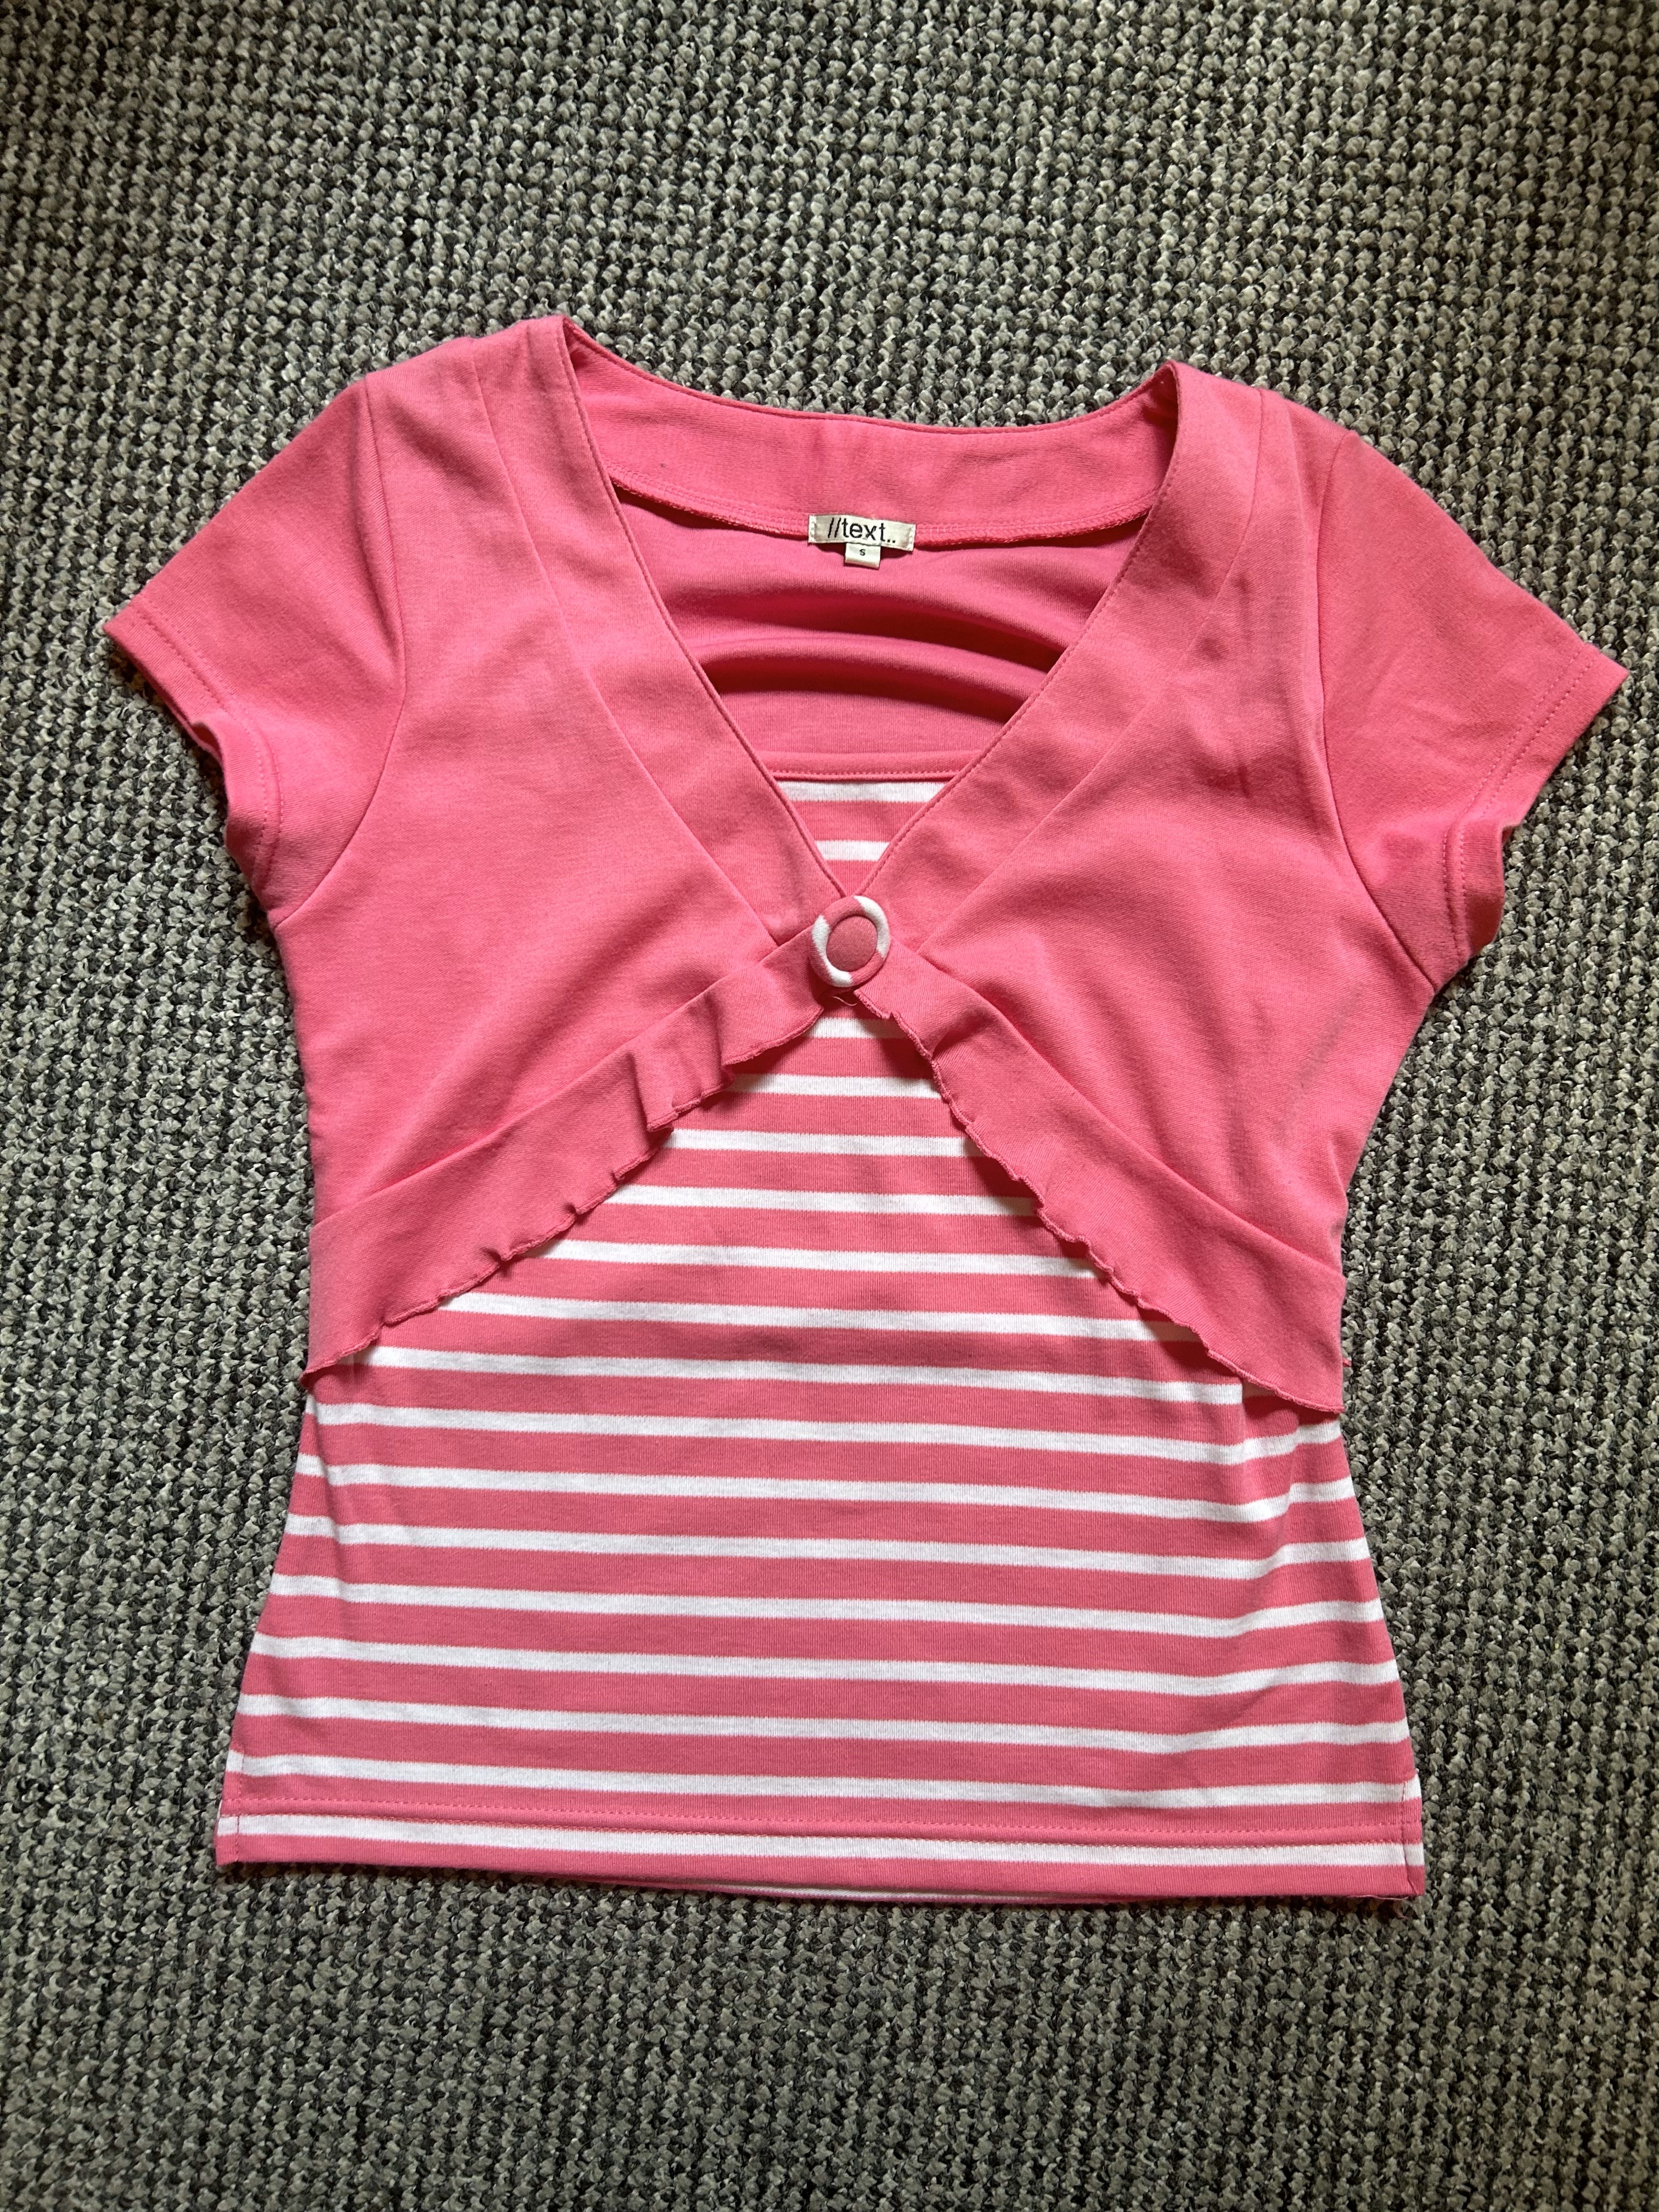
And lastly but definitely not least, this adorable Pink Bolero style top was so gorgeous when I found it at the charity shop, and it only cost me £5 so I bought it! While the fit itself isn’t horrendous, its not what I had in mind so its time for an upcycle! I wanted to make the top more form fitting which would also help it to be a little more cropped. The first thing I did was try it on inside out and make a note of where I want the sides to be sewn in a little tighter.
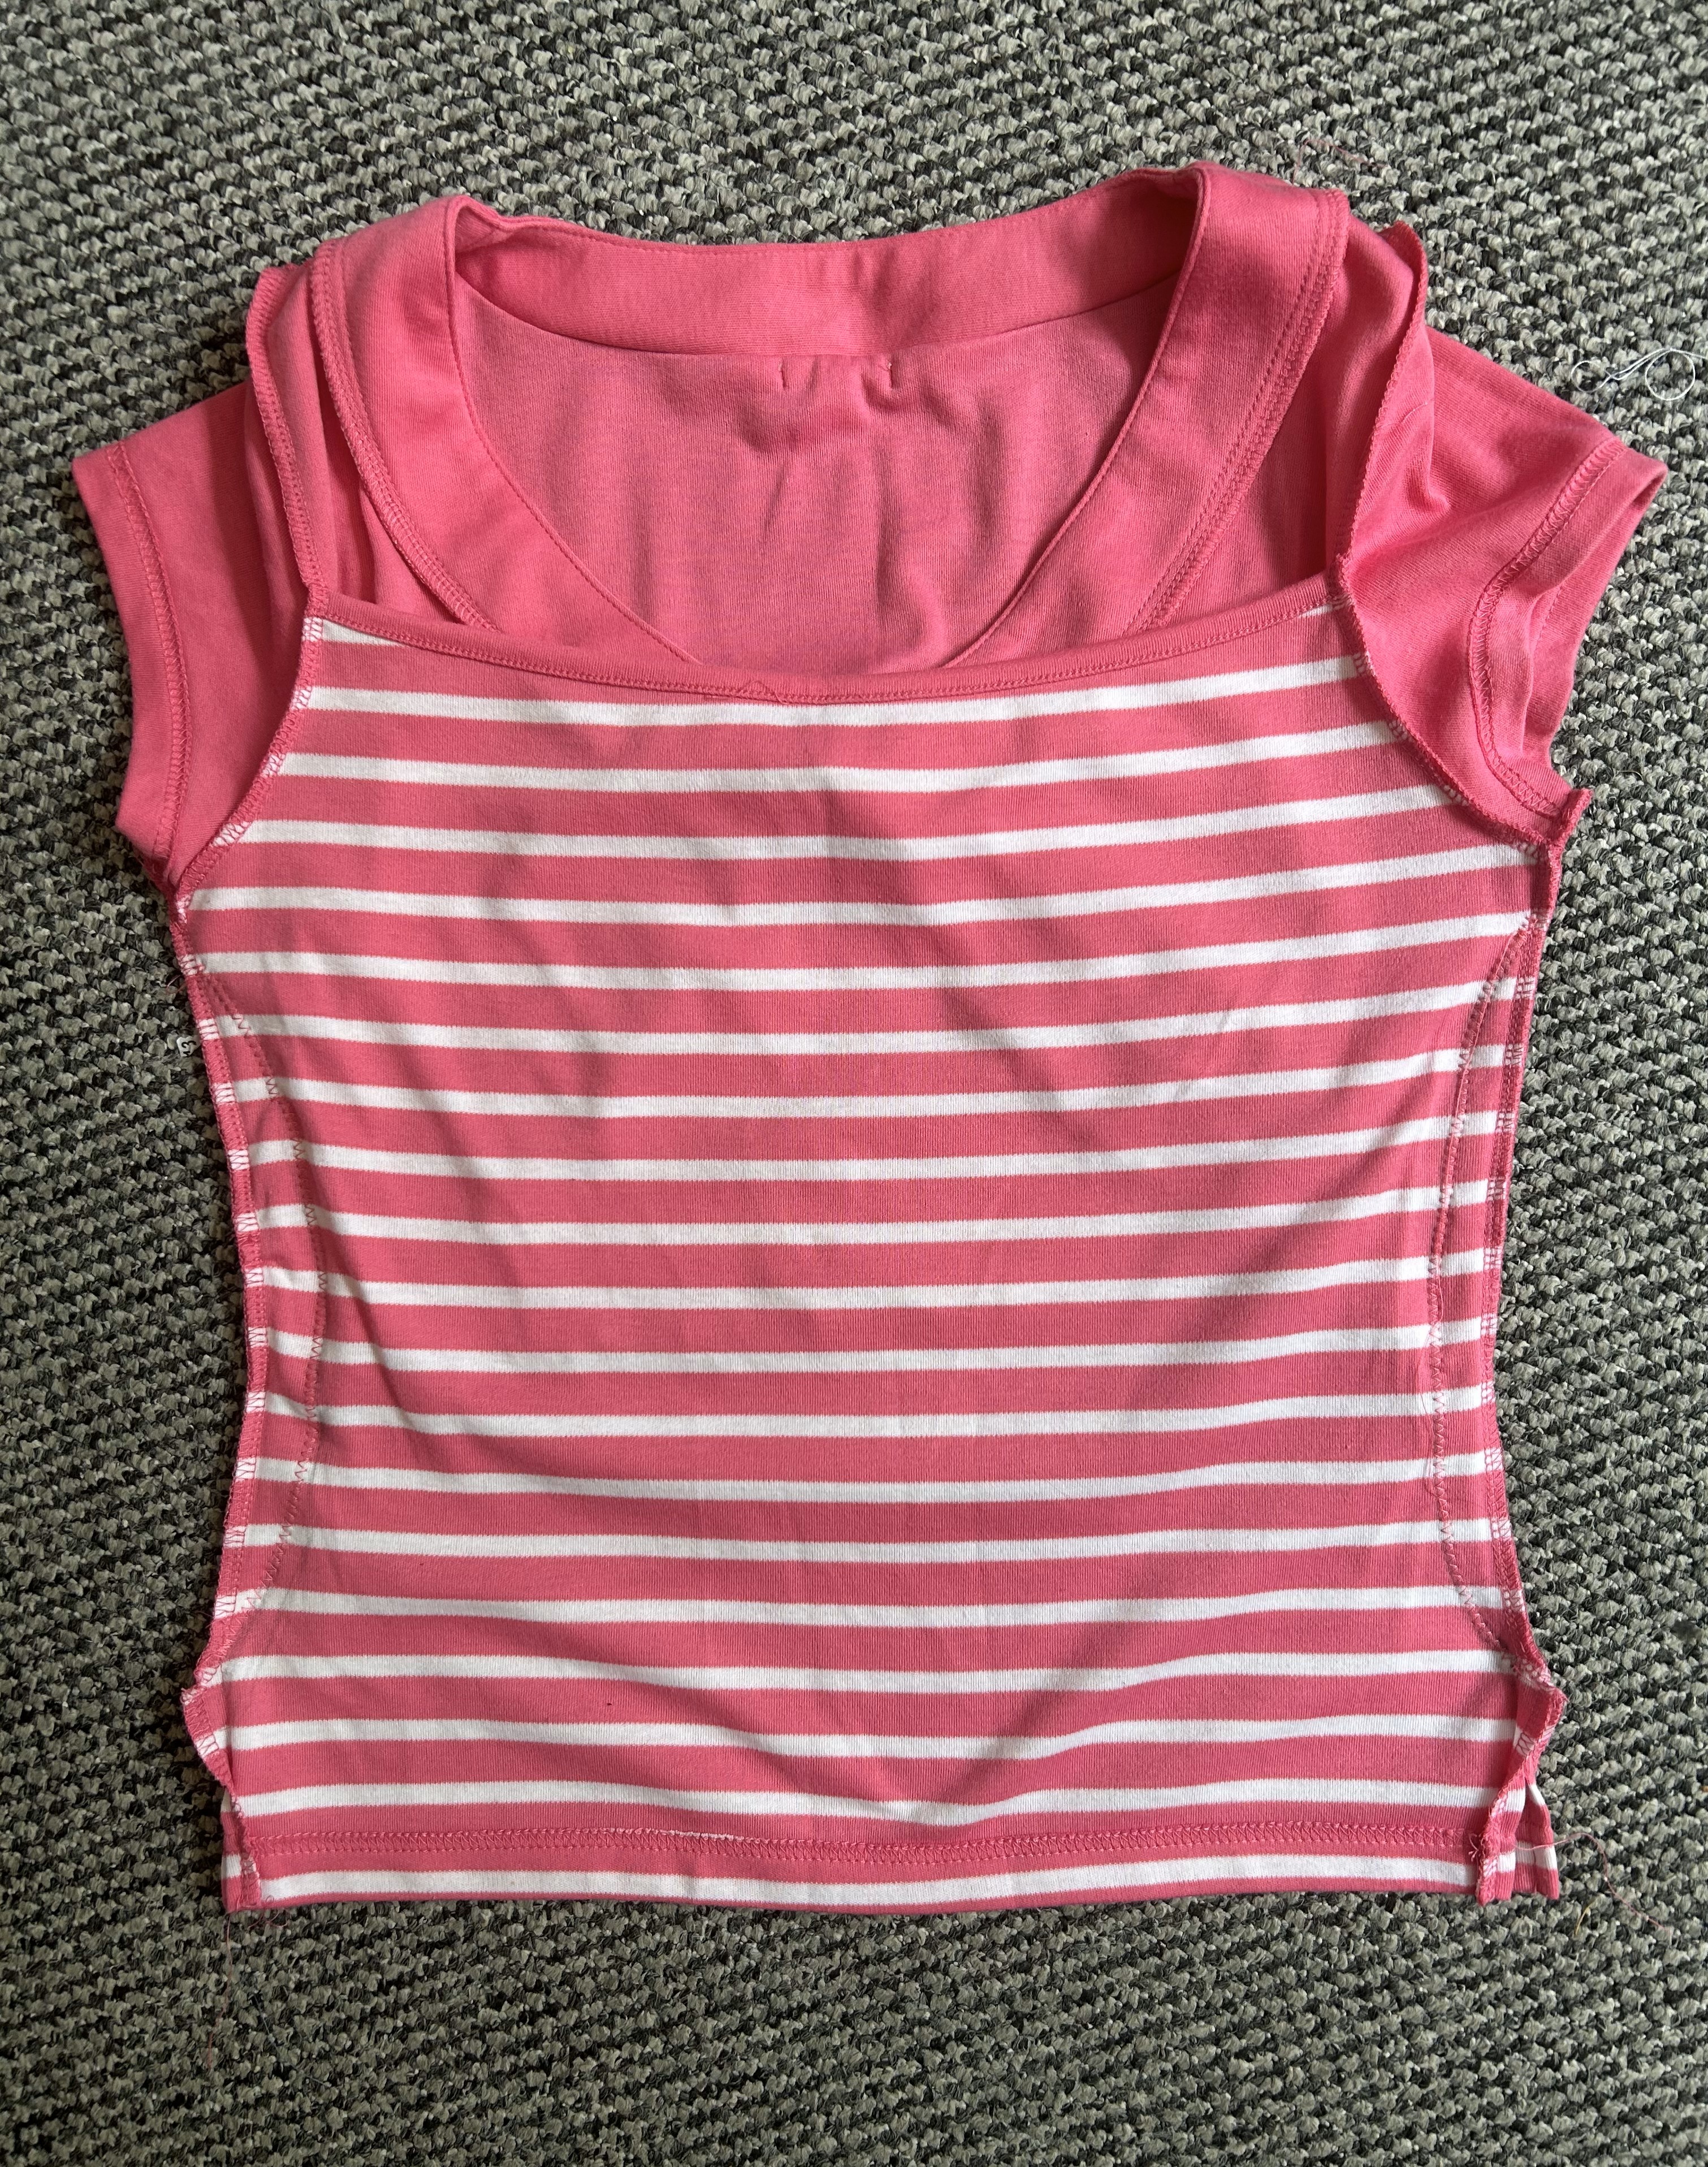
After that I placed another stretchy top on top of it and drew out where to sew and I pinned the fabric together. It’s now time for the sewing machine! After I sewed the fabric together on the sides, I tried it on and checked the fit. Since I was happy with how the fit was, I then cut the excess fabric away!
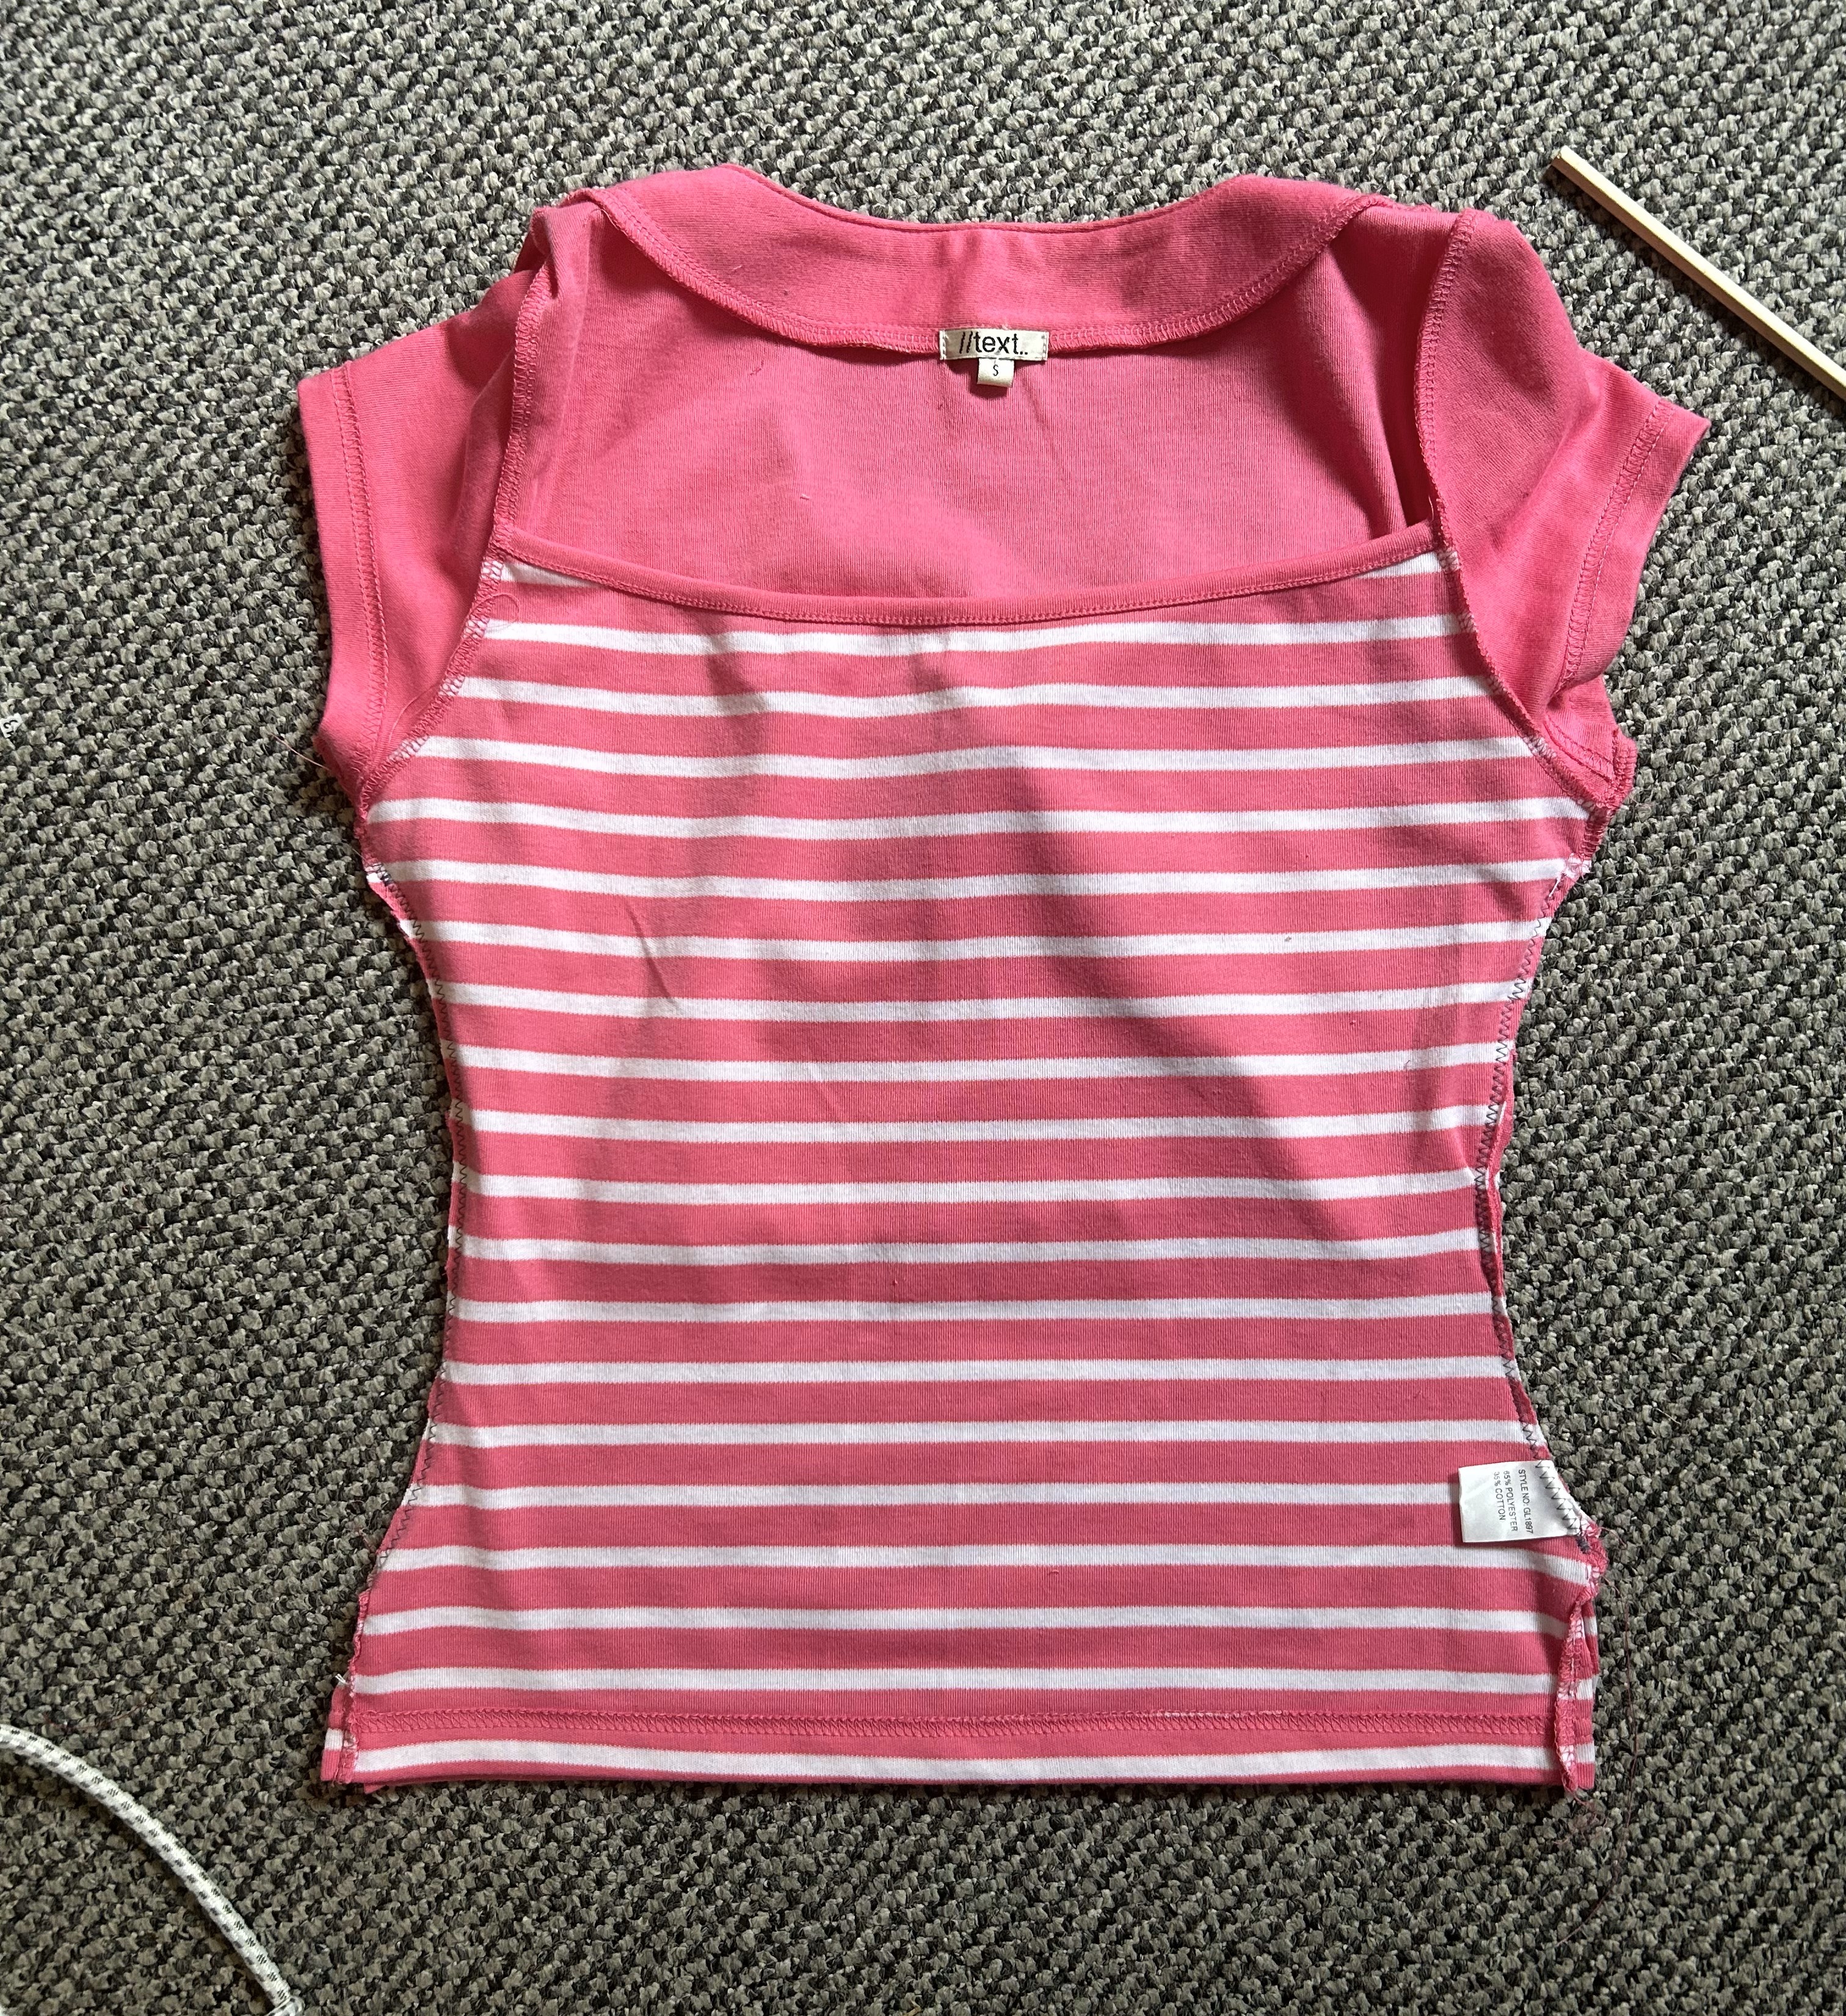
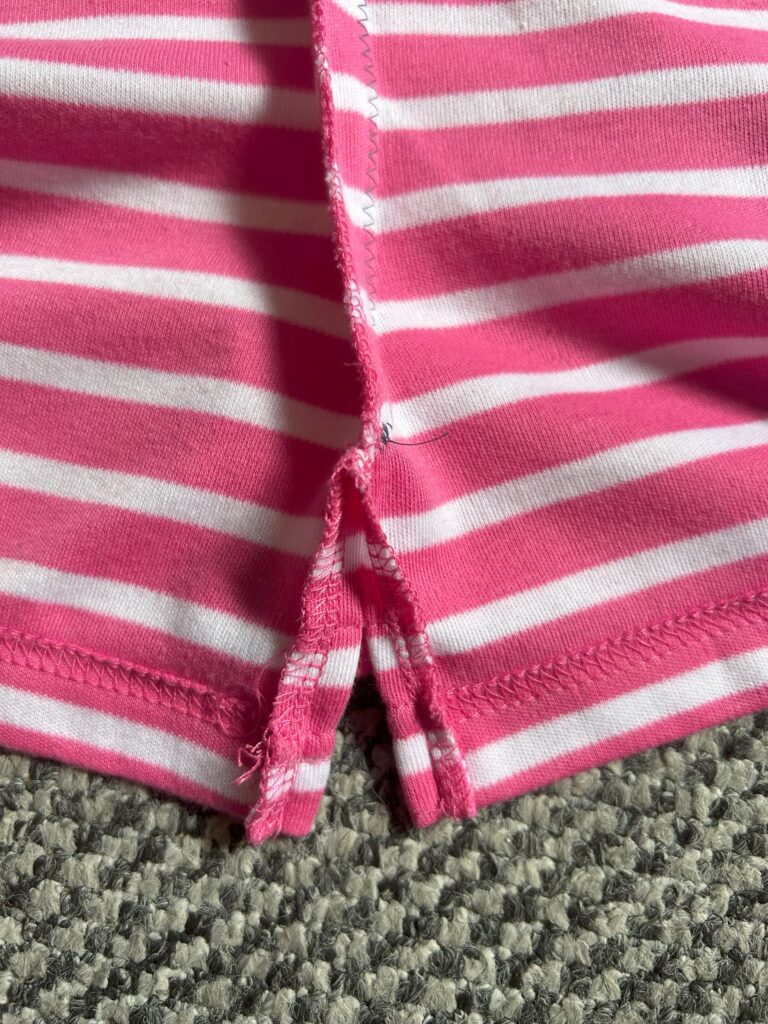
Then I decided to open the little slits at the side a little more, so I unpicked the stiches until I met my newly sewed side seams and then I hand stitched them flat and together. After that I just tried it on again and the whole garment fits so much better! I’m so glad I am able to fix things that I might have never worn or even thrown away in the past!