My sister and I were going to the Eras Tour in Dublin, and we decided to make some bracelets to commemorate the time and we did such an amazing job and since then I’ve been having so much fun making all kinds of bracelets!
In this blog post I thought I’d show you all a way to make bracelets for Pride since its Pride Month where I live now! This bracelet can add a personal touch to your Pride attire or it can make a great gift if you’d like to gift it to someone special!
Tools I used and where to find them;
Now onto the bracelet making!
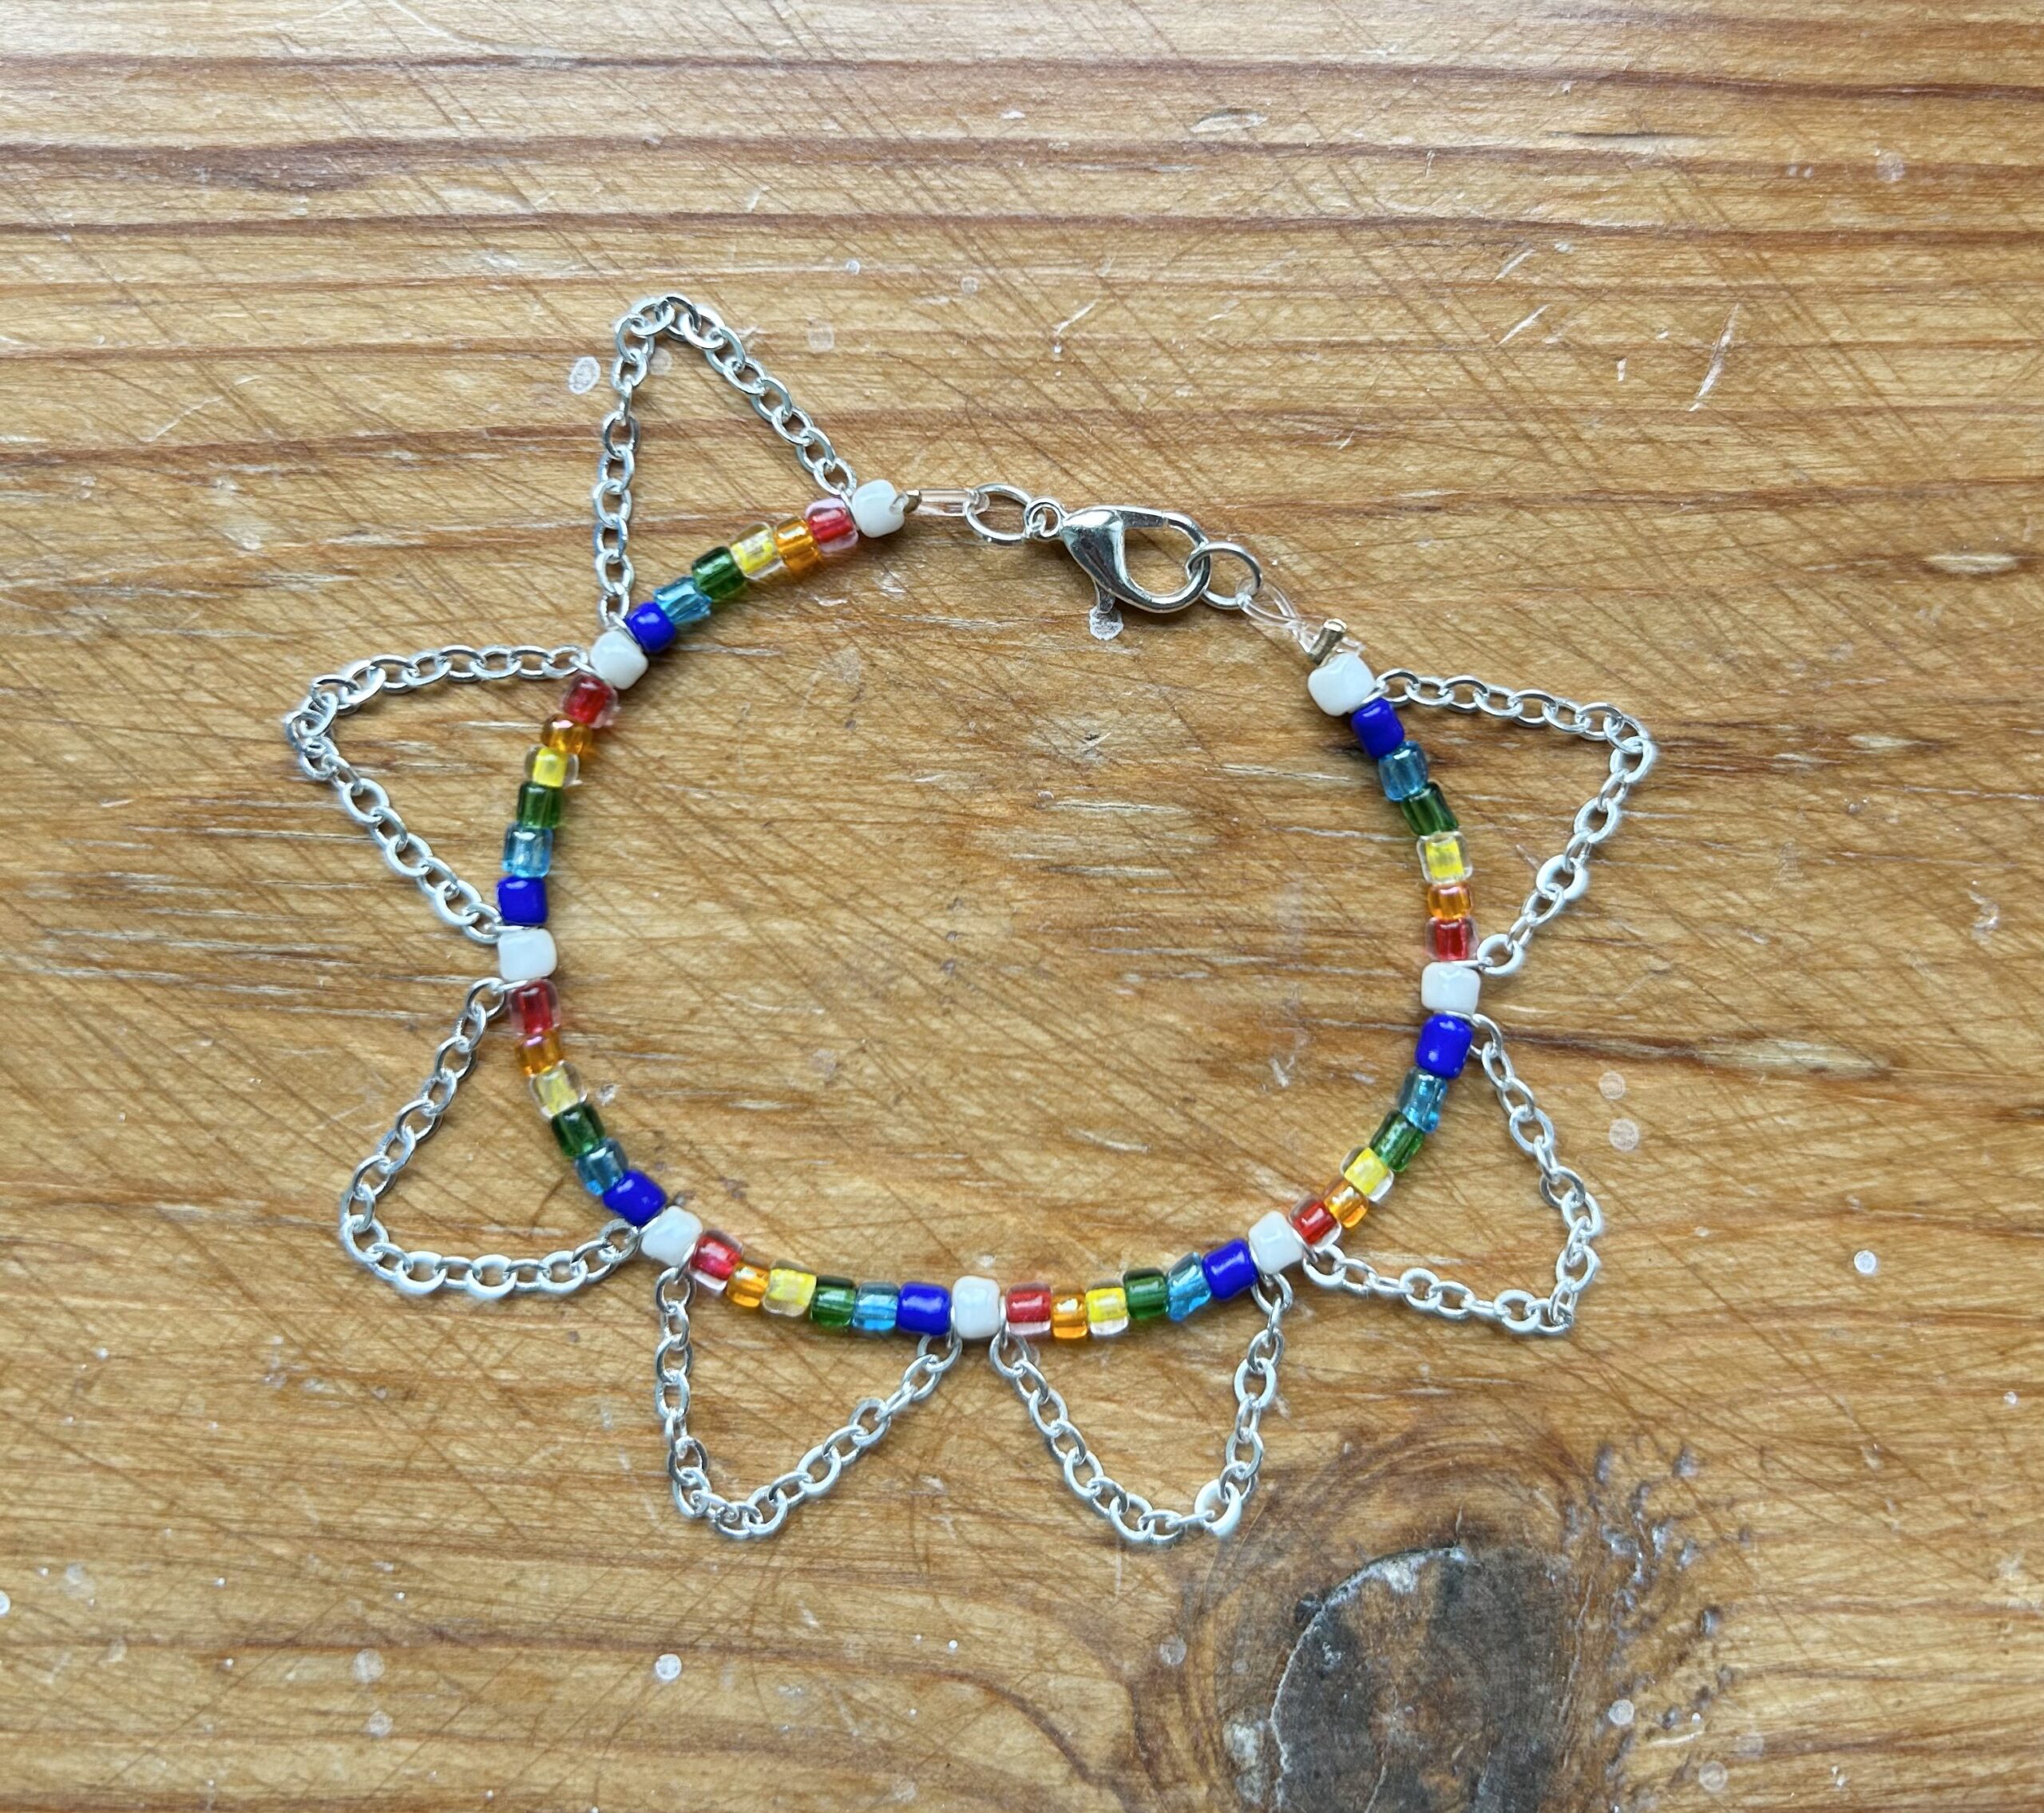
I’m going to show you how you can make a beaded bracelet with a twist. The twist being some jewellery chain that I love to add to my beaded adventures!
- The very first step is to measure out your elastic. I like to measure around the wrist and then add about 2 more inches just in case but also to add the fastening loops.


- Now that we have our elastic, its time to attach a fastener. The best way I’ve found to do this is to take a metal crimping bead and thread it through one end of the elastic chord. Now that you’ve thread it on the elastic, you’ll want to grab a metal loop and thread that after the crimping bead. Now you’ll want to create a loop with the elastic and loop it back through the crimping bead, so you have the metal loop on the very end and the crimping bead next to it.


- The next step is to make sure that the crimping bead, the elastic loop and the metal loop are at the very end of the elastic chord. Then you’ll grab your tweezers and clamp down on the crimping bead. Use as much force as you need to get it flat and unmoving.


- Once your fastener is on, you can start your beading! My tip to you would be to come up with a design before you do anything else. For me, I decided to do a repeating design so I picked out the colours I wanted to use and then I just decided on a pattern and repeated it until the end of the elastic chord.
Another tip for the design and beading process is to get your beads for each pattern already picked out and put them somewhere apart from the rest of the beads so it becomes easier to remember your pattern.

- Now we can add the jewellery chain! For my bracelet, I decided to add some draping with the chain to add some drama. All you really have to do to add chain is measure out how much chain you want to use and then just use the jewellery pliers to break the chain link and thread it onto the elastic as you would for a bead. But just remember that here are 2 ends to the chain so I would recommend that you attach one end of the chain to the one part of the design and then if you’re repeating the design, attach the other end of the chain to the repeated design (if you’re using a larger length of chain). This will create a gorgeous effect!


- At this point, you should have all of your beaded completed and now its time to close the bracelet with another fastener. Just make sure that the bracelet fits nicely around the wrist. What you’ll want to do is repeat step 2 on the opposite end of the elastic but once you’ve finished crimping the bead and your ends are secure, you’re going to want to open the metal loop with your pliers (I recommend using 2 for this) and you’ll want to attach a lobster claw fastener to the loop and close it securely with the pliers.


- Once your fastener is attached, you’re all good to go!

