On the journey to creative freedom, a really important part of being able to be free creatively is to find inspiration anywhere and everywhere! In this post, I will show you my process for allowing inspiration to strike! The very first and most important tip is to get to know yourself better! How will you know what inspires you if you don’t even know yourself well enough to know your likes and dislikes? The best way to get to know yourself is to spend more time engaging with your feelings. For example, in the context of makeup, when you add bright colours to your routine, what do you enjoy about it? Is it comfortable for you? Does it boost your confidence? Are you using it to hide yourself? These are the sort of questions you need to ask yourself, and if the answers to these questions align with your creativity then you have you come to understand yourself a little better! The most important journey of life (in my humble opinion) is to become yourself in the most authentic way and to come to know yourself as well as you know your closest friend! Even the Ancient Greeks had the same idea when Aristotle said, “Knowing yourself is the beginning of all wisdom”.
In this post I will take you through my own process for using art to inspire me and inspire my own art as well as my Makeup. If this appeals to you at all then please consider it a challenge and see if you can become inspired by great paintings!
1 – The very first step is to decide on a Painting.
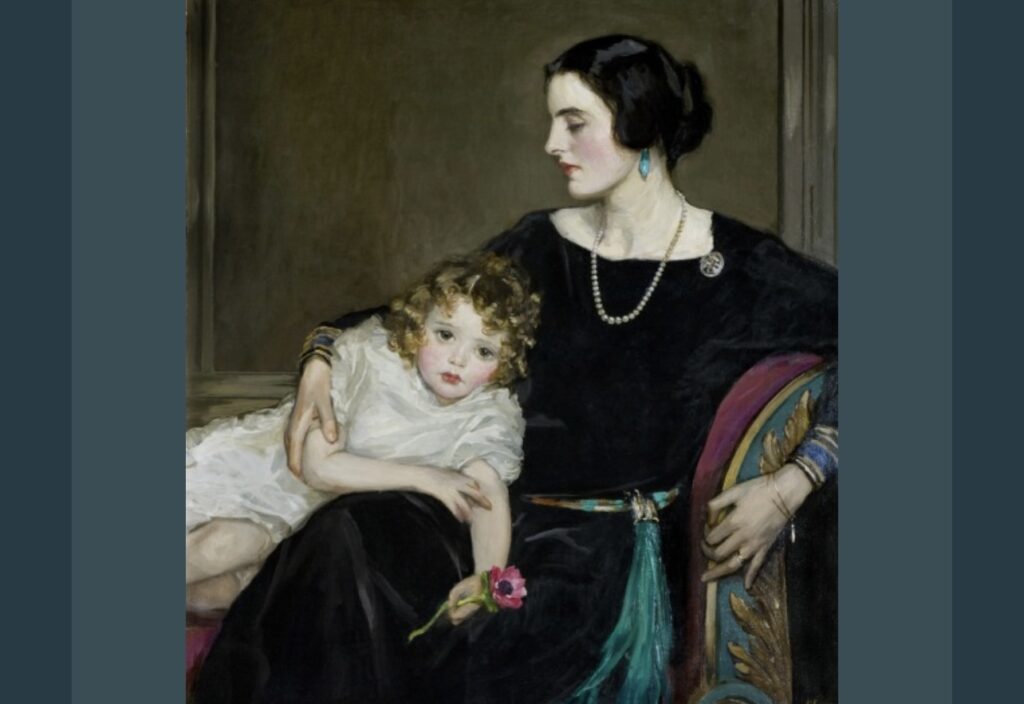
When I was looking for a painting to inspire me, I focused mainly on the colour schemes, the interesting props as well as the whole vibe of the painting. Following all of these trails I was able to find this gorgeous painting by John Lavery which is called, “Anne Moira and the Honourable Mrs Forbes-Sempill”. This painting first spoke to me once I saw the colours; the gorgeous and vibrant teal blue colours as well as all the gold elements, which are nicely contrasted by the rich plum/burgundy colour. All of this inspired me first of all, after that I just had to decide which aspects I wanted to focus on for my own painting. I decided that since I wanted to use the flower that the little girl is holding, I would focus on the girl primarily and ignore the elegant woman!
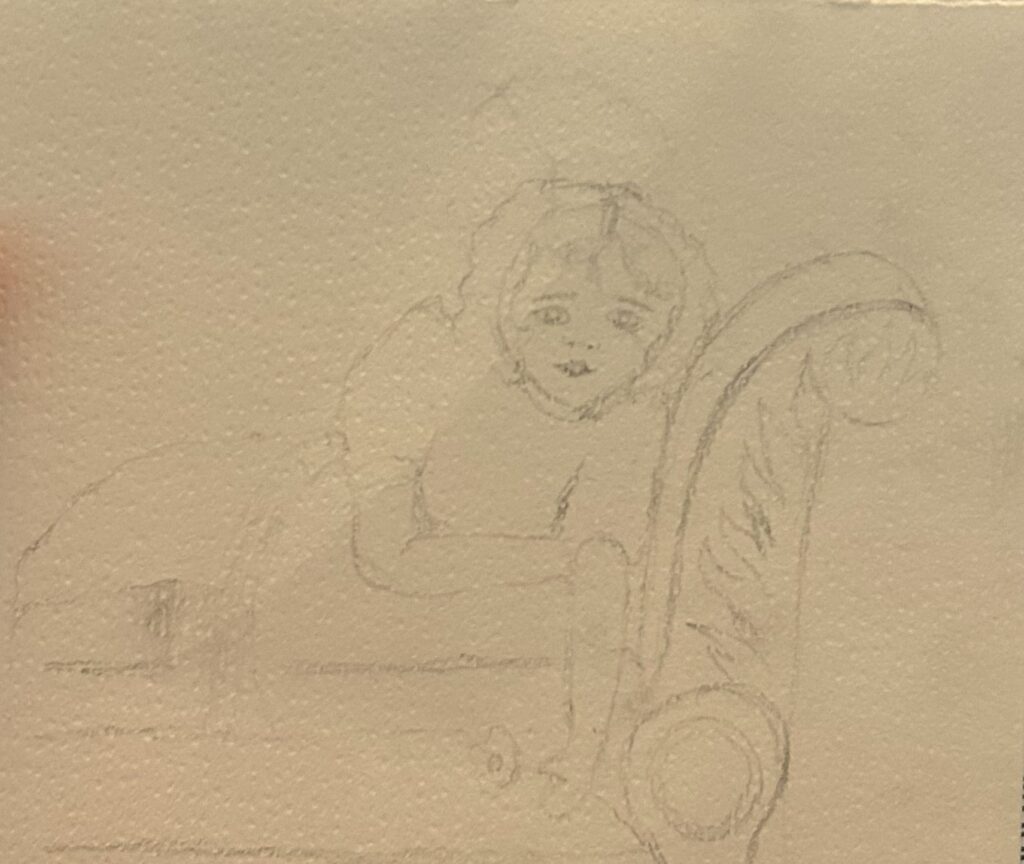
2 – The sketch!
This is the next very important step. It’s so helpful to first sketch out your ideas before settling on a design. First of all it helps you to scale your painting accurately, but it also allows you to change your ideas when they need to be changed! For example, at first, I was just going to draw the little girl and the flower on the sofa, but then I decided to add the mother’s tassel to the little girl’s dress because that tassel was the first thing to speak to me when I first saw the painting! In the end, this is the final sketch;
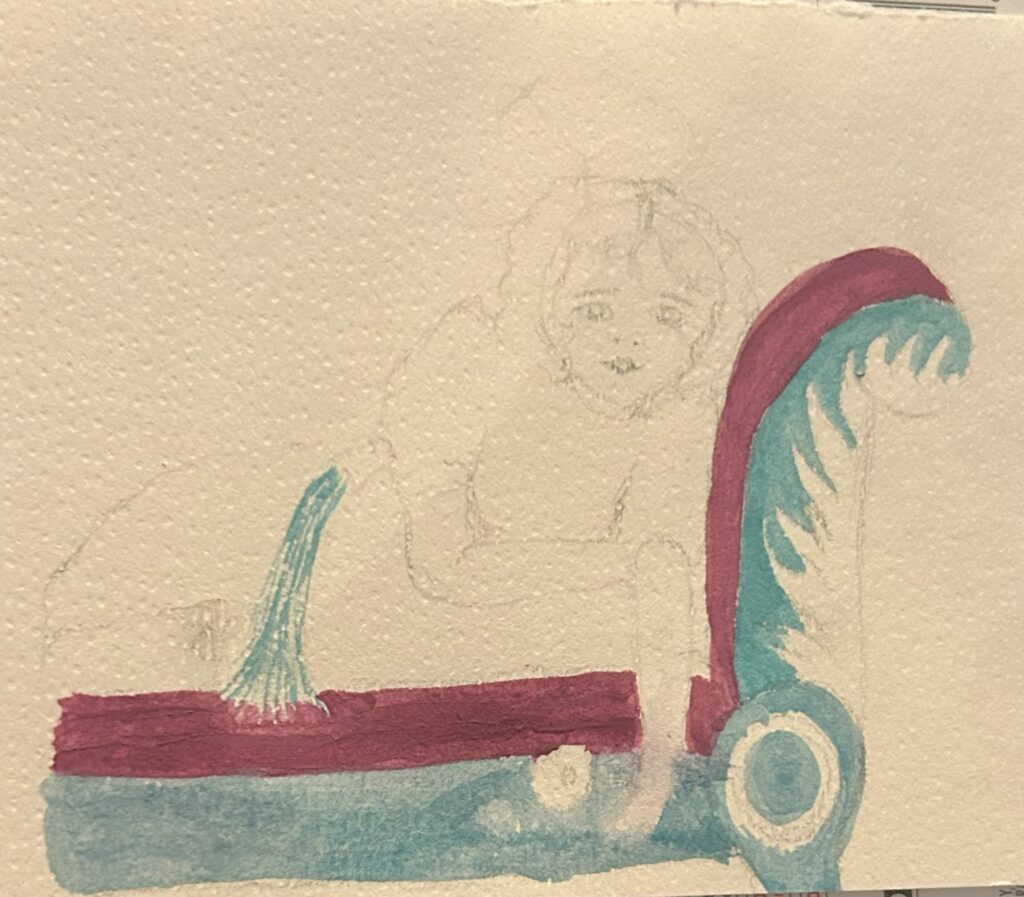
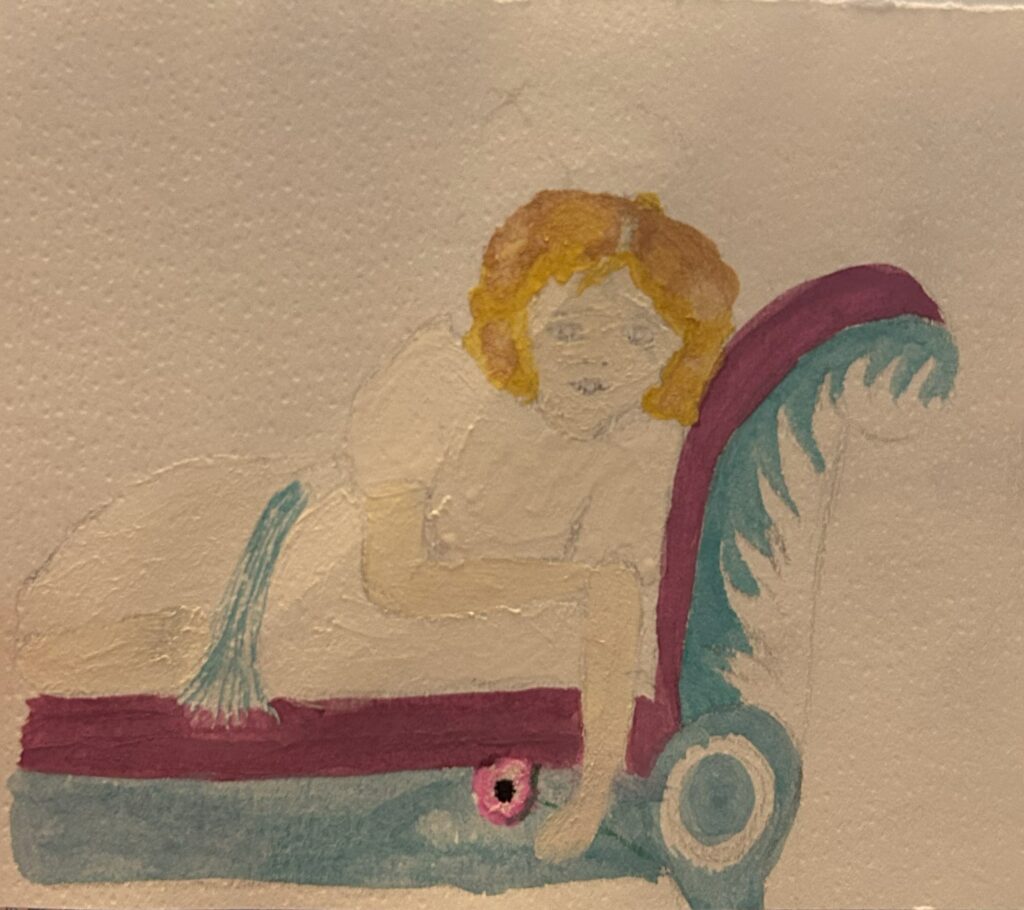
3 – Painting time!
The next step after finishing your sketch is to start painting! The best way to avoid not knowing where to start is to think of it as a paint by numbers in a way. What I like to do is decide on the colour I want to start with and complete all of the aspects of the painting that have that colour. For me it was the teal colour and I started on the chair that the little girl was sitting on as well as the tassel that I attached to her dress. Once the first colour is on the page it becomes a lot easier as you don’t have to worry about where to start!
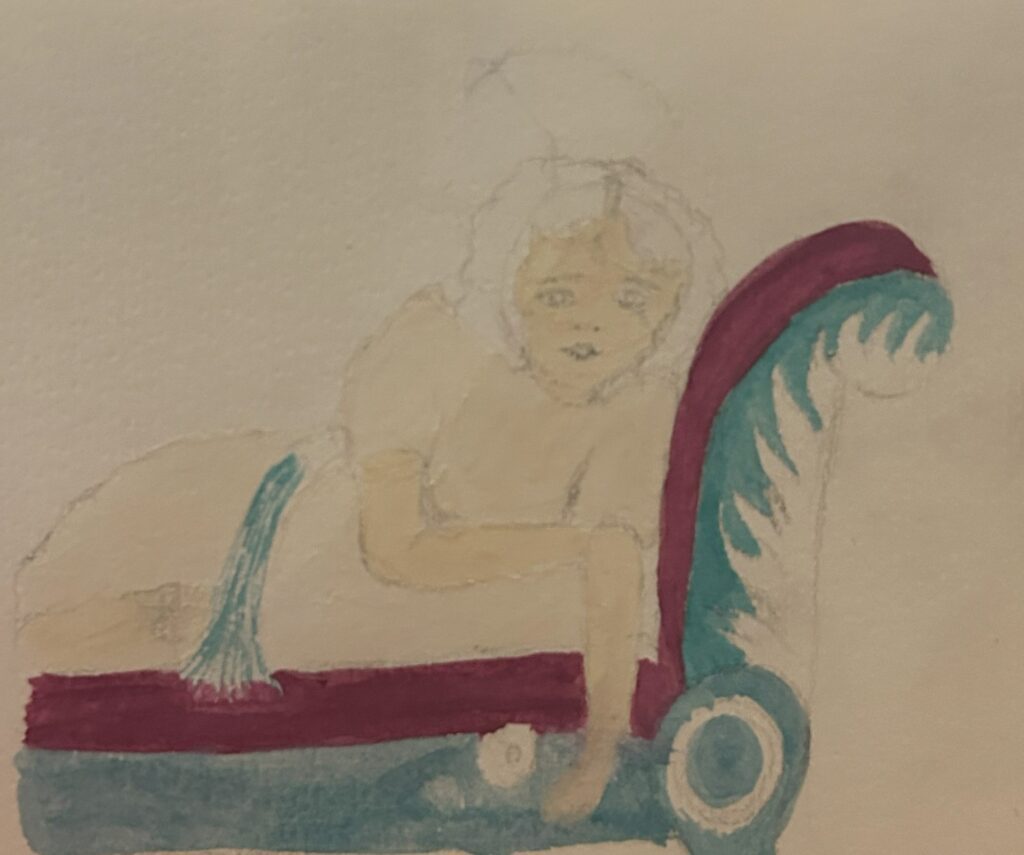
After the teal colour, I also wanted to finish the chair first, so I added the plum colour to the cushioning of the chair, and I then decided to paint the child’s skin tone. This was definitely a challenge and anyone who has ever tried to create skin colours will tell you it is probably impossible to create the same skin colour twice! Thankfully, the child in the painting is so pale that I was able to use the watercolours to my advantage and I just went over her with a very pale white with a hint of yellow!
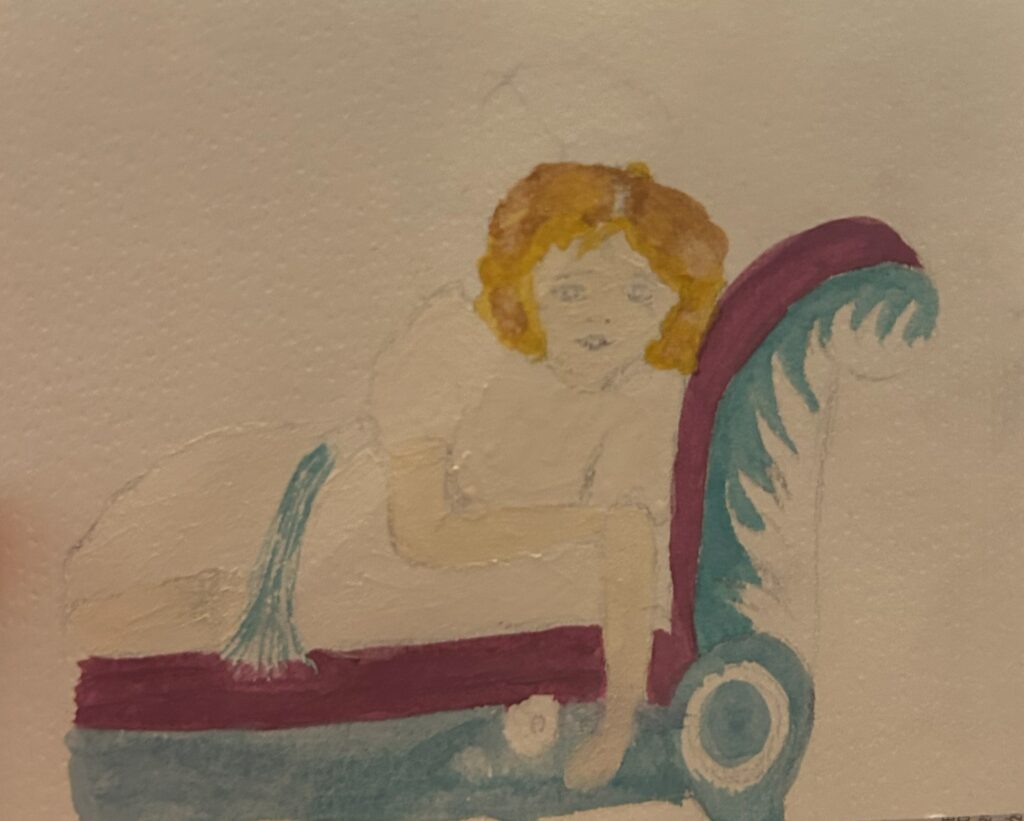
Next up is the hair! Now hair is also a very difficult thing to paint and get right and I don’t think I got it right but I’m still learning and progressing, so I’m not upset with myself! I used a khaki yellow colour to add the highlighted hair first and then I went in with a darker yellow/brown colour that would be the rest of the girl’s hair. After that I went in with a darker skin tone and I added some definition to her body parts. Along with that I also added some facial features to the girl and gave her some green eyes! Along with that I also added the little flower.
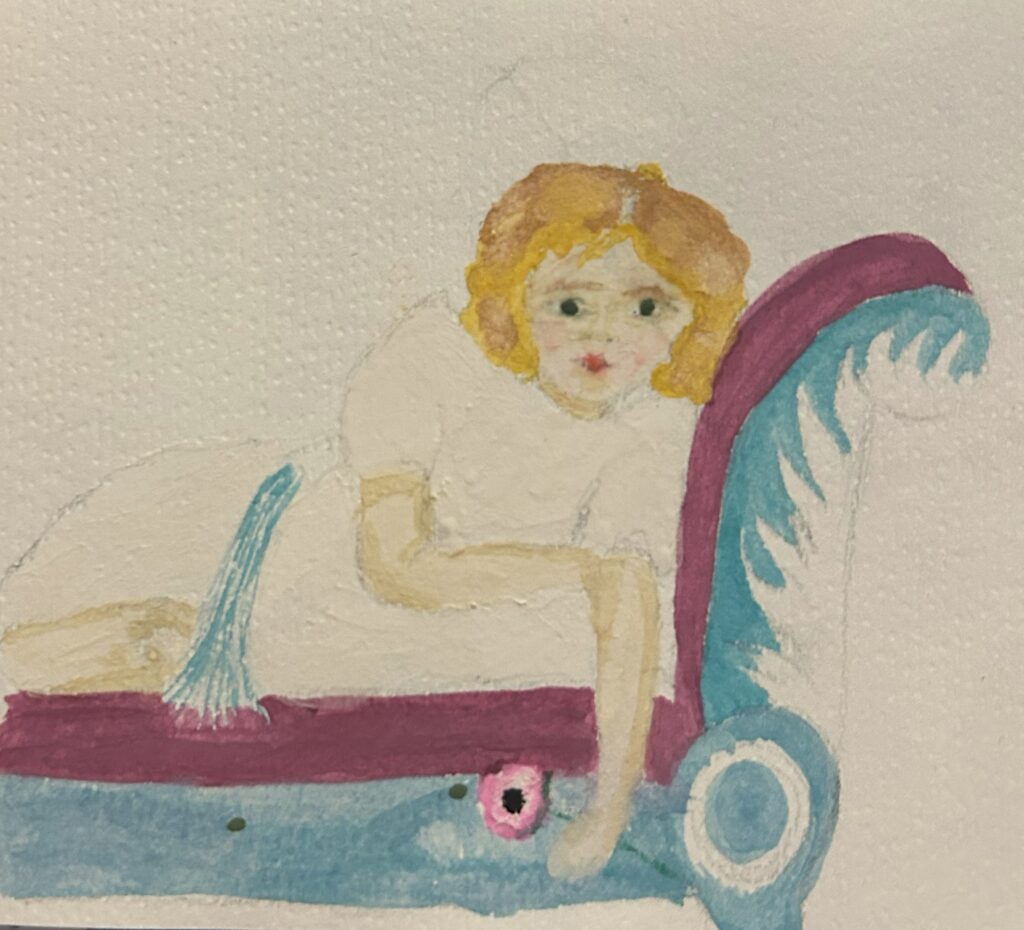
4 – Gold!
The second to last part of creating this painting was to add the gold touches! So I started out with the gold feathering on the chair as well as the on the tassel. Once the gold was added I was then ready to add a background colour! I decided to stick with the blues theme, and I used a darker teal colour as the background as I just felt it added to the vintage feel of the painting! And voila! The painting is complete!

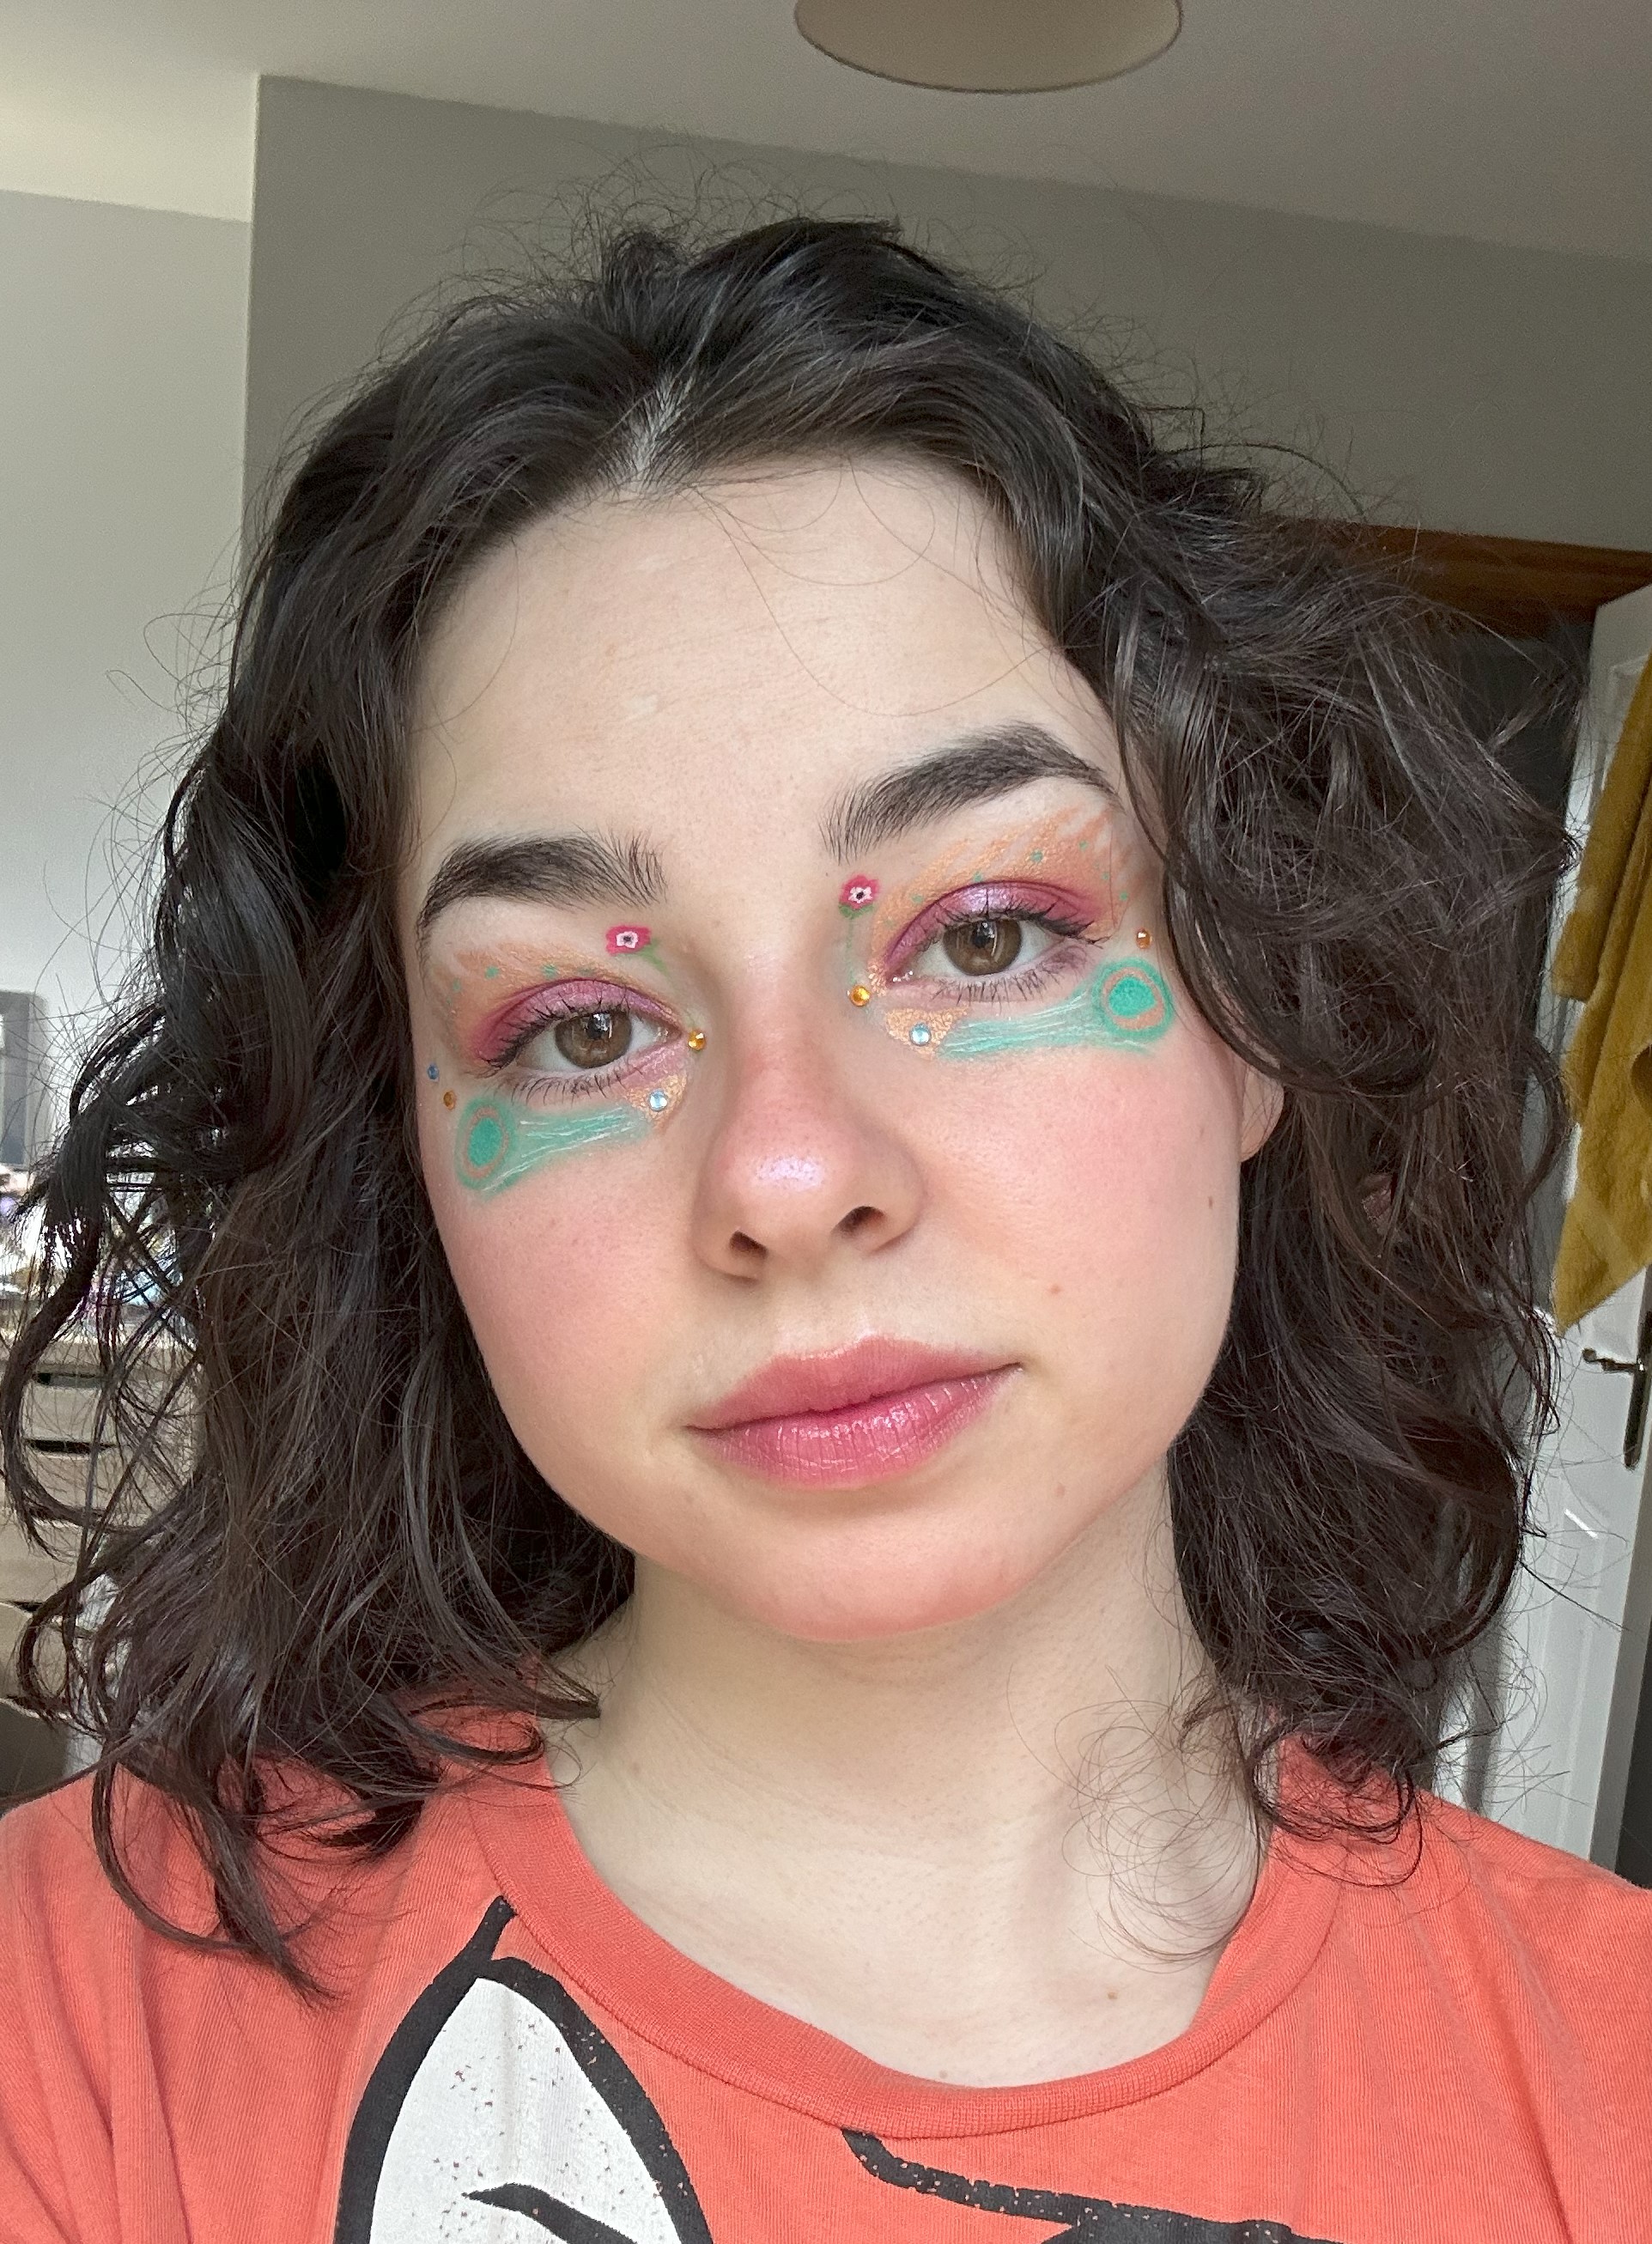
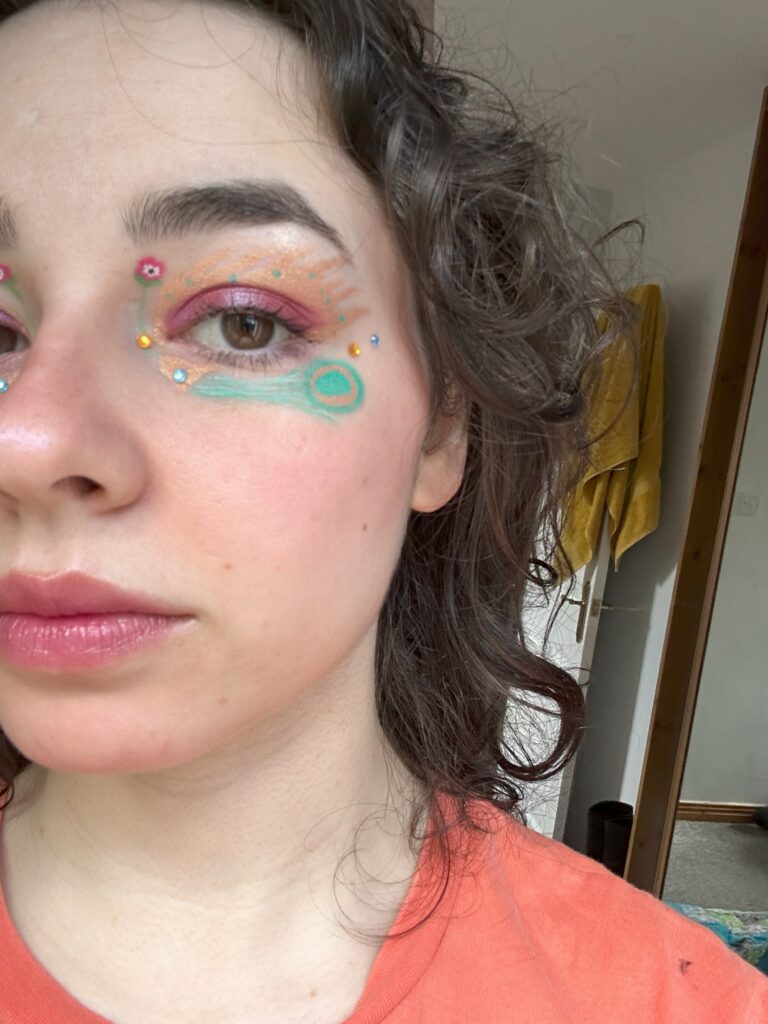
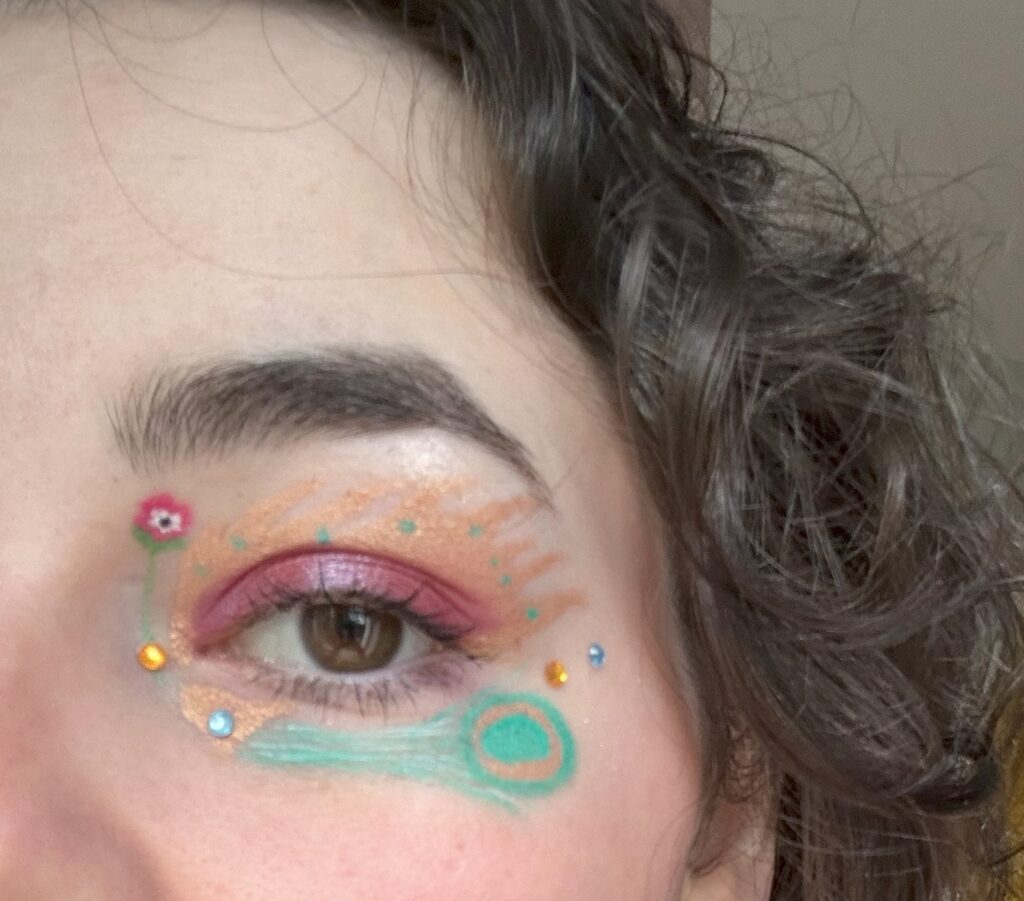
Life Imitates Art
This is the part where you can see how the painting inspired not only my own painting but also my makeup look! For this look I knew I wanted to focus more on the furnishings of the painting rather than having to paint a child on both my eyelids. So I started off with a gold feather as the shape of the eye look. For this gold colour I mixed some gold eyeshadow with some primer and applied it with a graphic liner brush. Once that was done, I finished all of the other gold aspects like the chair leg circle and the tassel head., I then created a gorgeous teal blue colour and applied that to the gold ring, I added the tassels, and I added some teal dots to the gold feather just to tie it in a little more! Next up was the burgundy/plum eyeshadow that I thankfully already had! I just applied that to my eyelid and blended it into the gold. Flower power time! I then just quickly drew the flower on with some graphic liner and the look was nearly finished! All it needs now is some mascara and some gems! And here is the final makeup look inspired by a fabulous painting!