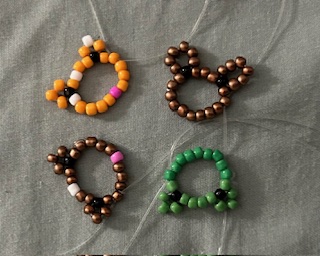
If you’re looking for a new hobby and have no idea where to start; why not start by making cute little beaded animal rings! This really is a beginner friendly hobby and once you’ve got the hang of it you can really make any animals you like and customise them however you like! For this tutorial I have decided to focus on 4 animals: a frog, a cat, a Mouse/Hamster, and a dog! If you enjoy this tutorial and decide to make your own little beaded animal rings, please show me how you get on, I’m so excited to see what you come up with! Also, you can also make these into bracelets and necklaces etc; you’re only hindered by your own creativity! I made my sister a frog bracelet with a matching ring a few weeks ago so it’s totally possible! If you’d like me to show you how to make any other animals just let me know and I will see what I can come up with!
Equipment needed
- Some plastic thread – I would recommend that you use either the 0.6 or the 0.5 diameter thread as if you use anything thicker, you’ll have trouble threading your beads. You can find some really affordable options on Amazon.
- Glass Seed Beads: I would again recommend using the size 2mm or larger but usually they are that size in general so if you already have some beads, you can use those no problem! But if you don’t there some some amazing and affordbale sets on Amazon that I myself have bought!
Let’s start with the Frog!
- The First step would be to measure the finger you want to use for the ring and then I would cut a piece of plastic thread at least twice as big as what you measured for your finger or even x3 bigger as it’ll make it a lot easier.
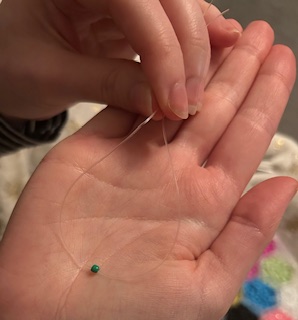
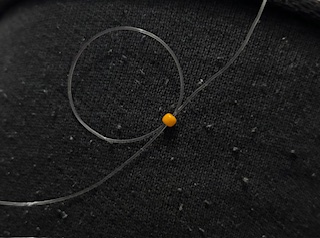
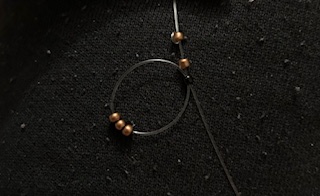
- The second step is to select your colour – I chose green of course. You then want to fold your thread in half and keep hold of the 2 ends. Then you want to thread the bead through one end and thread the other end of the thread through the other side of the bead and pull both threads until the bead is centred in the middle of the thread, so it looks like this.

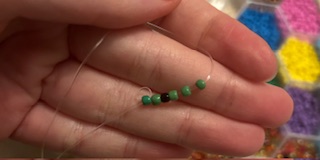
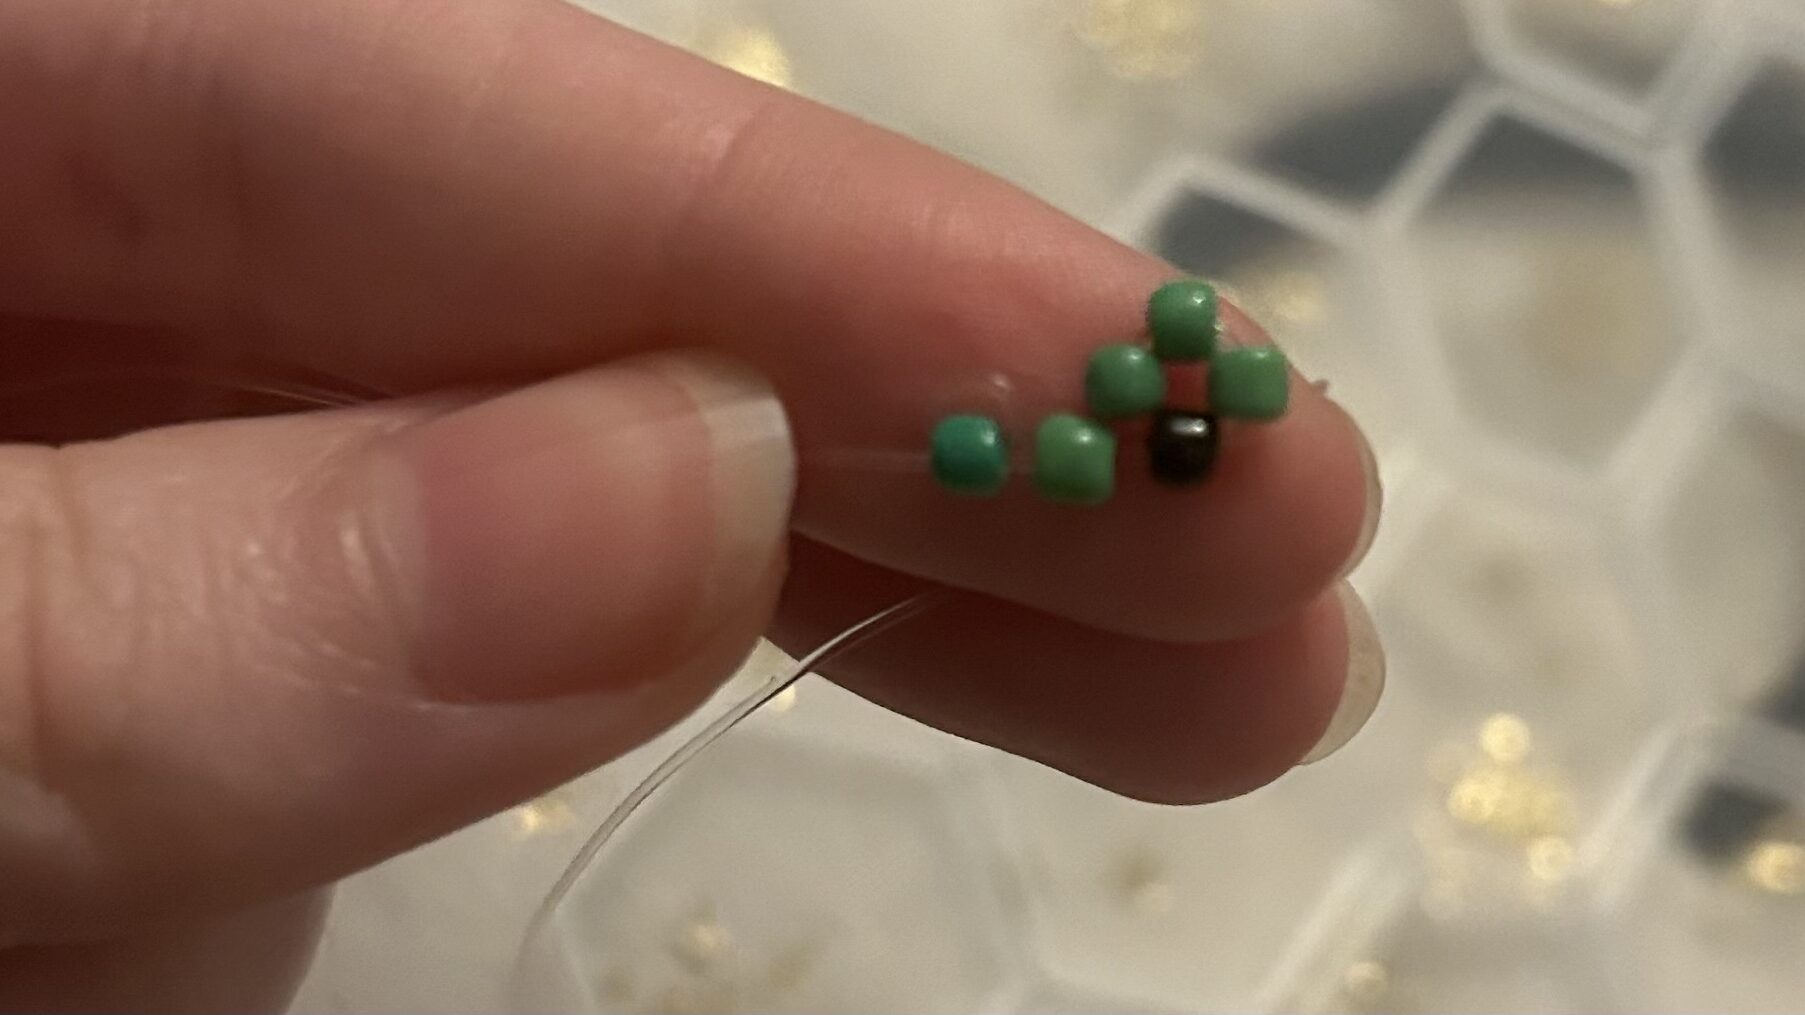
- The third step is to then add 1 more green bead to one end of the thread along with 1 black bead and 3 more green beads – this will create the eyes
- The fourth step is to then thread the plastic thread that the beads are on through the black bead.
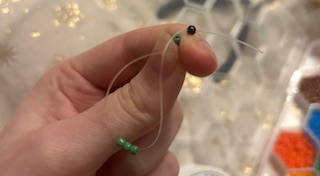
- Now you’ll want to pull the thread through until the green beads become a little triangle above the black bead.
- After that you need to add 4 more green beads as well as 1 black and then 3 more beads. This will make the other eye.
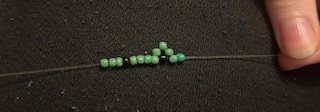
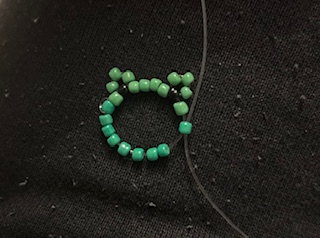
- You will then need to thread the thread through the black bead again and pull until the triangle of beads is above the black bead. You might need to adjust where the eye goes; to do this you just want to pull on the green triangle to pull it closer to the other beads.
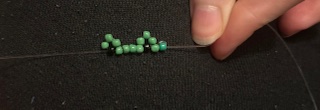
- After your eyes are done you just want to add one more bead to finish the frog eye and then you can add 7 (or as many as needed for your ring size) beads to the other plastic thread end.

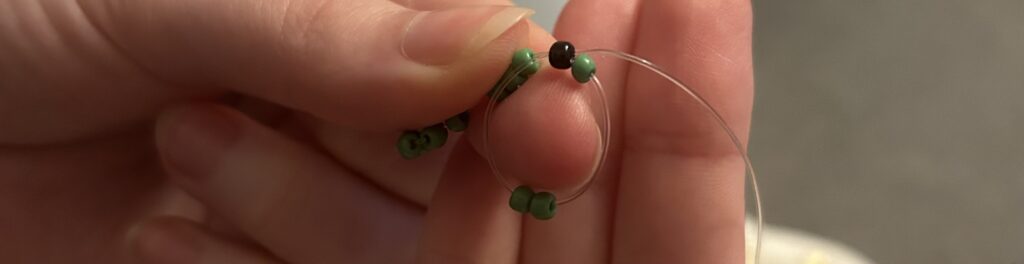
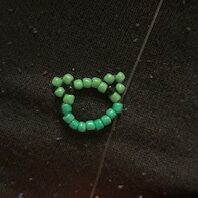
- Now were nearly done! All we need to do to close it off is to hold the two ends of the plastic thread again and thread a bead through the one side and insert the other thread through the opposite end of the bead and pull!
- Now that you have your little frog ring, all you need to do is tie it off with a few simple knots; just make sure to pull quite tightly as the thread is pretty slippery!
The next animal ring in this tutorial is the Cat!
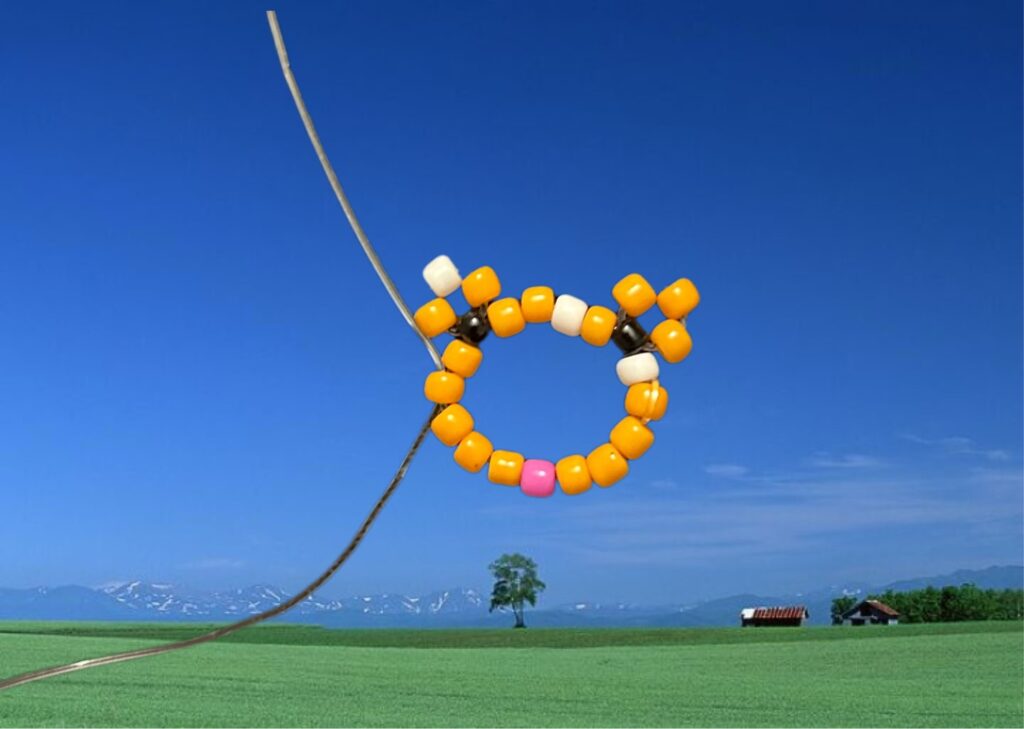
The steps will be the same for this ring as it was for the frog, but I decided to make the cat a little orange and white cat with a little pink tongue!
- The first step would be to measure the finger you want to use for the ring and then I would cut a piece of plastic thread at least twice as big as what you measured for your finger or even x3 bigger as it’ll make it easier.
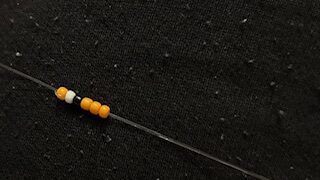
- The second step is to select your colours – I chose orange and white. You then want to fold your thread in half and keep hold of the 2 ends. Then you want to thread the bead through one end and thread the other end of the thread through the other side of the bead and pull both threads until the bead is centred in the middle of the thread, so it looks like this.
- The third step is to then add 1 white bead to one end of the thread along with 1 black bead and 3 more orange beads – this will create the eyes
- The fourth step is to then thread the plastic thread that the beads are on through the black bead. Now you’ll want to pull the thread through until the beads become a little triangle above the black bead. (I forgot to get an image of this step so just refer to the frog step 4 as its exactly the same)
- After that you need to add 1 orange bead and then 1 white as well as 2 (or as many as you want in whatever colour you want) 2 more orange beads for in between the eyes. Then add 1 black and then 3 more beads. This will make the other eye.
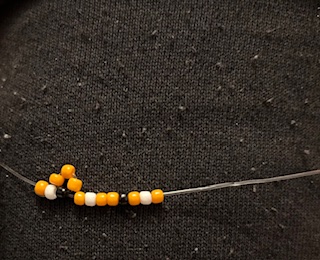
- You will then need to thread the thread through the black bead again and pull until the triangle of beads is above the black bead – also you might need to adjust where the eye goes; to do this you just want to pull on the beaded triangle to pull it closer to the other beads.

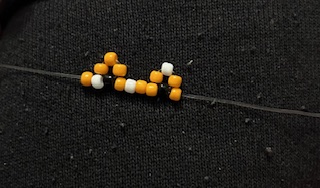
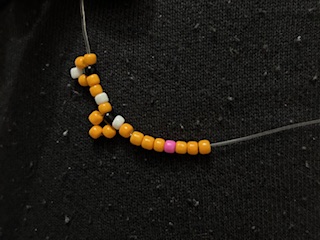
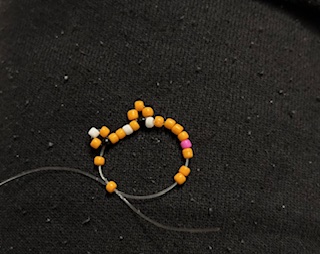
- After your eyes are done you just want to add one more bead to finish the Cat’s eye and then you can add 3 beads of any colour you want to the other plastic thread end – I chose orange, (or as many as needed for your ring size) followed by a little pink bead for the tongue and then add 3 more beads.
- Now were nearly done! All we need to do to close it off is to hold the two ends of the plastic thread again and thread a bead through the one side and insert the other thread through the opposite end of the bead and pull!
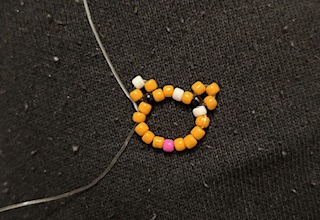
- Now that you have your Cat ring, all you need to do is tie it off with a few simple knots; just make sure to pull quite tightly as the thread is pretty slippery!
The Third Animal Ring in this Tutorial is the Mouse!
The steps will be the very silimar for this ring as it was for the frog and cat.
- The First step would be to measure the finger you want to use for the ring and then I would cut a piece of plastic thread at least twice as big as what you measured for your finger or even x3 bigger as it’ll make it easier.
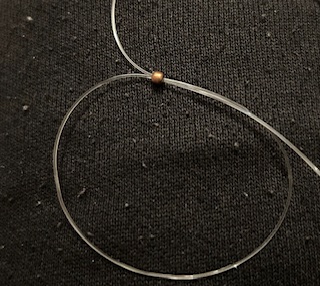
- The second step is to select your colour – I chose brown. You then want to fold your thread in half and keep hold of the 2 ends. Then you want to thread the bead through one end and thread the other end of the thread through the other side of the bead and pull both threads until the bead is centred in the middle of the thread, so it looks like this.

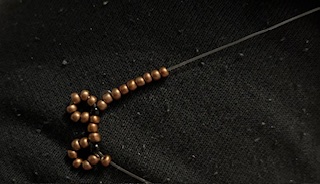
- The third step is to then add 1 brown bead to one end of the thread along with 1 black bead and 6 more brown beads – this will create the eyes with the little rounded ears. Then thread the plastic thread that the beads are on through the black bead. Now you’ll want to pull the thread through until the brown beads become a little circle above the black bead.
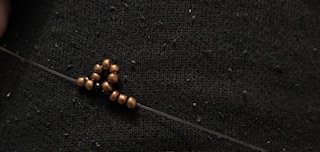
- After that you need to add 3 brown beads (or as many as you need to fit your fingers in whatever colour you want) for in between the eyes. Then add 1 black and then 6 more brown beads. This will make the other eye and ear.

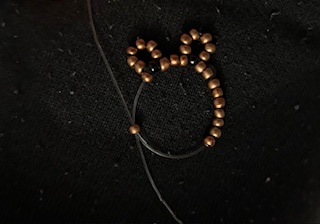
- You will then need to thread the thread through the black bead again and pull until the circle of beads is above the black bead – also you might need to adjust where the eye goes; to do this you just want to pull on the beaded triangle to pull it closer to the other beads.
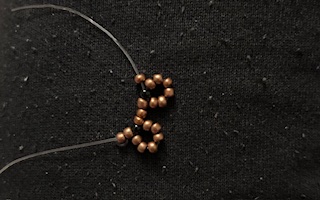
- After your eyes are done you just want to add one more bead to finish the mouse’s eye and then you can add 7 beads of any colour you want to the other plastic thread end – I chose brown, (or as many as needed for your ring size).
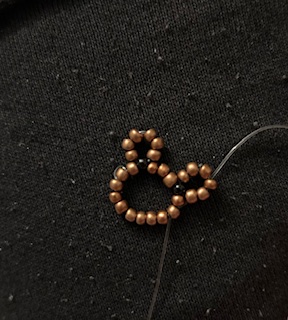
- Now were nearly done! All we need to do to close it off is to hold the two ends of the plastic thread again and thread a bead through the one side and insert the other thread through the opposite end of the bead and pull!
- Now that you have your Mouse ring, all you need to do is tie it off with a few simple knots; just make sure to pull quite tightly as the thread is pretty slippery!
The Final animal in this Tutorial is the Dog!
The steps will be the very similar as it was for the Frog, Cat and Mouse.
- The First step would be to measure the finger you want to use for the ring and then I would cut a piece of plastic thread at least twice as big as what you measured for your finger or even x3 bigger as it’ll make it easier.
- The second step is to select your colour – I chose brown. You then want to fold your thread in half and keep hold of the 2 ends. Then you want to thread the bead through one end and thread the other end of the thread through the other side of the bead and pull both threads until the bead is centred in the middle of the thread, so it looks like this.
- The third step is to then add 1 brown bead to one end of the thread along with 1 black bead and 3 more brown beads – this will create the eyes with the little triangular ears. Then thread the plastic thread that the beads are on through the black bead. Now you’ll want to pull the thread through until the brown beads become a little triangle above the black bead
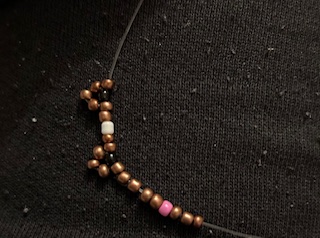
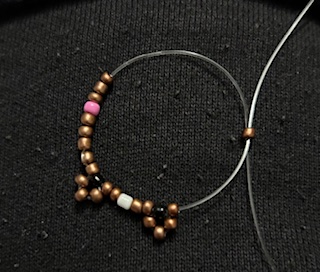
- After that you need to add 2 brown beads, 1 white bead and 2 more brown beads (or as many as you need to fit your fingers in whatever colour you want) for in between the eyes. Then add 1 black and then 3 more brown beads. This will make the other eye and ear.
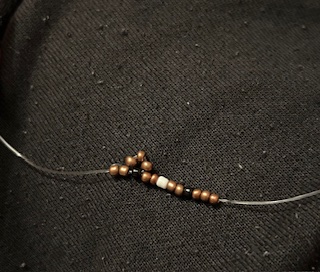
- You will then need to thread the thread through the black bead again and pull until the circle of beads is above the black bead – also you might need to adjust where the eye goes; to do this you just want to pull on the beaded triangle to pull it closer to the other beads.
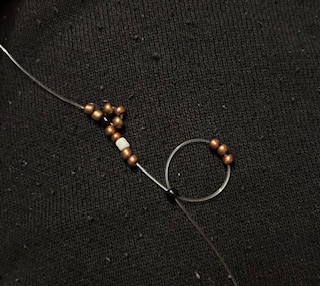
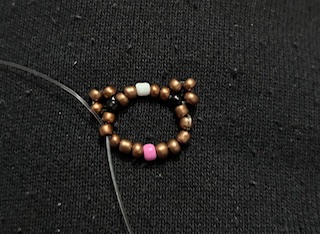
- After your eyes are done you just want to add one more bead to finish the dog’s eye and then you can add 3 beads of any colour you want to the other plastic thread end followed by a little pink bead and 3 more brown beads – I chose brown, (or as many as needed for your ring size)
- Now were nearly done! All we need to do to close it off is to hold the two ends of the plastic thread again and thread a bead through the one side and insert the other thread through the opposite end of the bead and pull!
- Now that you have your Mouse ring, all you need to do is tie it off with a few simple knots; just make sure to pull quite tightly as the thread is pretty slippery!
And there you have it! You can now make 4 adorable animal rings!